Student Registration
New to ICAB? This guide shows you, step by step, how to create your student account and register on the IIS portal.
Overview
Registration has two simple parts:
- First, you create your account and verify your mobile number.
- Then, once you are signed in, you fill out your student application across six tabs (Personal Info, Contact, Student Type, Academic, Address, Preview) and submit it for approval.
Once submitted, your application is reviewed by ICAB staff. You can read more about that in Student Approval Workflow.
Before you begin
Keep these things ready so registration goes smoothly:
- Your full name, written exactly as it appears on your SSC certificate.
- An active mobile number — IIS sends an OTP (one-time code) to this number to verify your account.
- If you are registering for Articleship: your firm code and principal details, plus a scanned copy of your training deed.
- Scanned copies of your academic documents (photo ID, transcripts, photograph).
Step 1 — Create your account
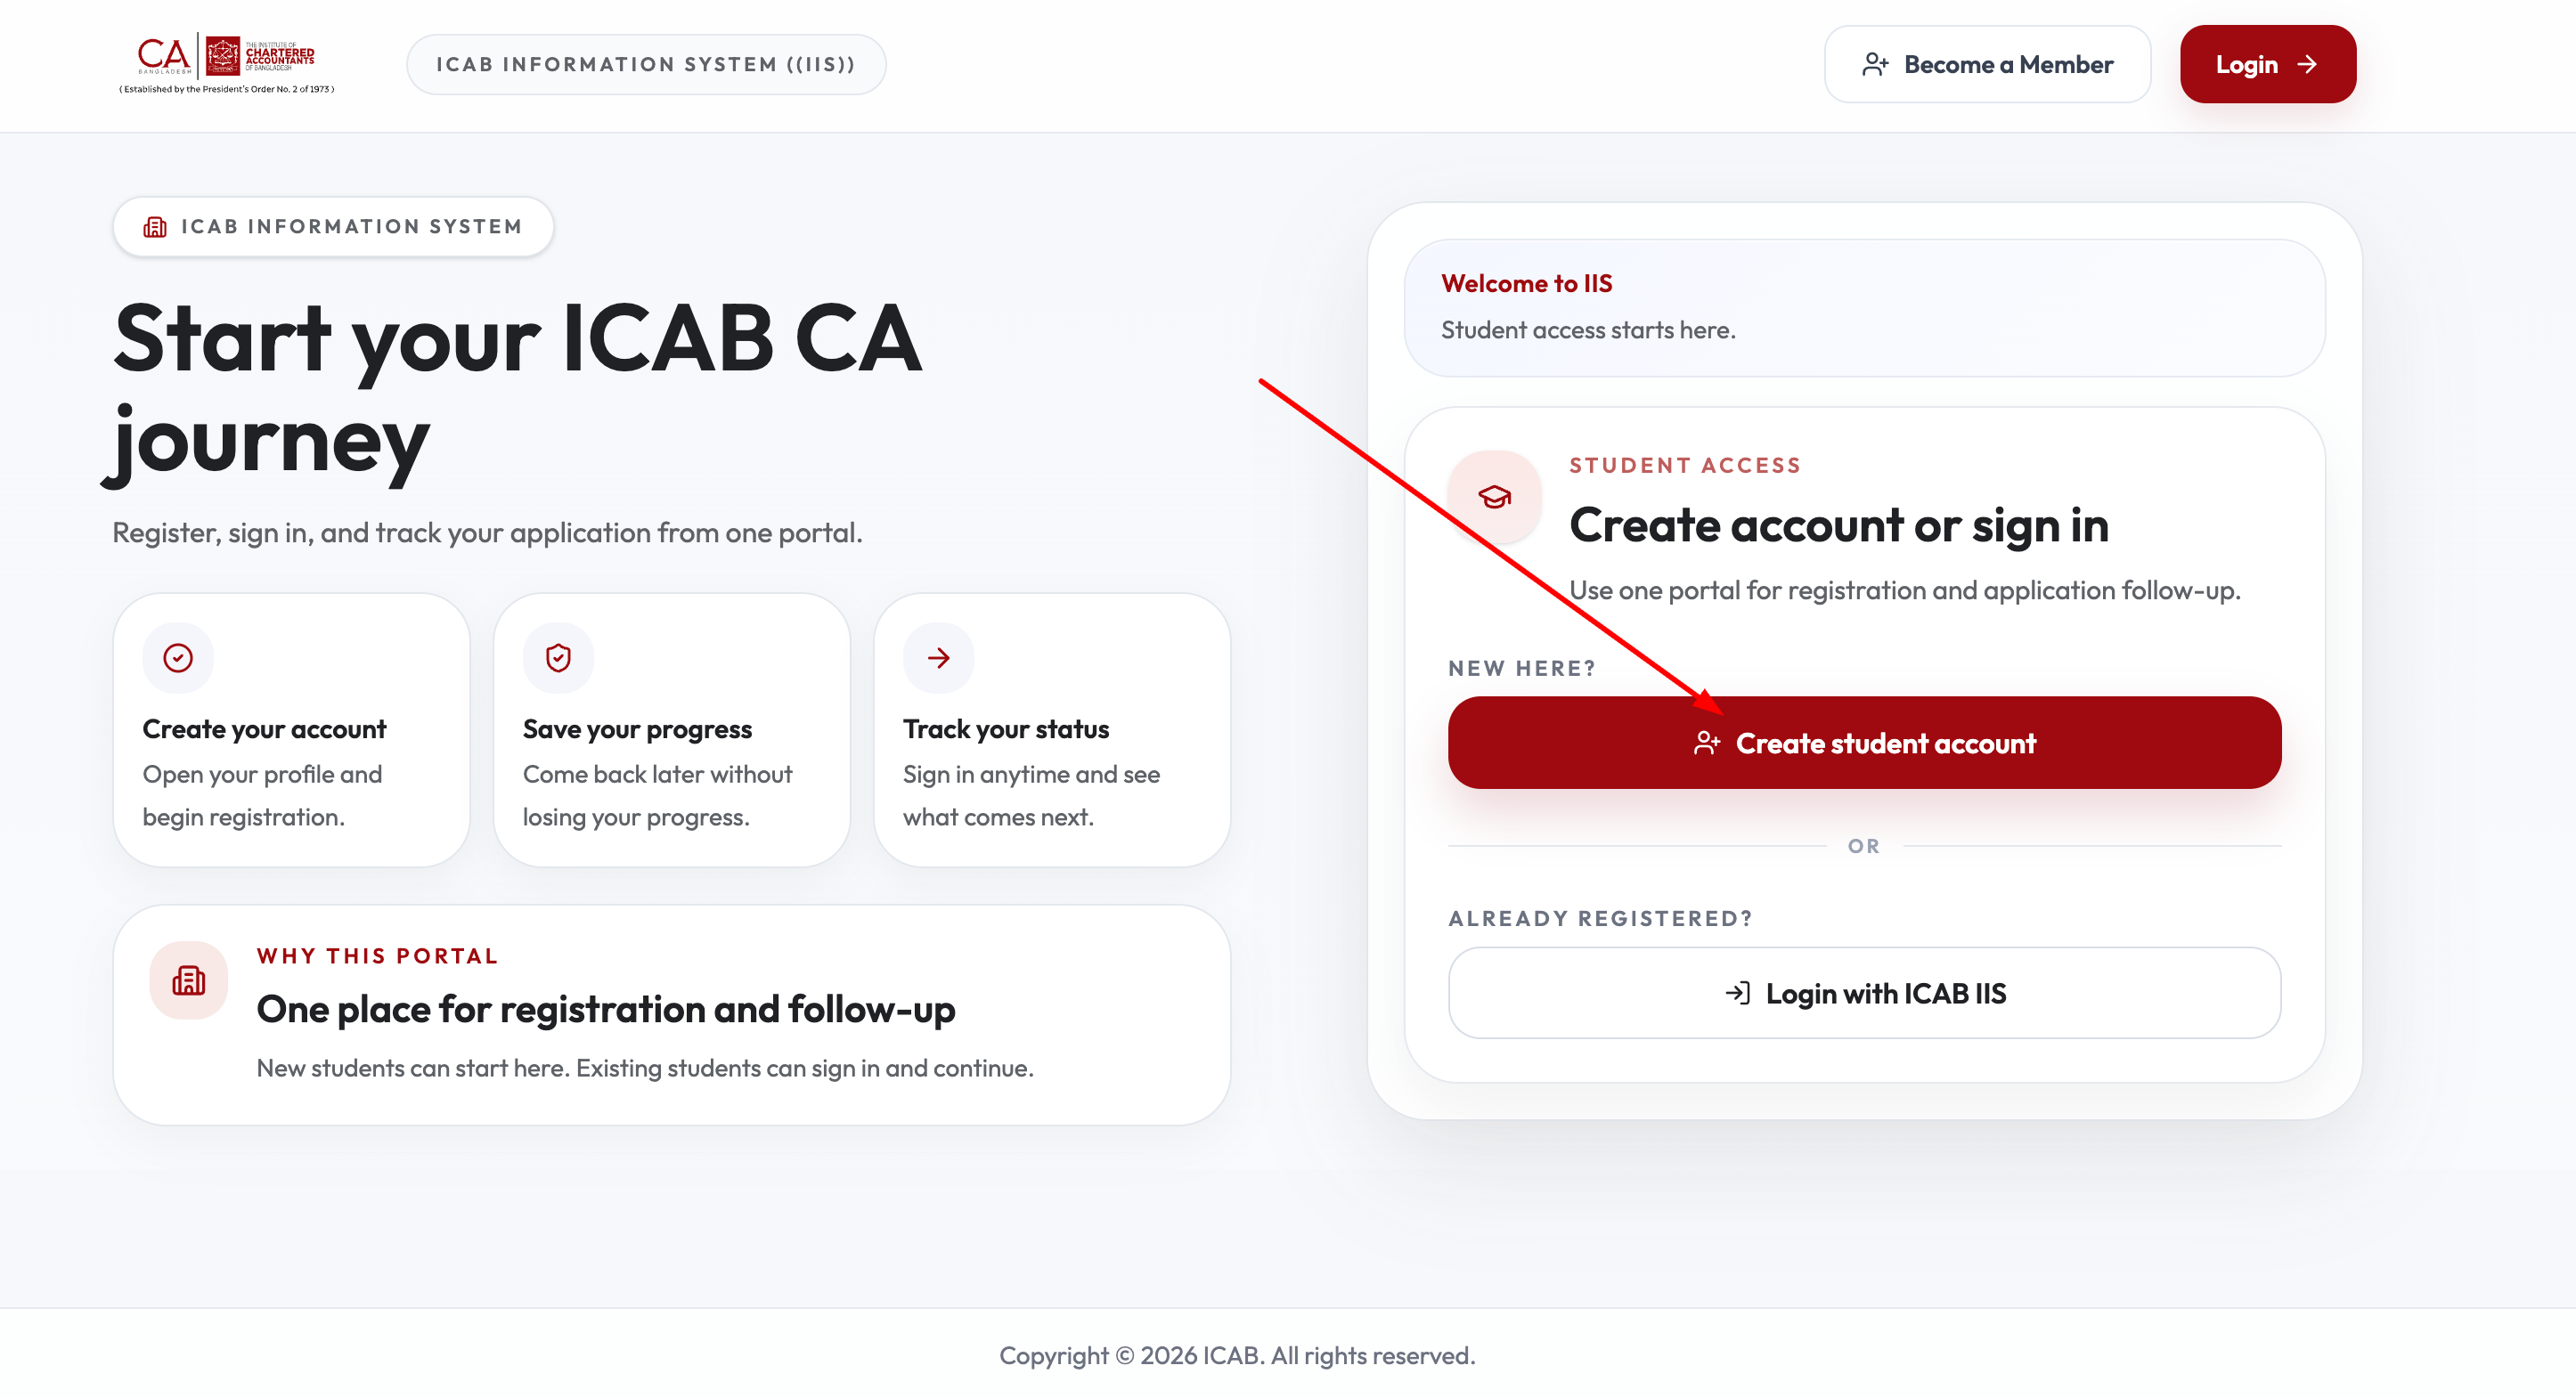
Select Create student account
From the IIS portal landing page, select Create student account under Student Access.
Select “Create student account” under Student Access Enter your details
On Step 1 of 2, enter your full name as per your SSC certificate, mobile number, and choose a password.
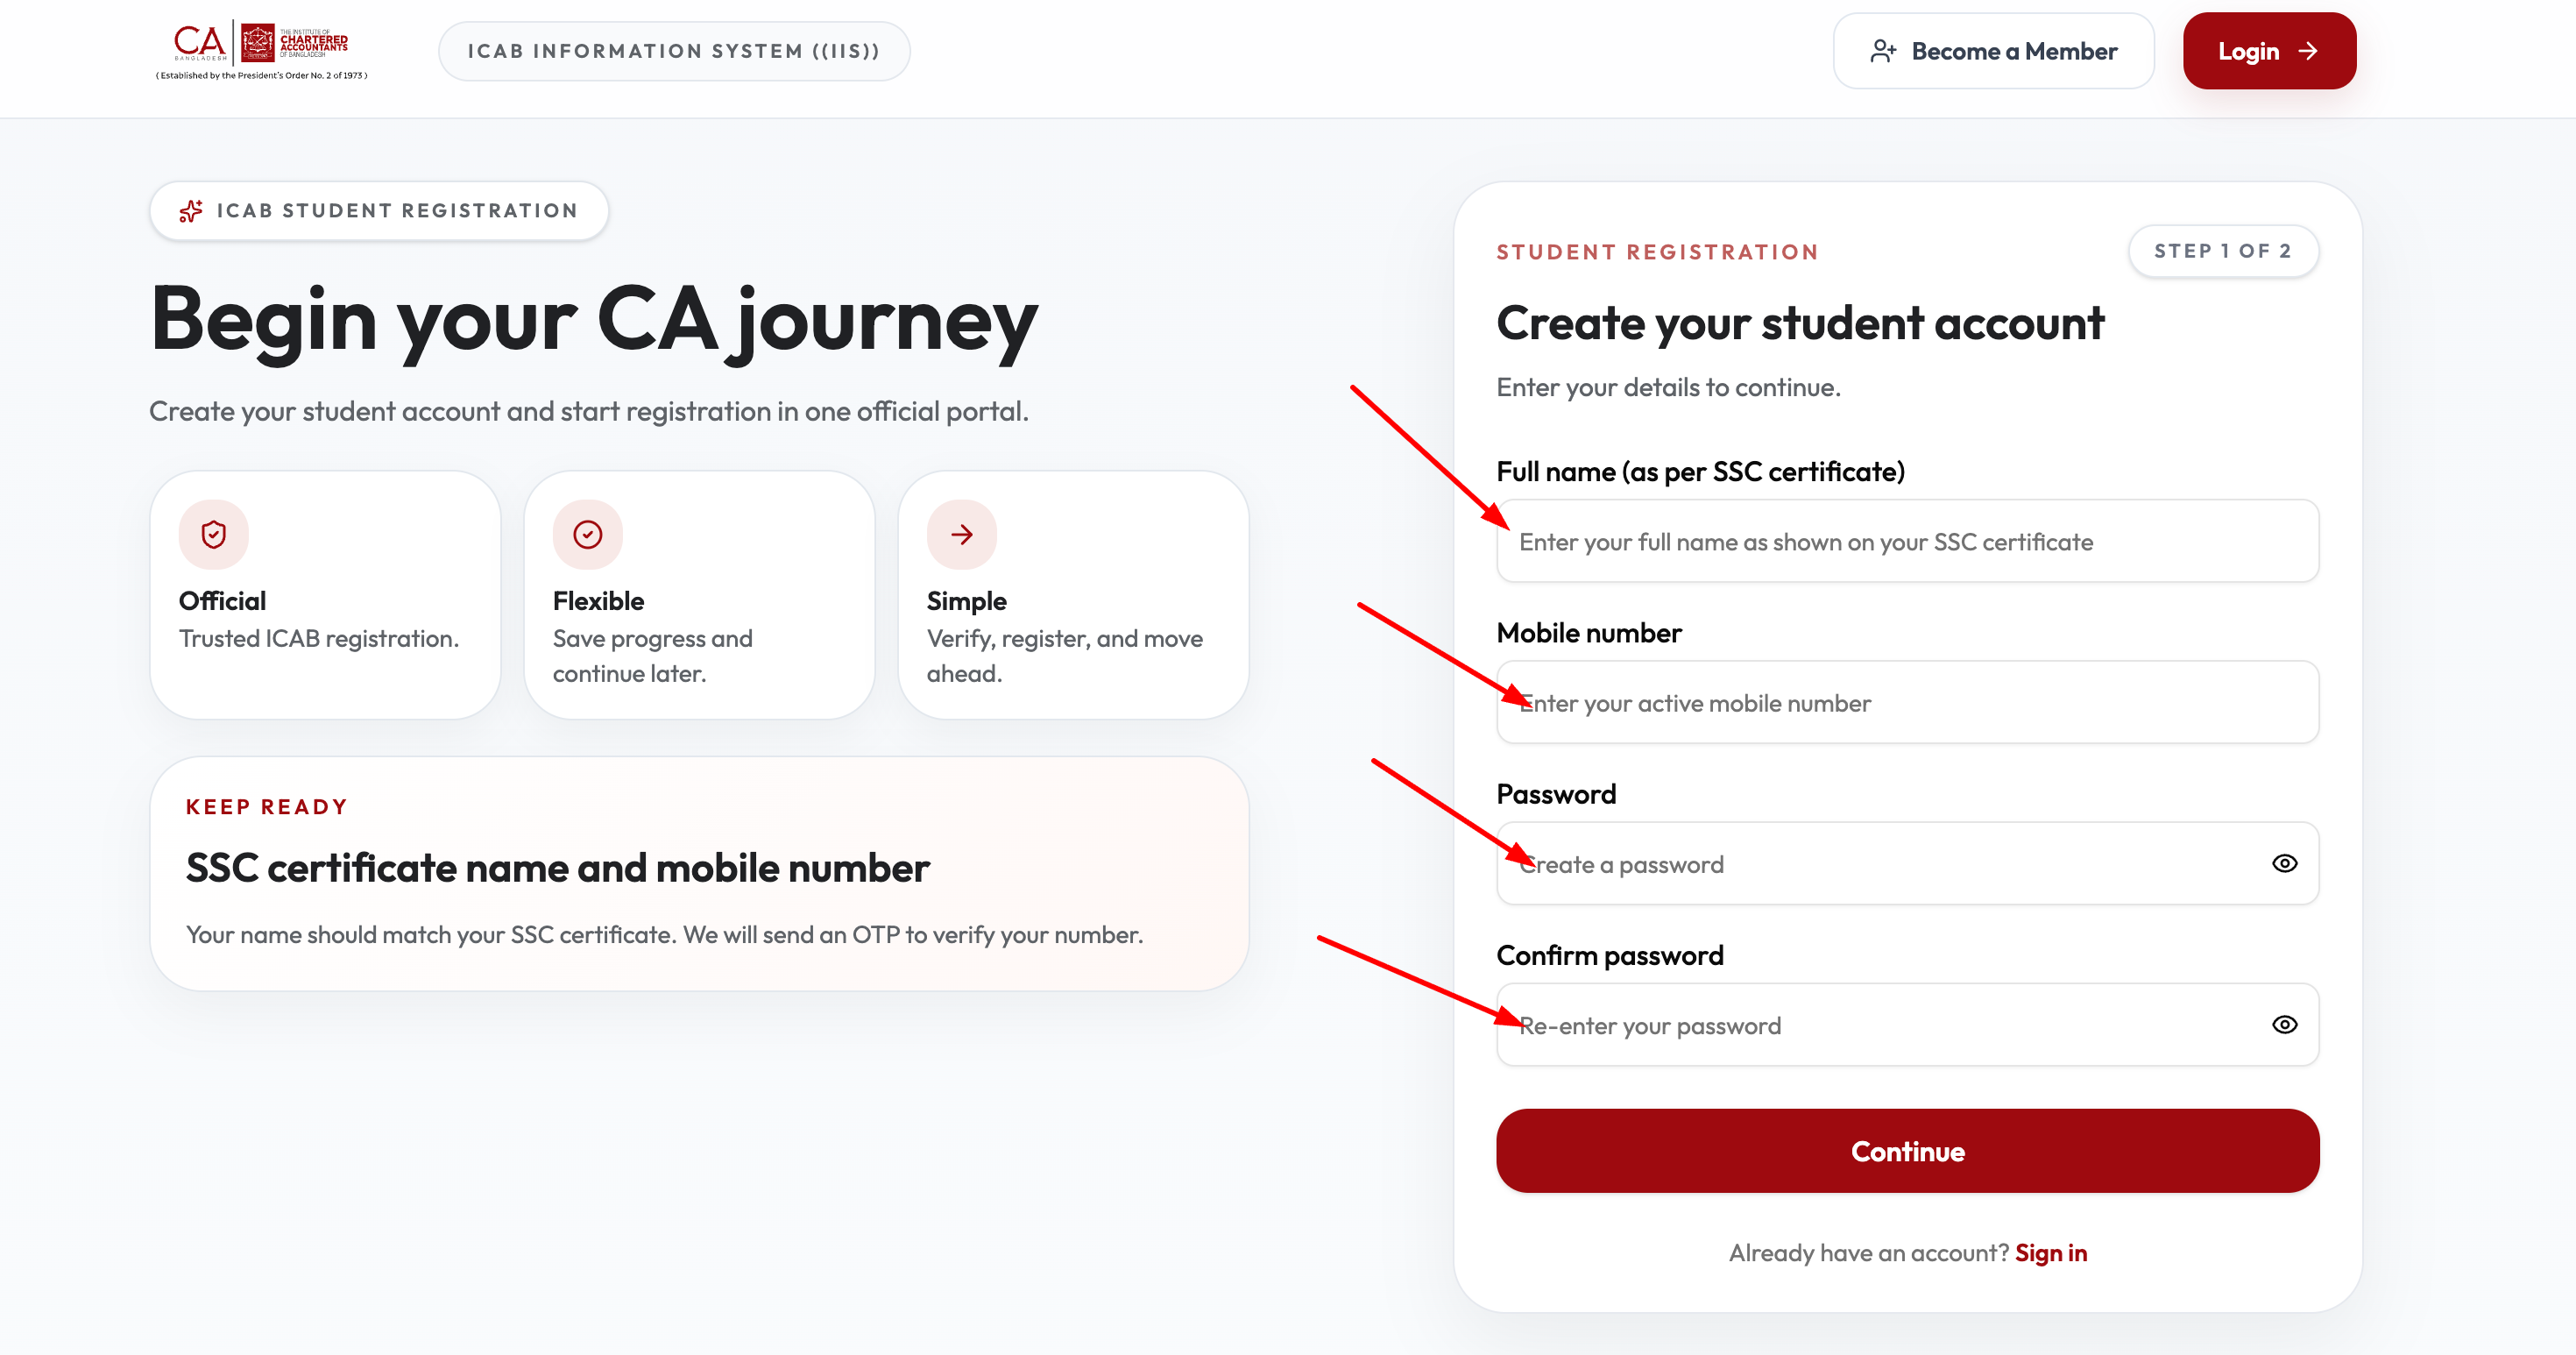
Step 1 of 2 — full name, mobile number, and password Check your OTP screen
On Step 2 of 2, IIS shows “Verify your mobile number” along with the phone number the code was sent to.
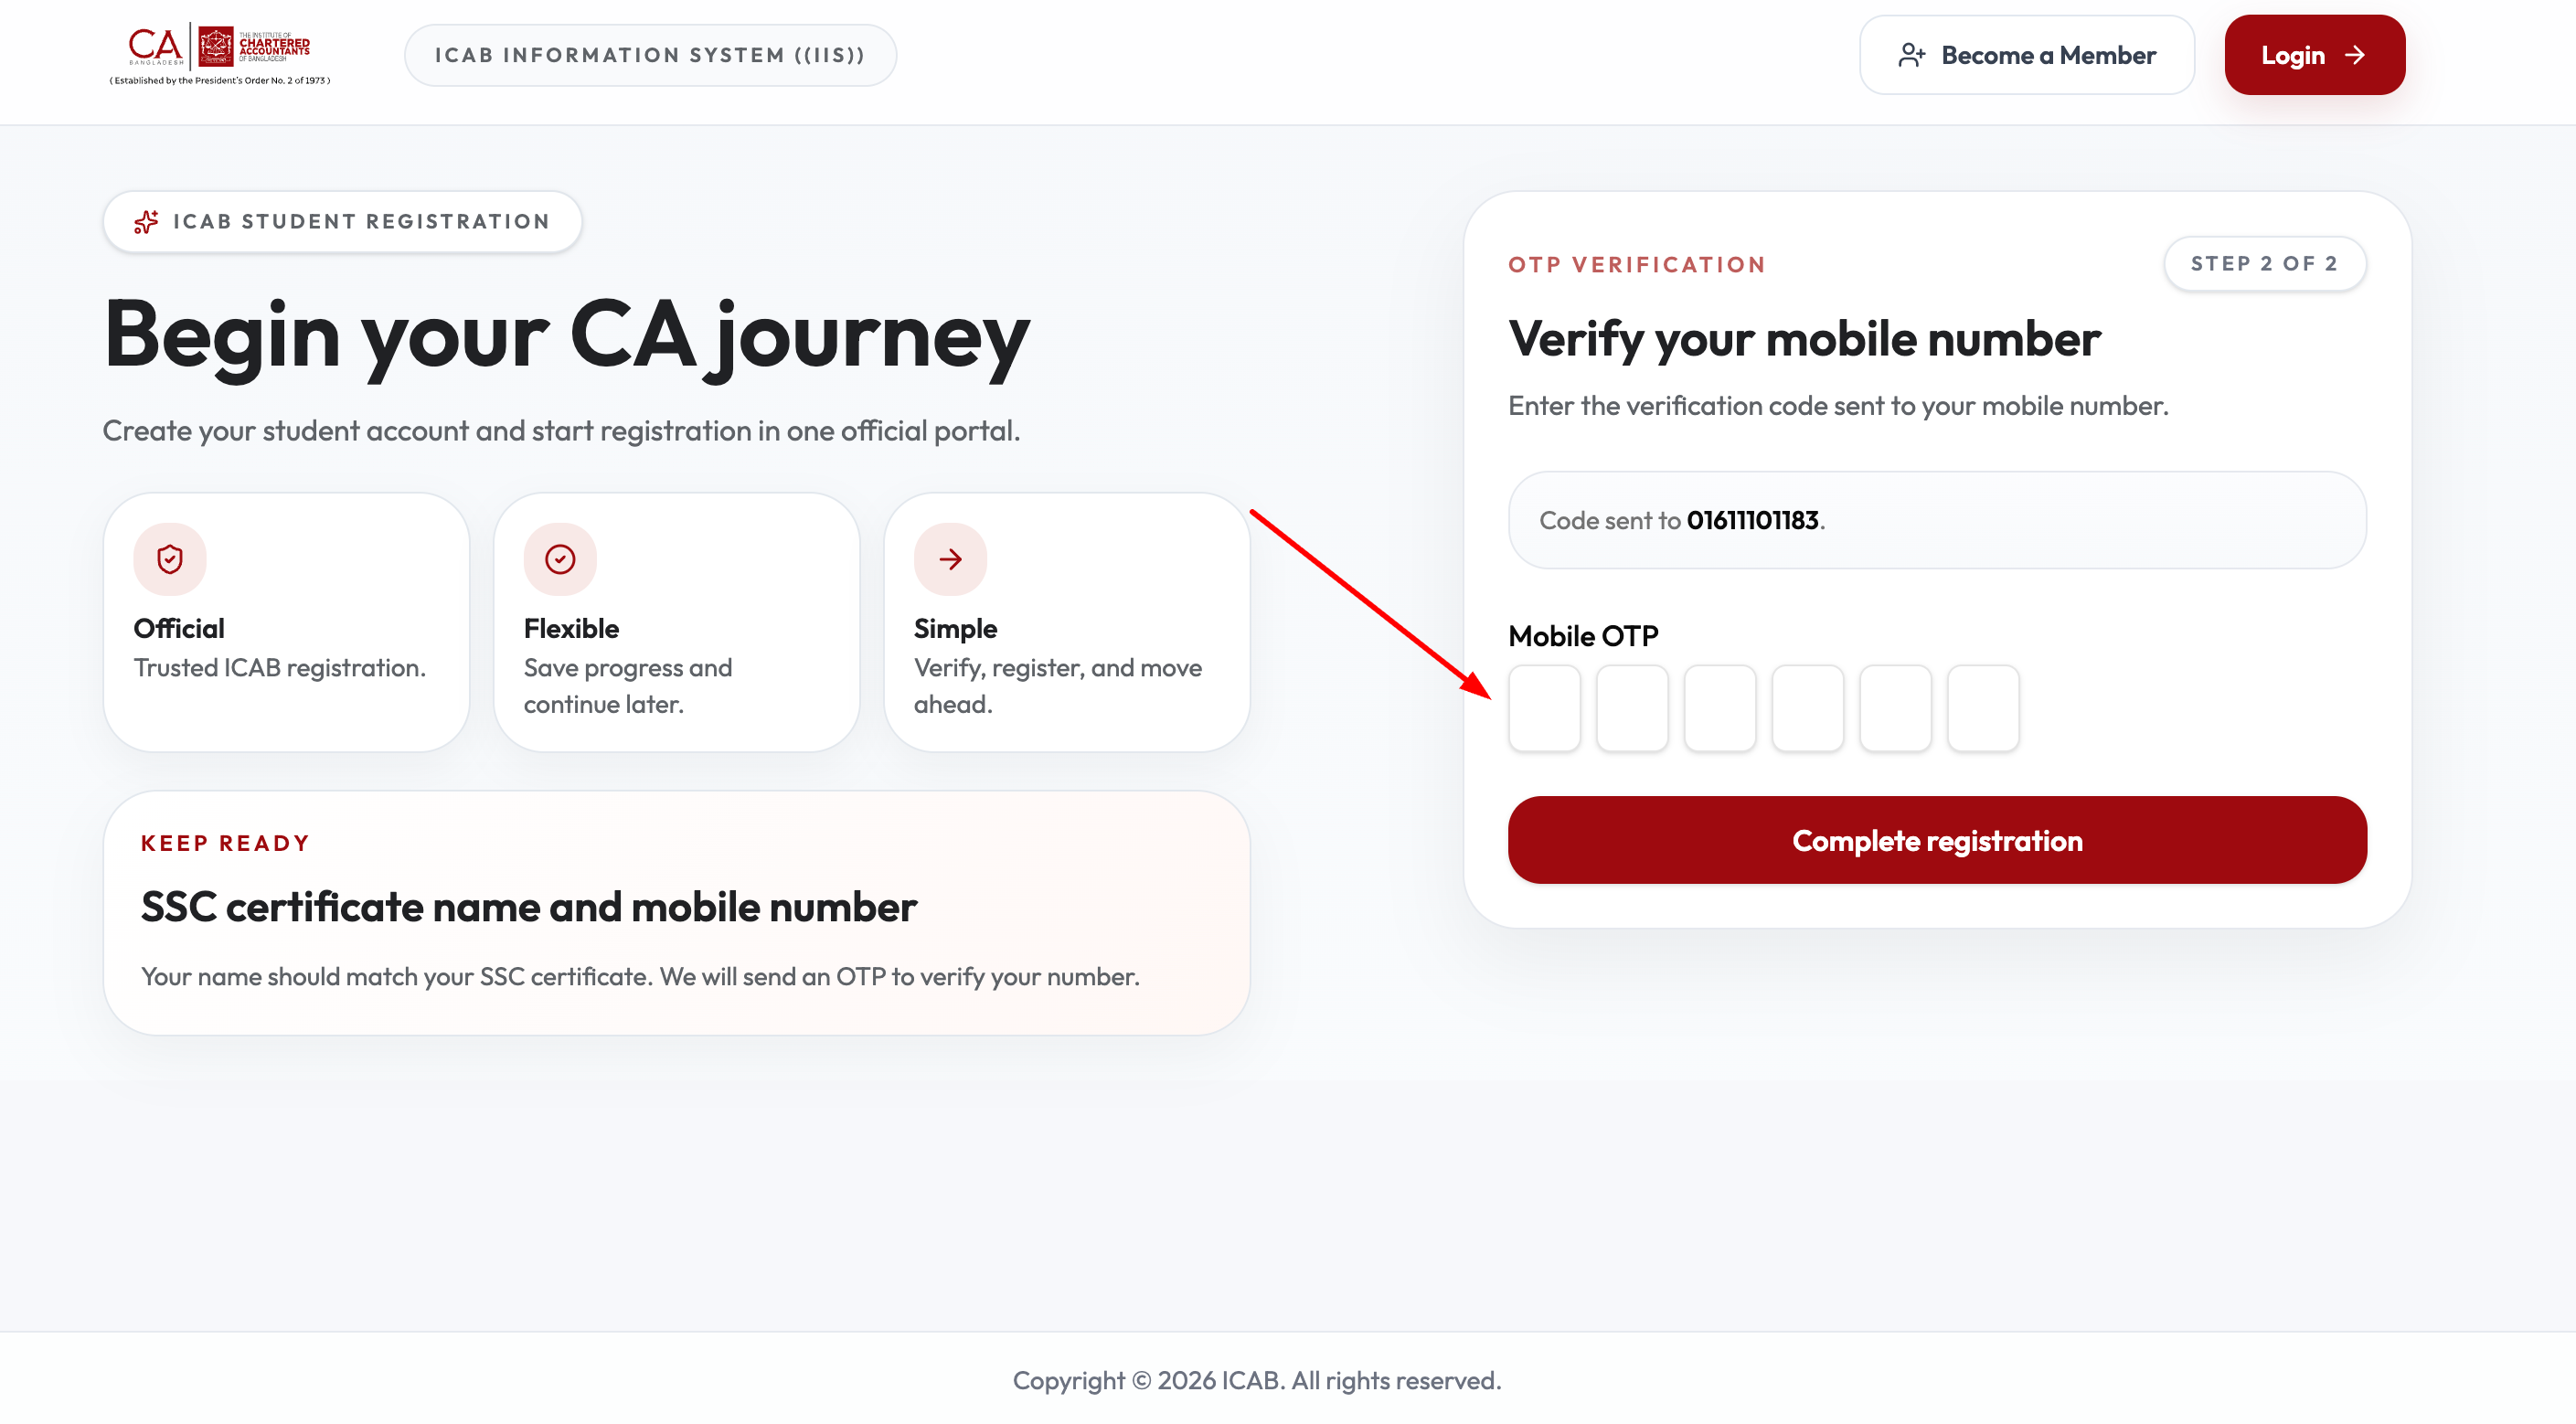
Step 2 of 2 — the OTP screen shows the mobile number the code was sent to Fill in the OTP and complete registration
Type the 6-digit code from your SMS into the Mobile OTP boxes, then select Complete registration.
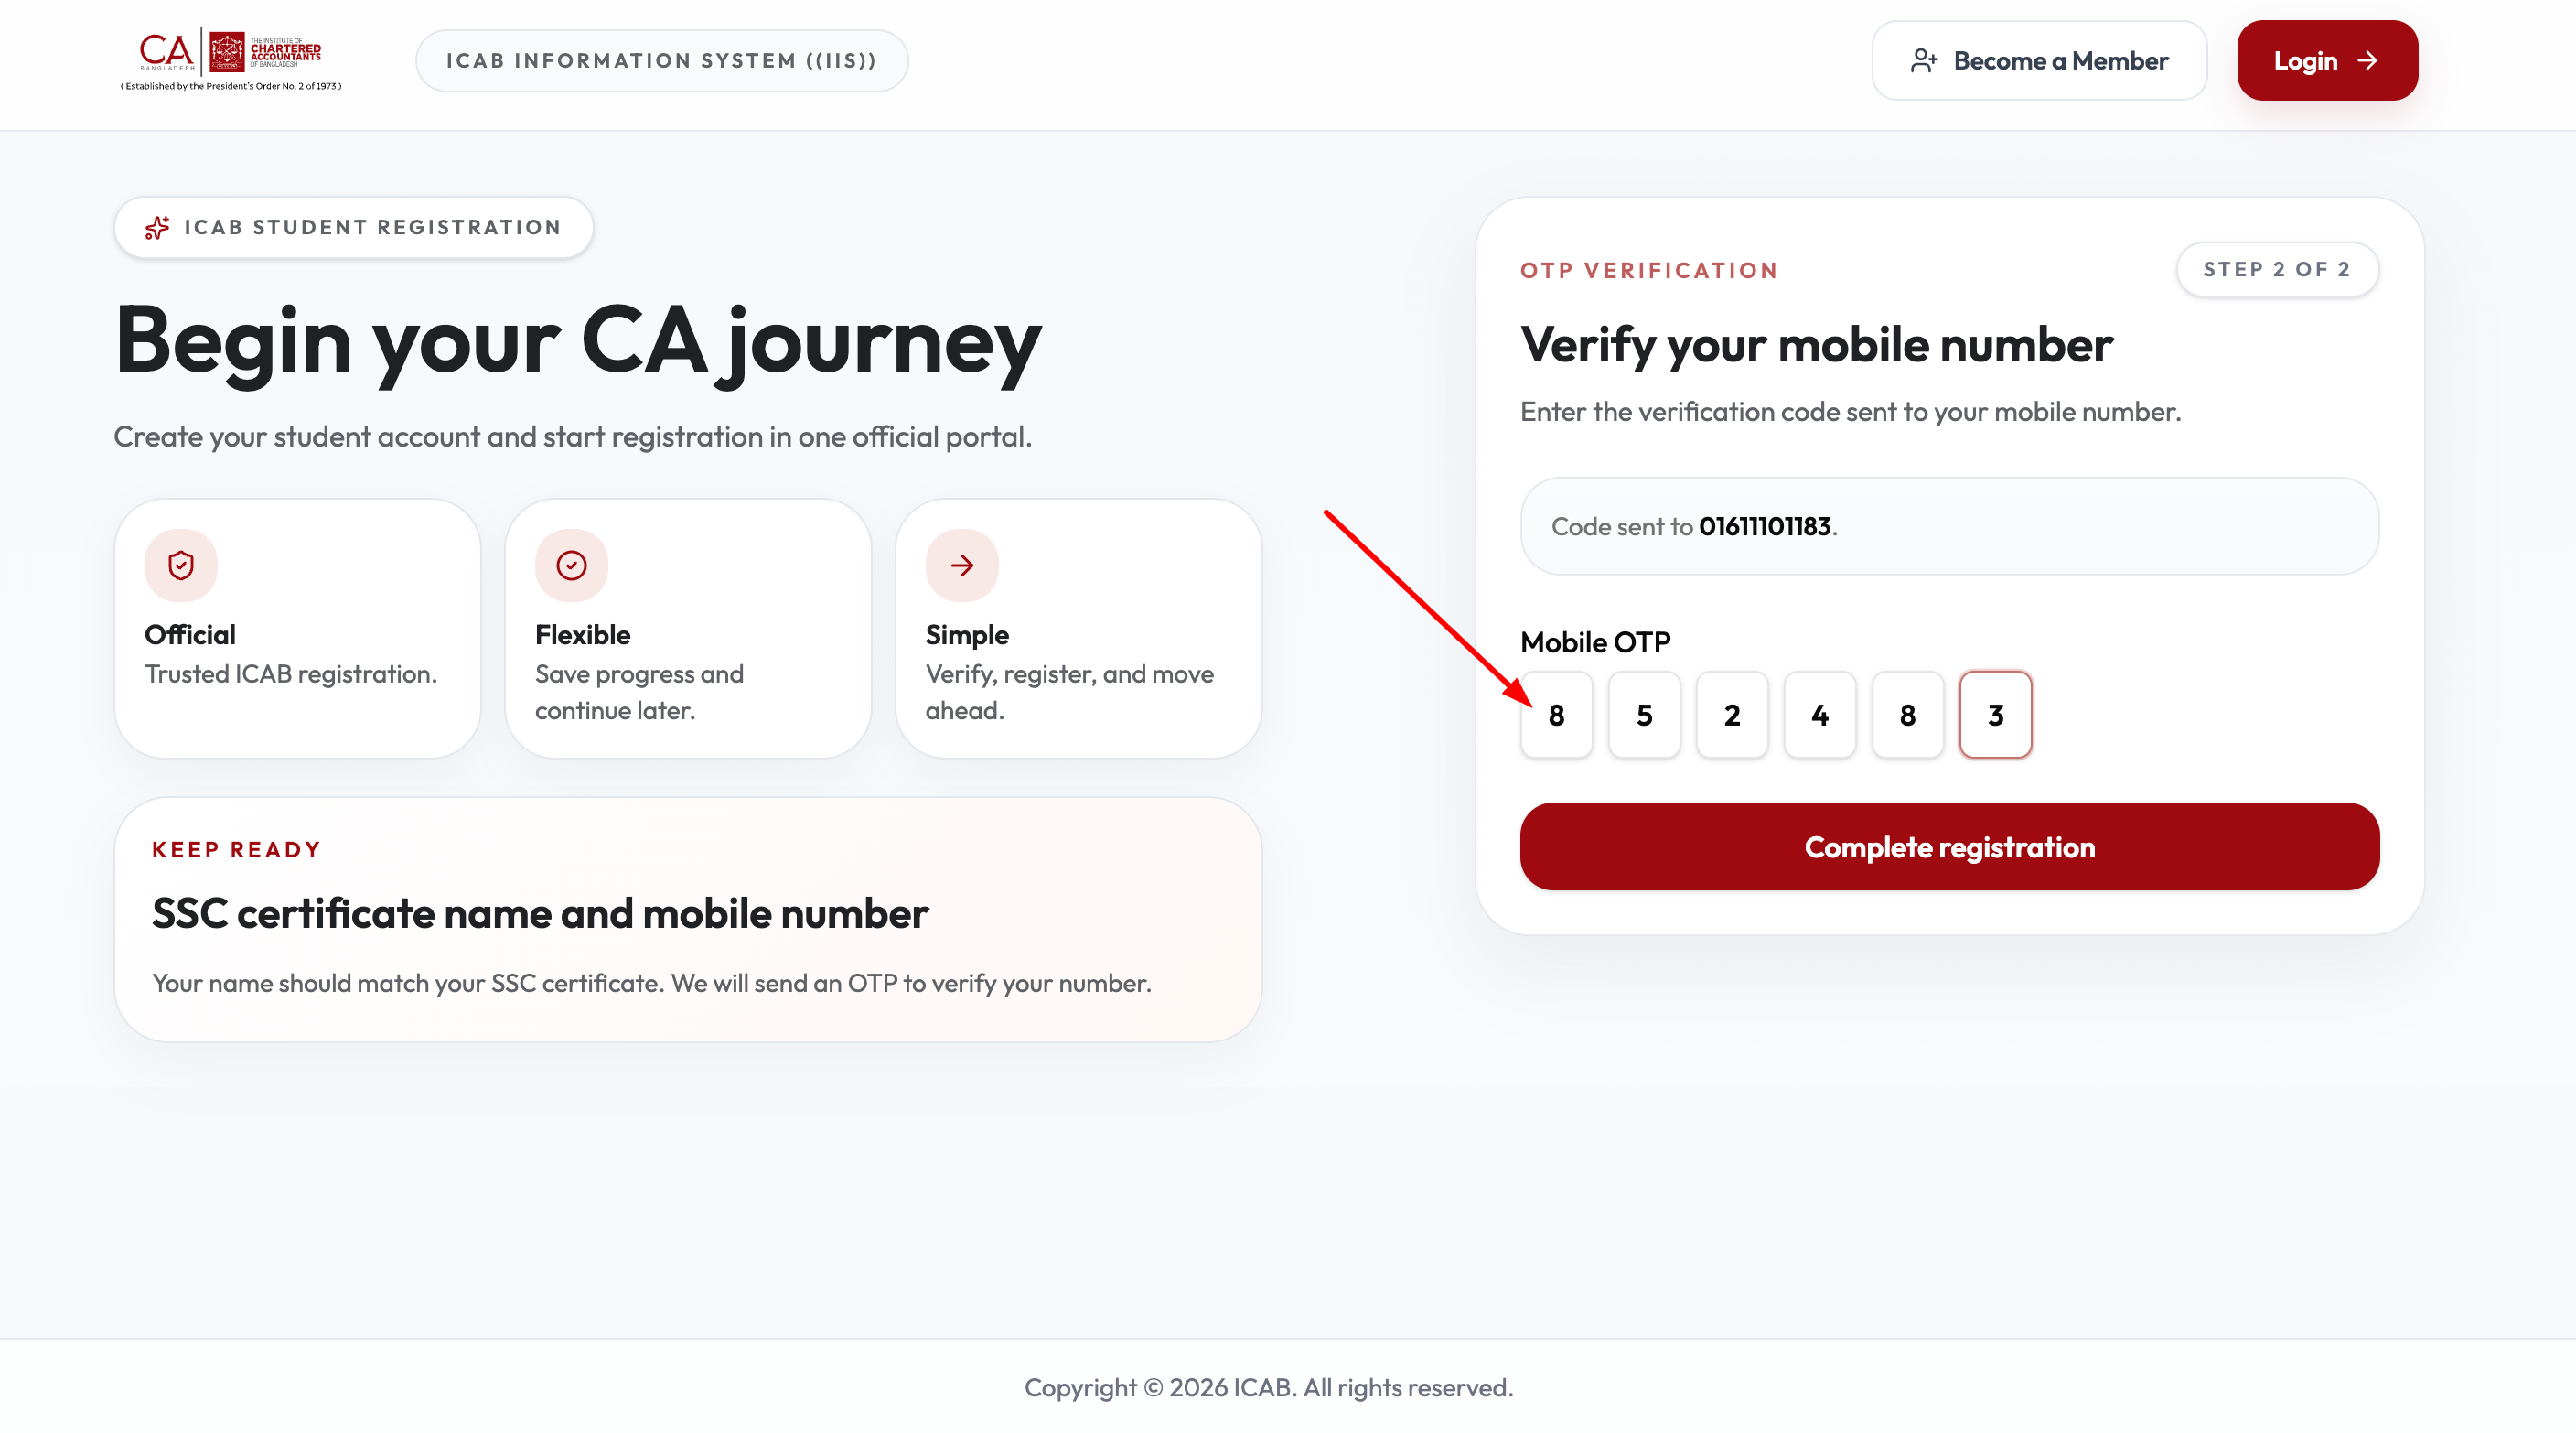
Enter the 6-digit code, then select “Complete registration” Account created
IIS shows “Registration successful” — your student account is ready. Select Back to Login and sign in with the mobile number and password you just created.
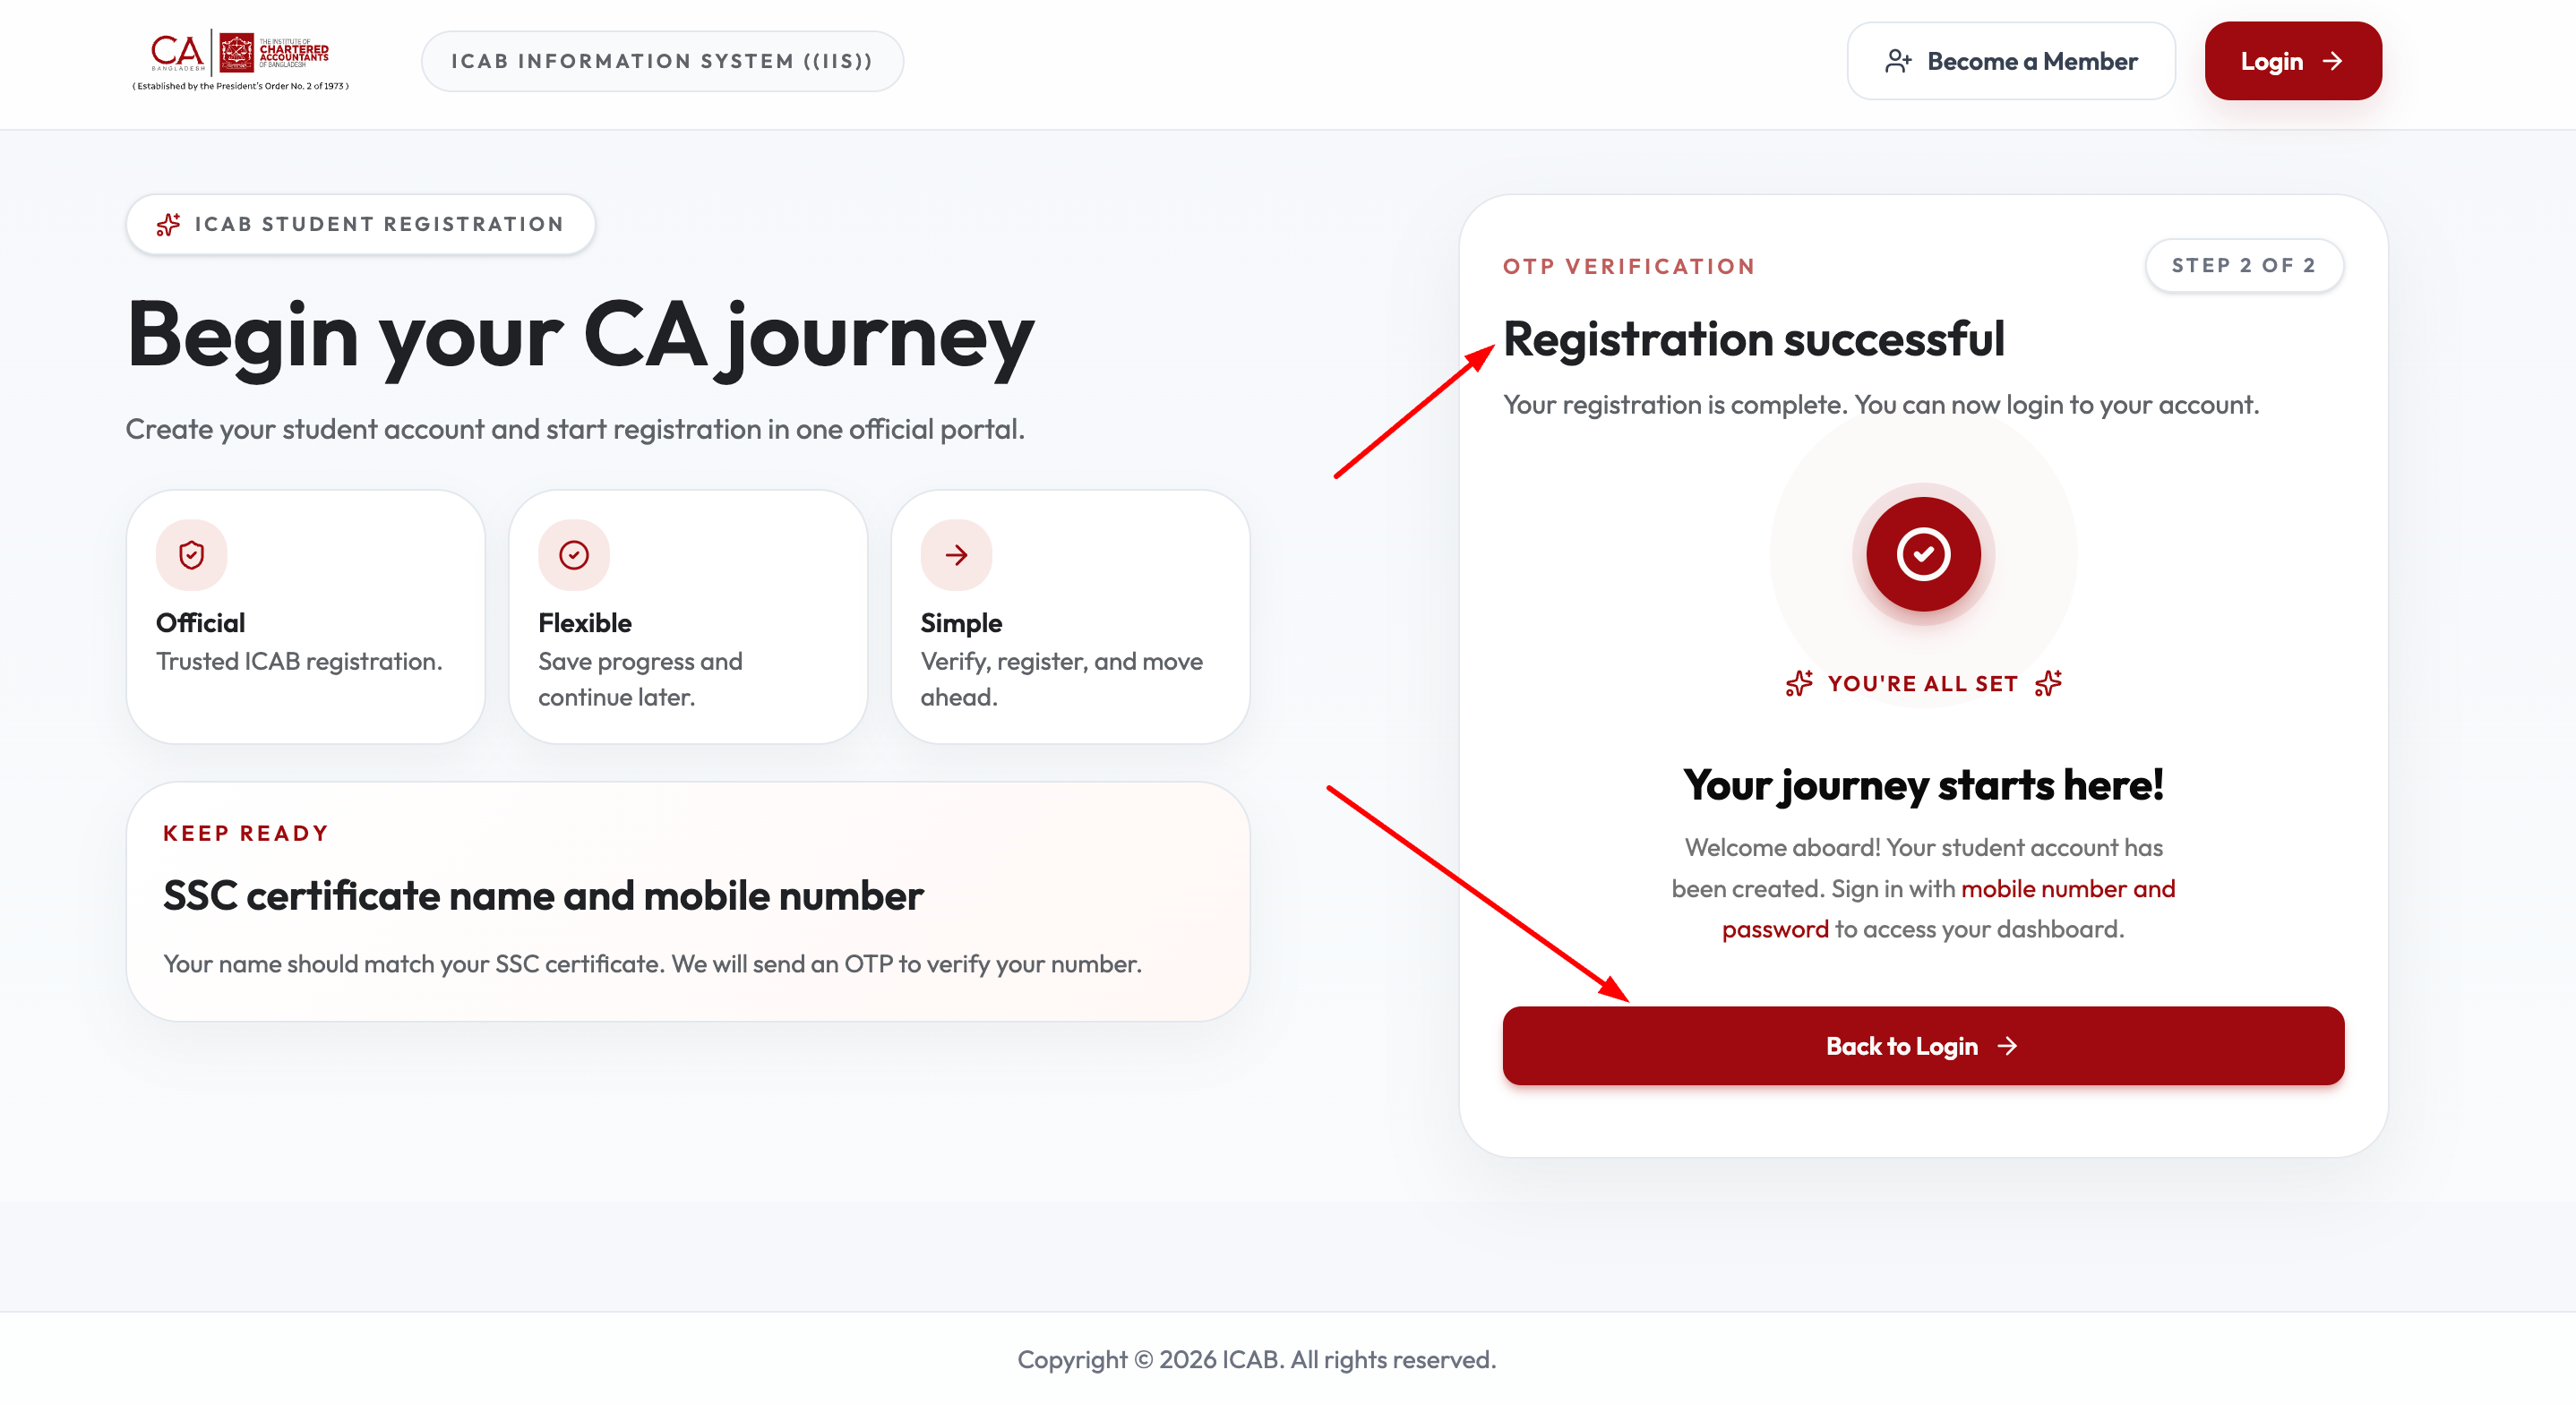
“Registration successful” — your account is ready
Your name should match your SSC certificate exactly, since this is what IIS verifies your OTP against.
Step 2 — Fill out your application
After signing in, open your application to Edit Application. The form is split into six tabs across the top — fill them in order, left to right:
Personal Info → Contact → Student Type → Academic → Address → Preview
You can move between tabs at any time, and your progress is saved as you go — so it’s fine to stop and come back later.
1. Personal Info
This is the first tab, and it asks for your basic personal details and photo.
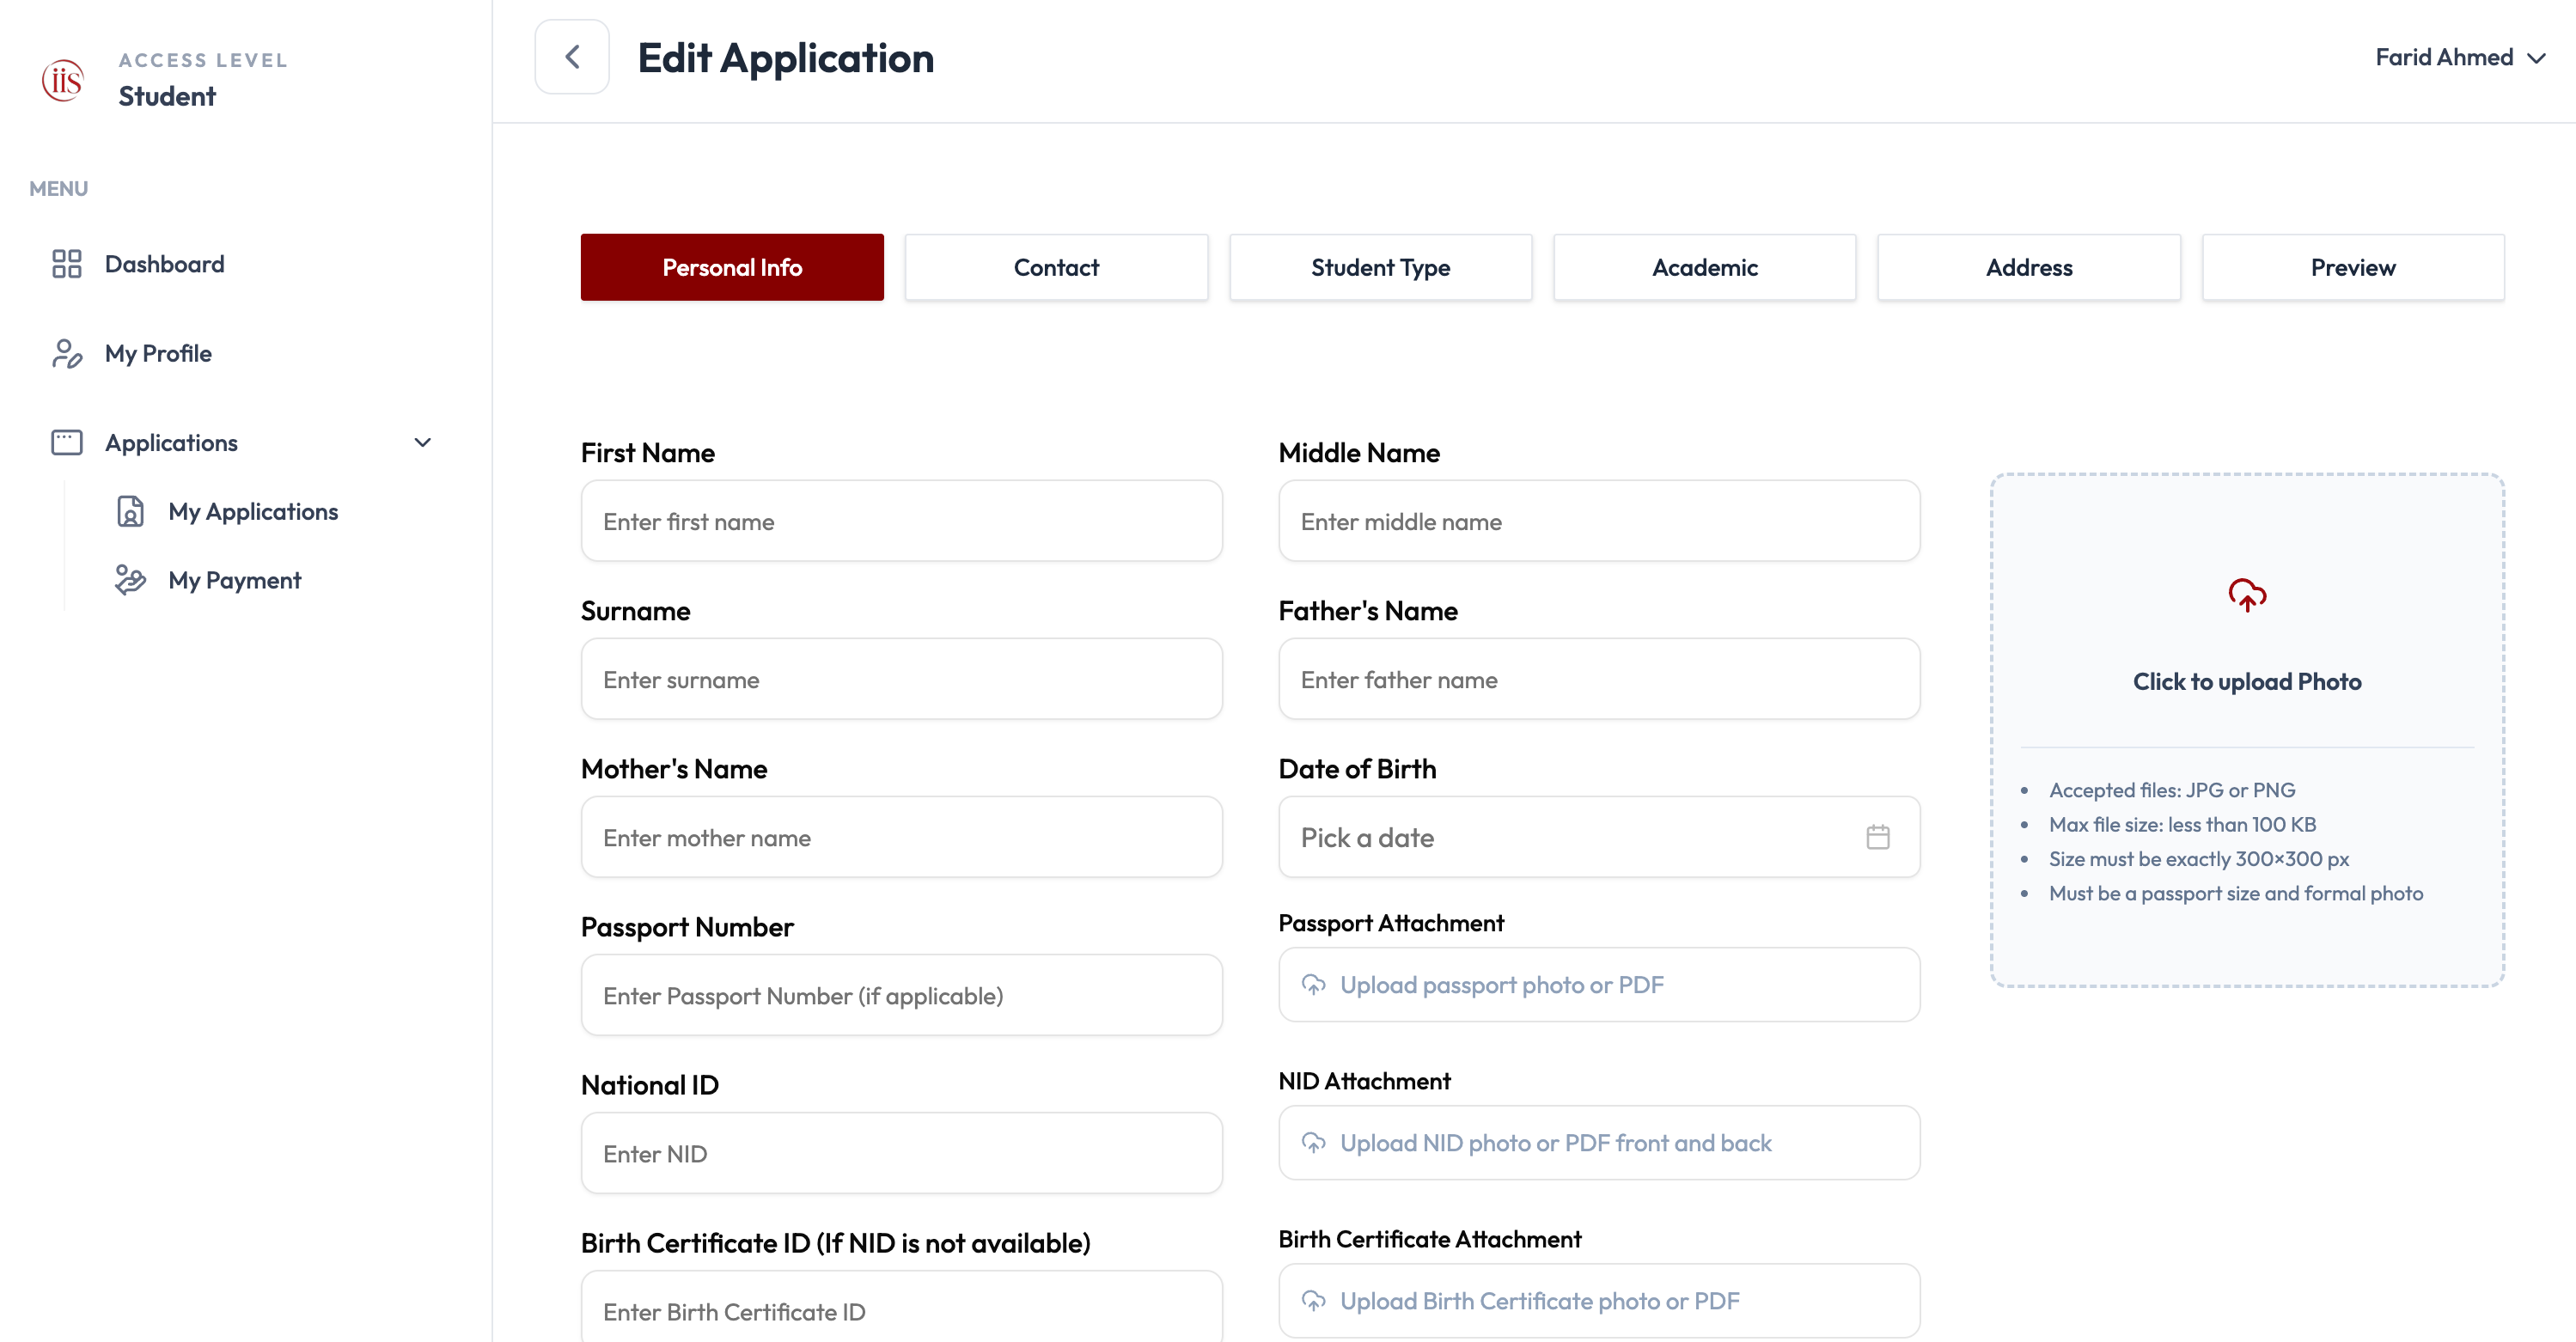
Enter your name
Fill in First Name, Middle Name, and Surname exactly as they appear on your SSC certificate. Only First Name is required — Middle Name and Surname are optional if you don’t have them.
Enter your parents’ names and date of birth
Fill in Father’s Name, Mother’s Name, and your Date of Birth.
Enter your ID number
Fill in your Passport Number or National ID (NID) if you have one. If you don’t have an NID, you must fill in Birth Certificate ID instead.
Upload your ID document
Upload a photo or PDF of whichever ID you used — Passport, NID (front and back), or Birth Certificate. Each file must be a PDF, under 2 MB.
Upload your photo
Click Click to upload Photo on the right. Your photo must be:
- A JPG or PNG file
- Under 100 KB in size
- Exactly 300×300 px
- A formal, passport-size photo
You only need one: use your National ID if you have it, or your Birth Certificate ID if you don’t.
Scroll down on the same Personal Info tab for a few more fields:
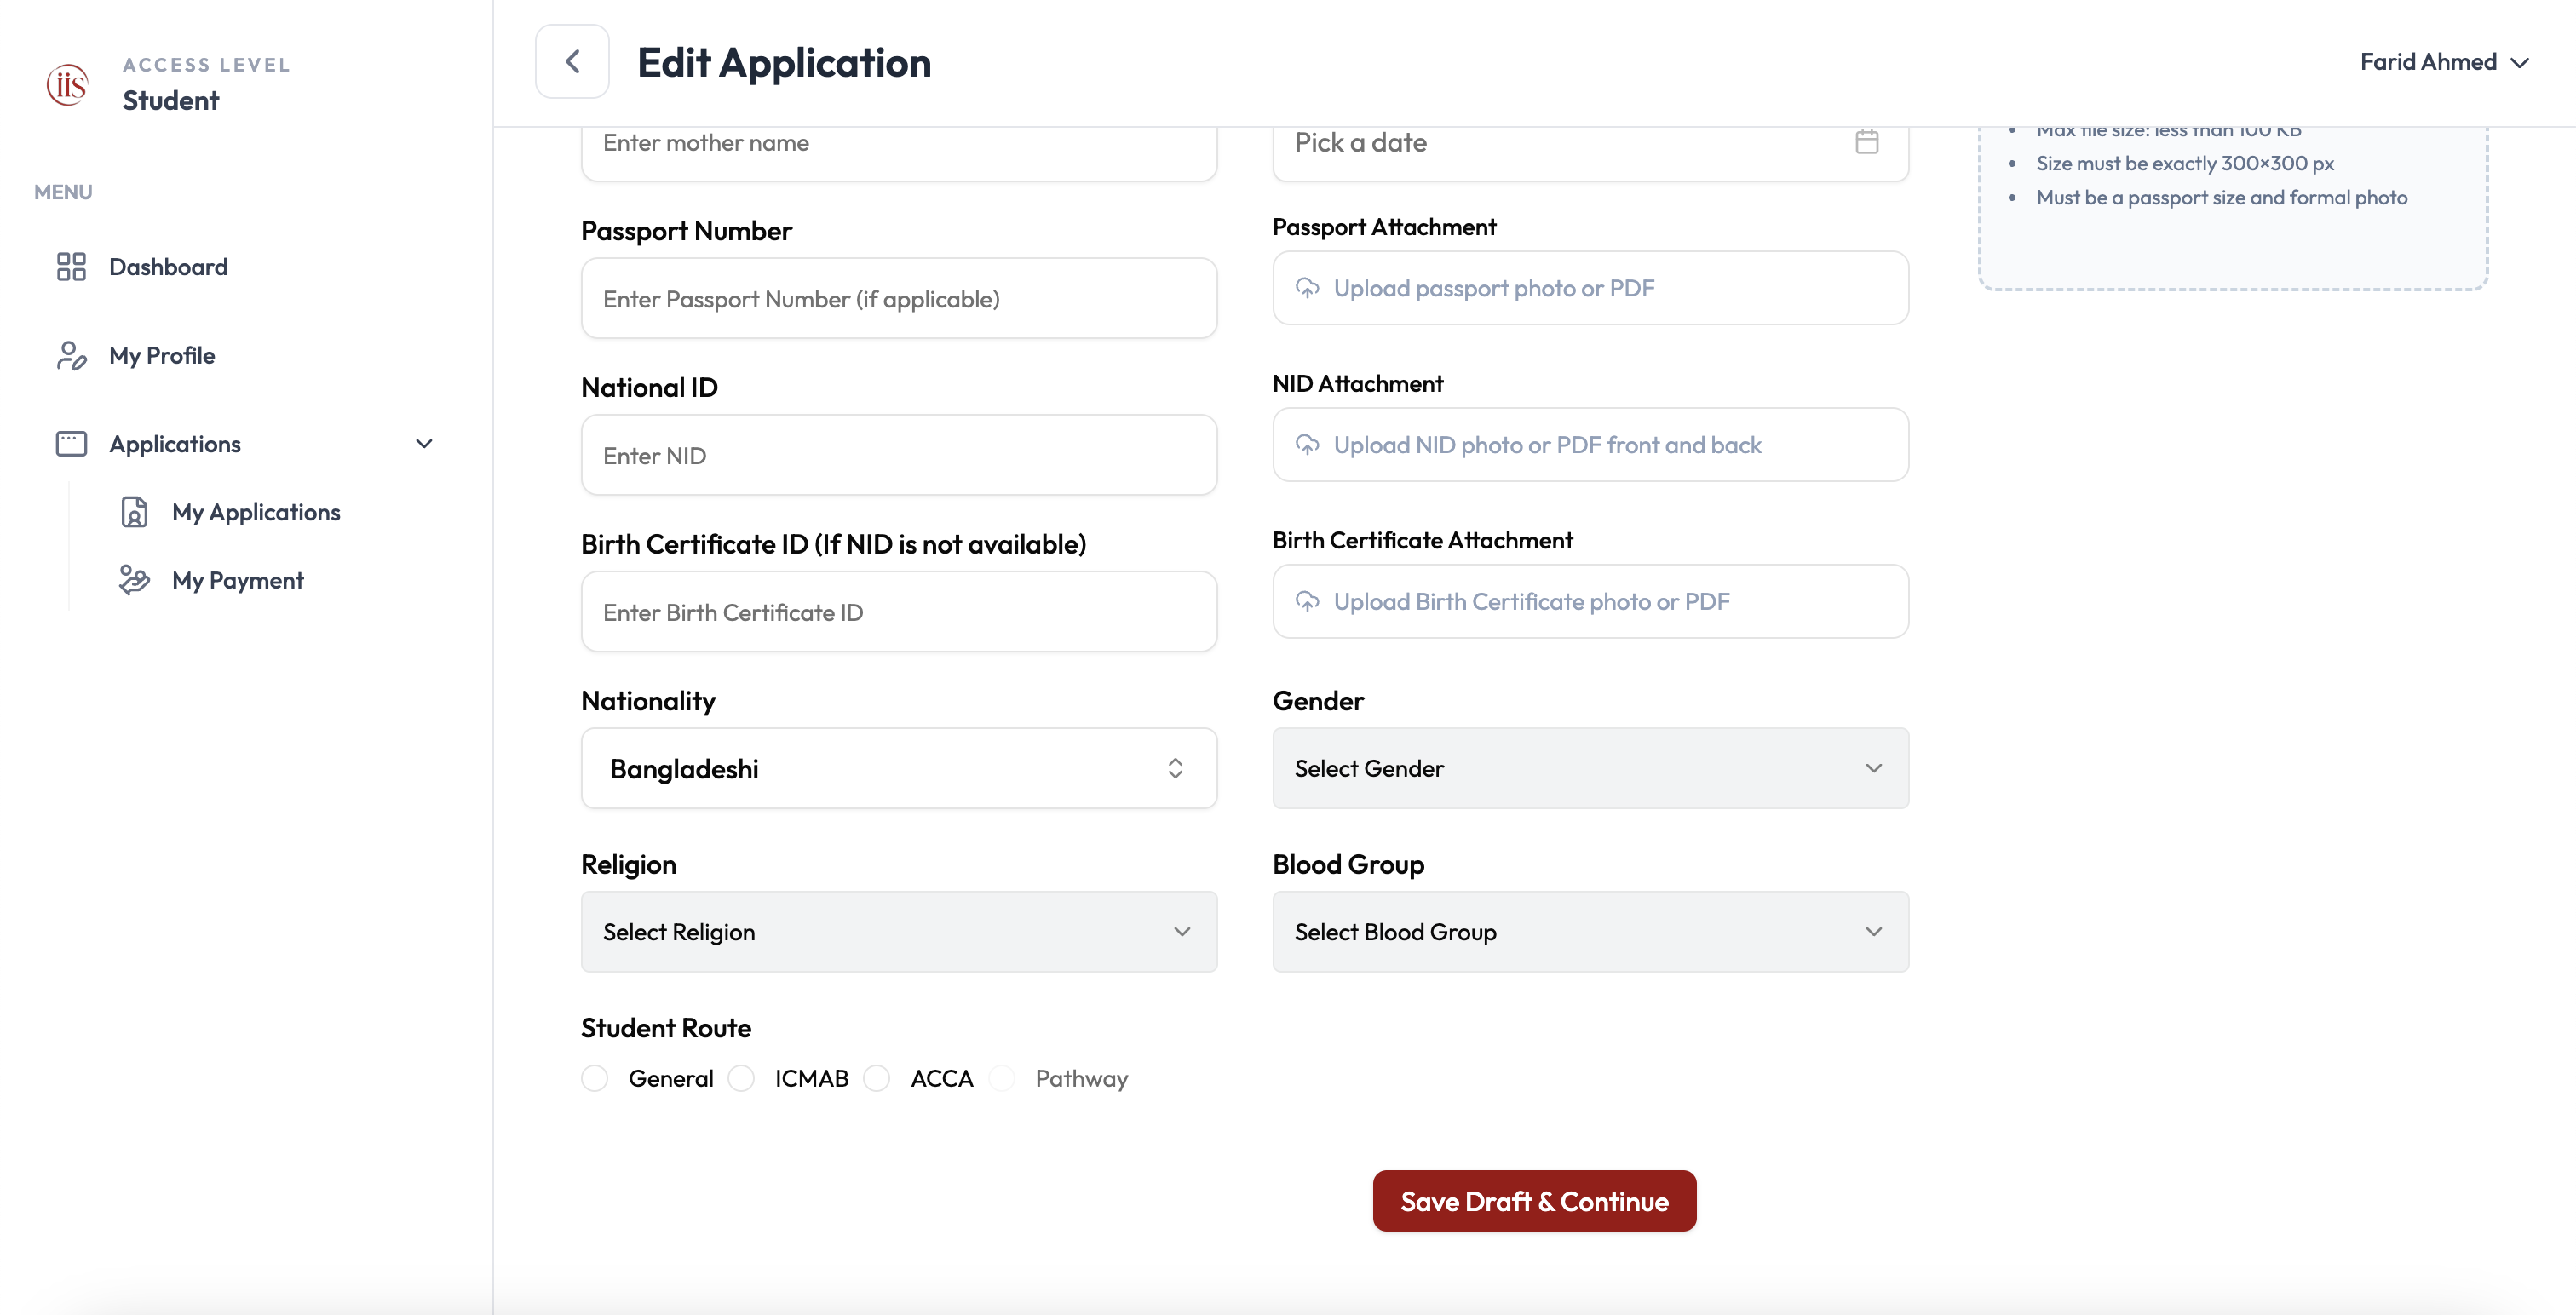
Select Nationality, Gender, Religion, and Blood Group
Choose the correct option from each dropdown.
Select your Student Route
Choose the option that matches your background:
- General — select this if you are not from ICMAB or ACCA.
- ICMAB — select this if you passed from ICMAB.
- ACCA — select this if you passed from ACCA.
Select “Save Draft & Continue”
This saves everything on the Personal Info tab and moves you to the next tab, Contact.
Always select Save Draft & Continue after filling in a tab. If you navigate away without saving, whatever you typed will be lost.
2. Contact
The Contact tab collects how IIS and ICAB can reach you — your phone numbers, email addresses, and an emergency contact.
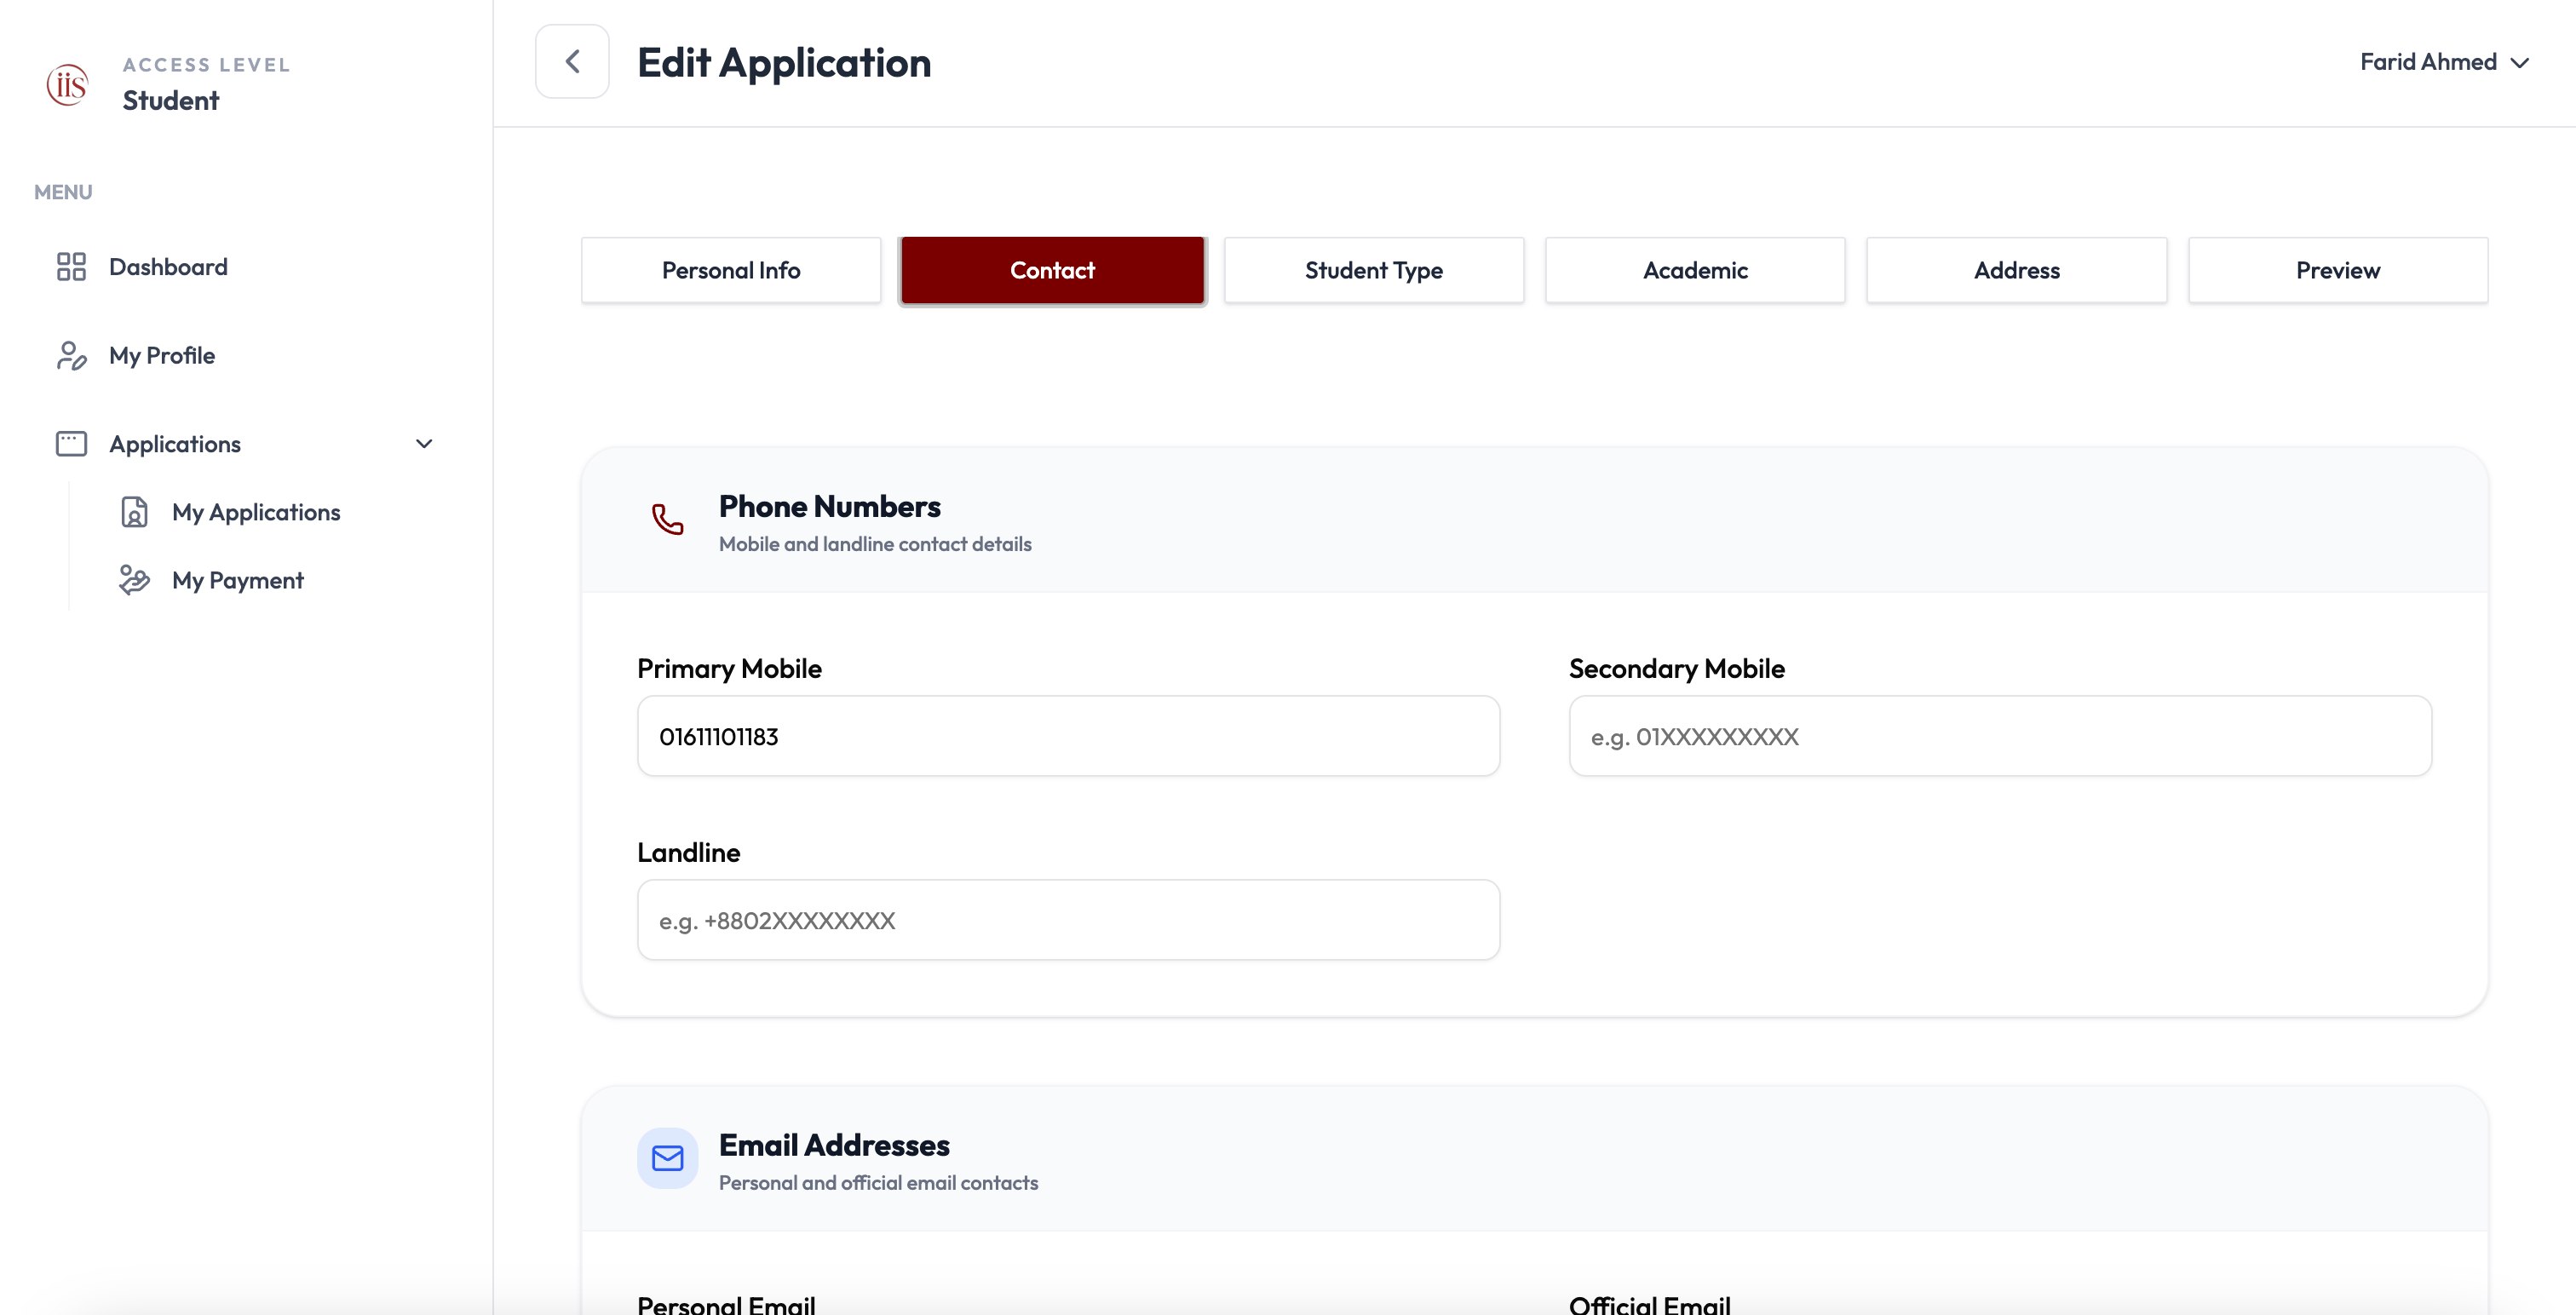
Enter your phone numbers
Fill in Primary Mobile (this is usually filled in already from your registration). Secondary Mobile and Landline are optional.
Enter your email addresses
Fill in your Personal Email and, if you have one, your Official Email (for example, a work or firm email).
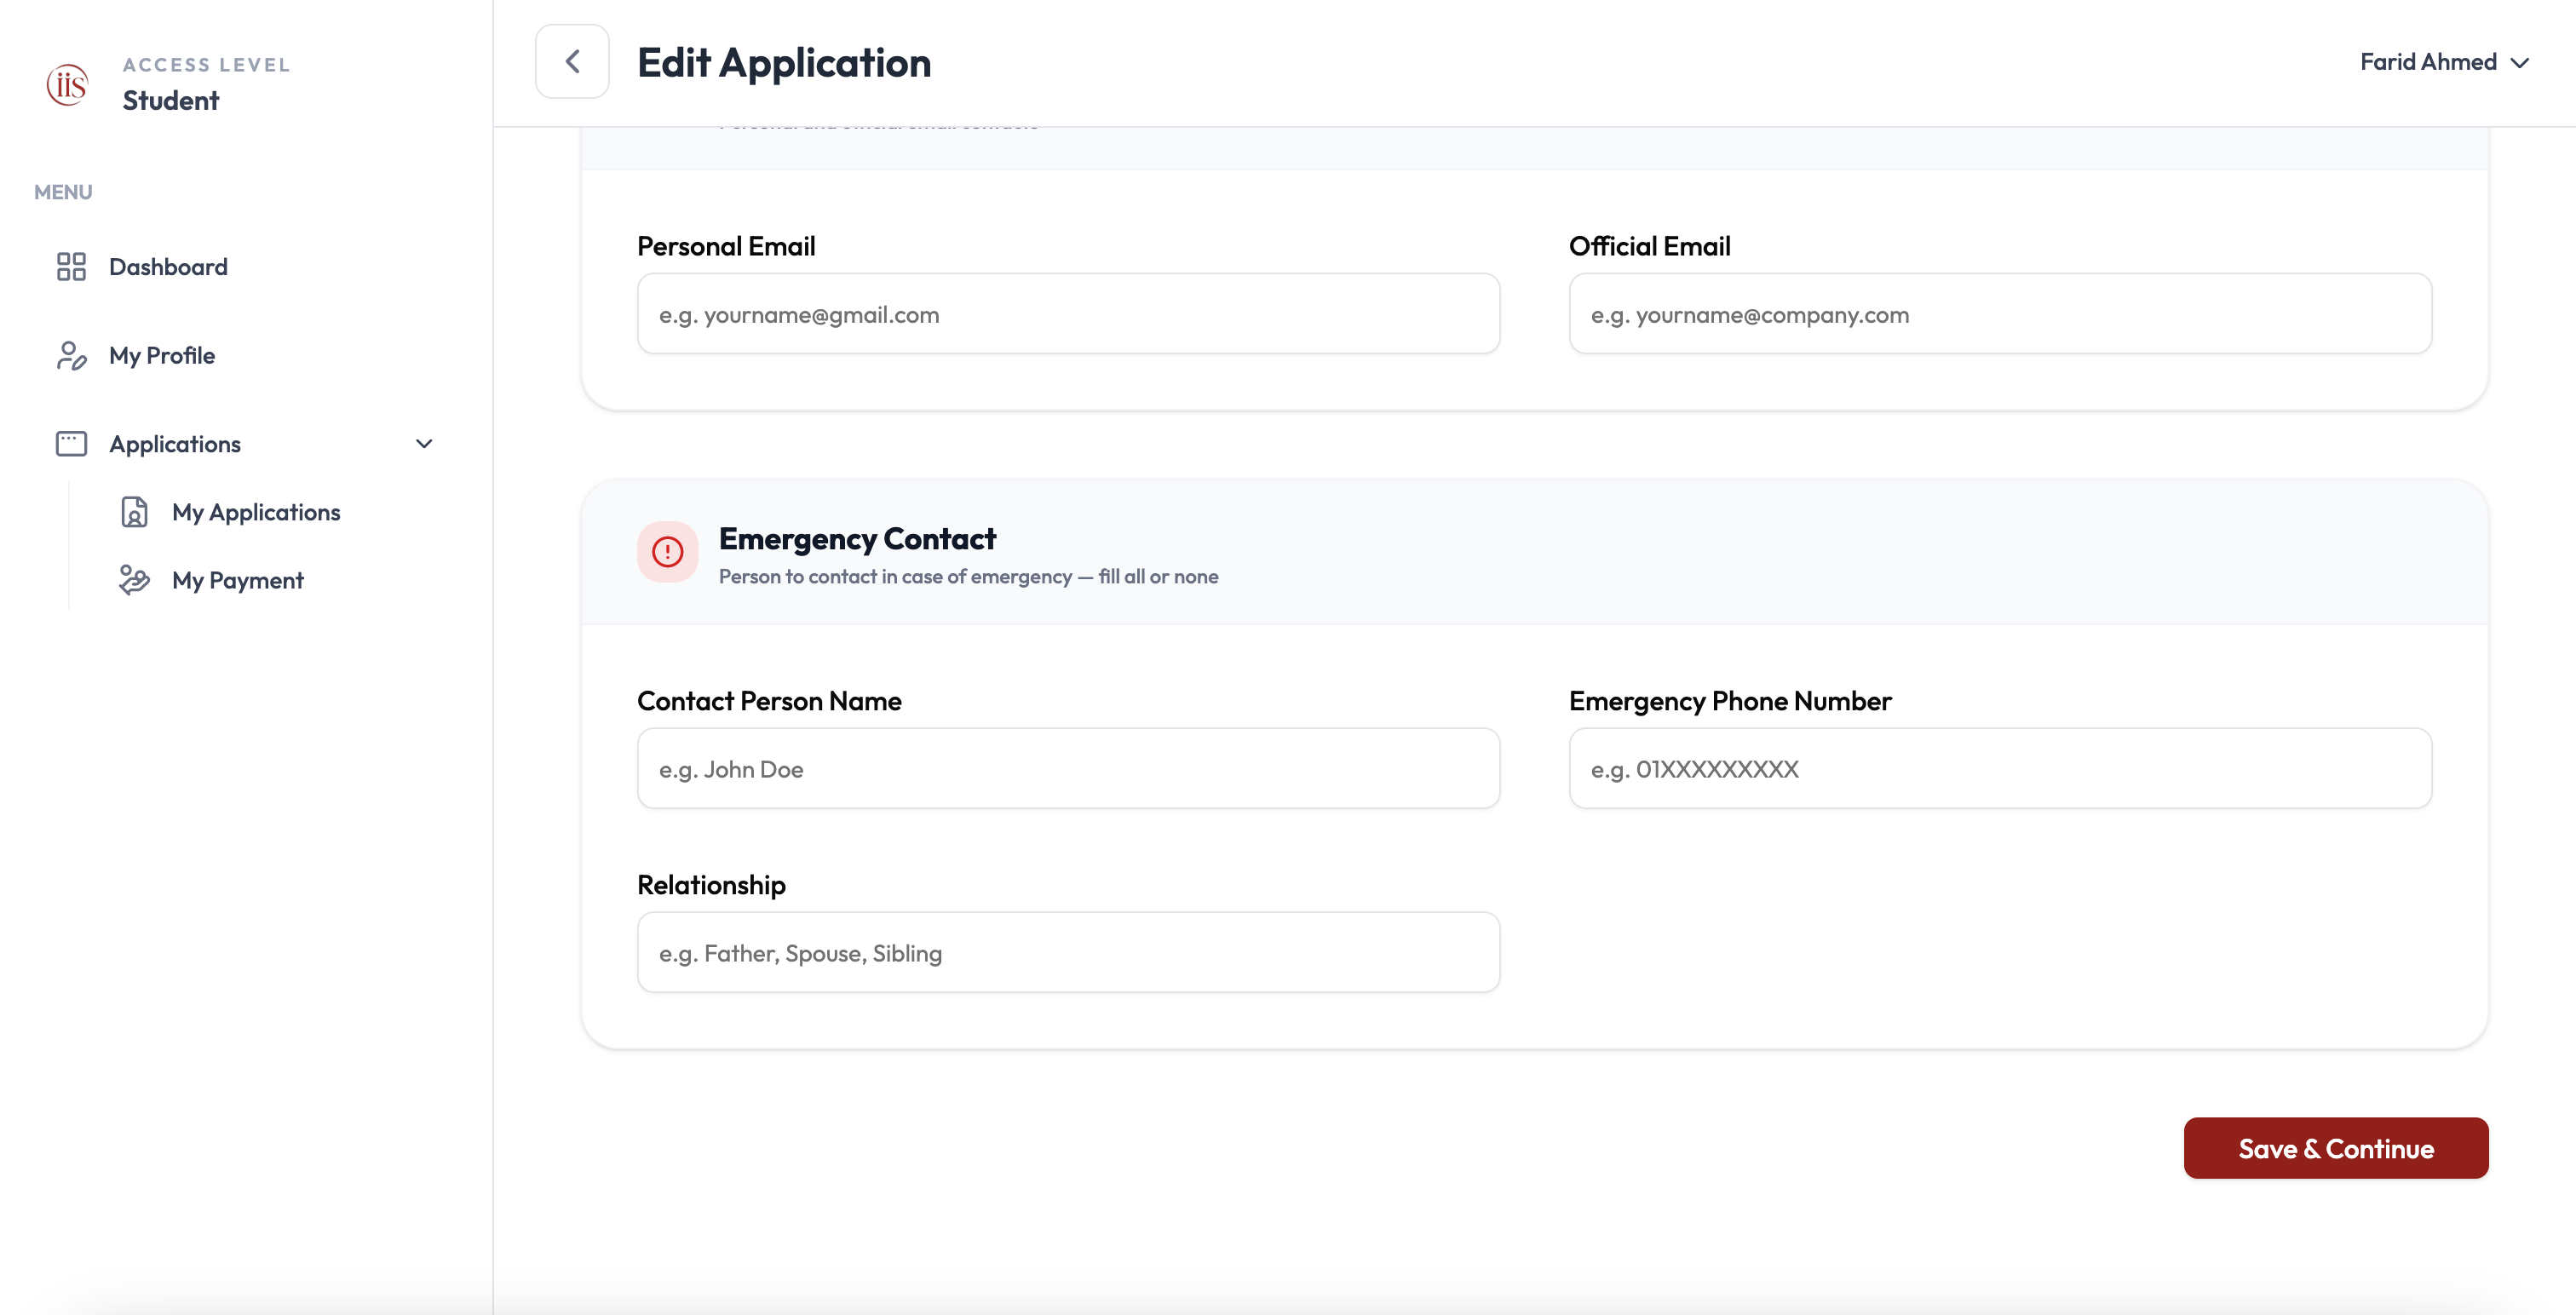
Enter an emergency contact (optional)
If you want to add one, fill in Contact Person Name, Emergency Phone Number, and Relationship (for example, Father, Spouse, Sibling). You can leave all three blank, but if you fill in one, fill in all three.
Select “Save & Continue”
This saves the Contact tab and moves you to Student Type.
Emergency Contact fields are optional as a group — either fill in Contact Person Name, Emergency Phone Number, and Relationship together, or leave all three empty.
3. Student Type
This tab asks how you are joining ICAB. There are two choices, each with its own rules shown on the right as Notes.
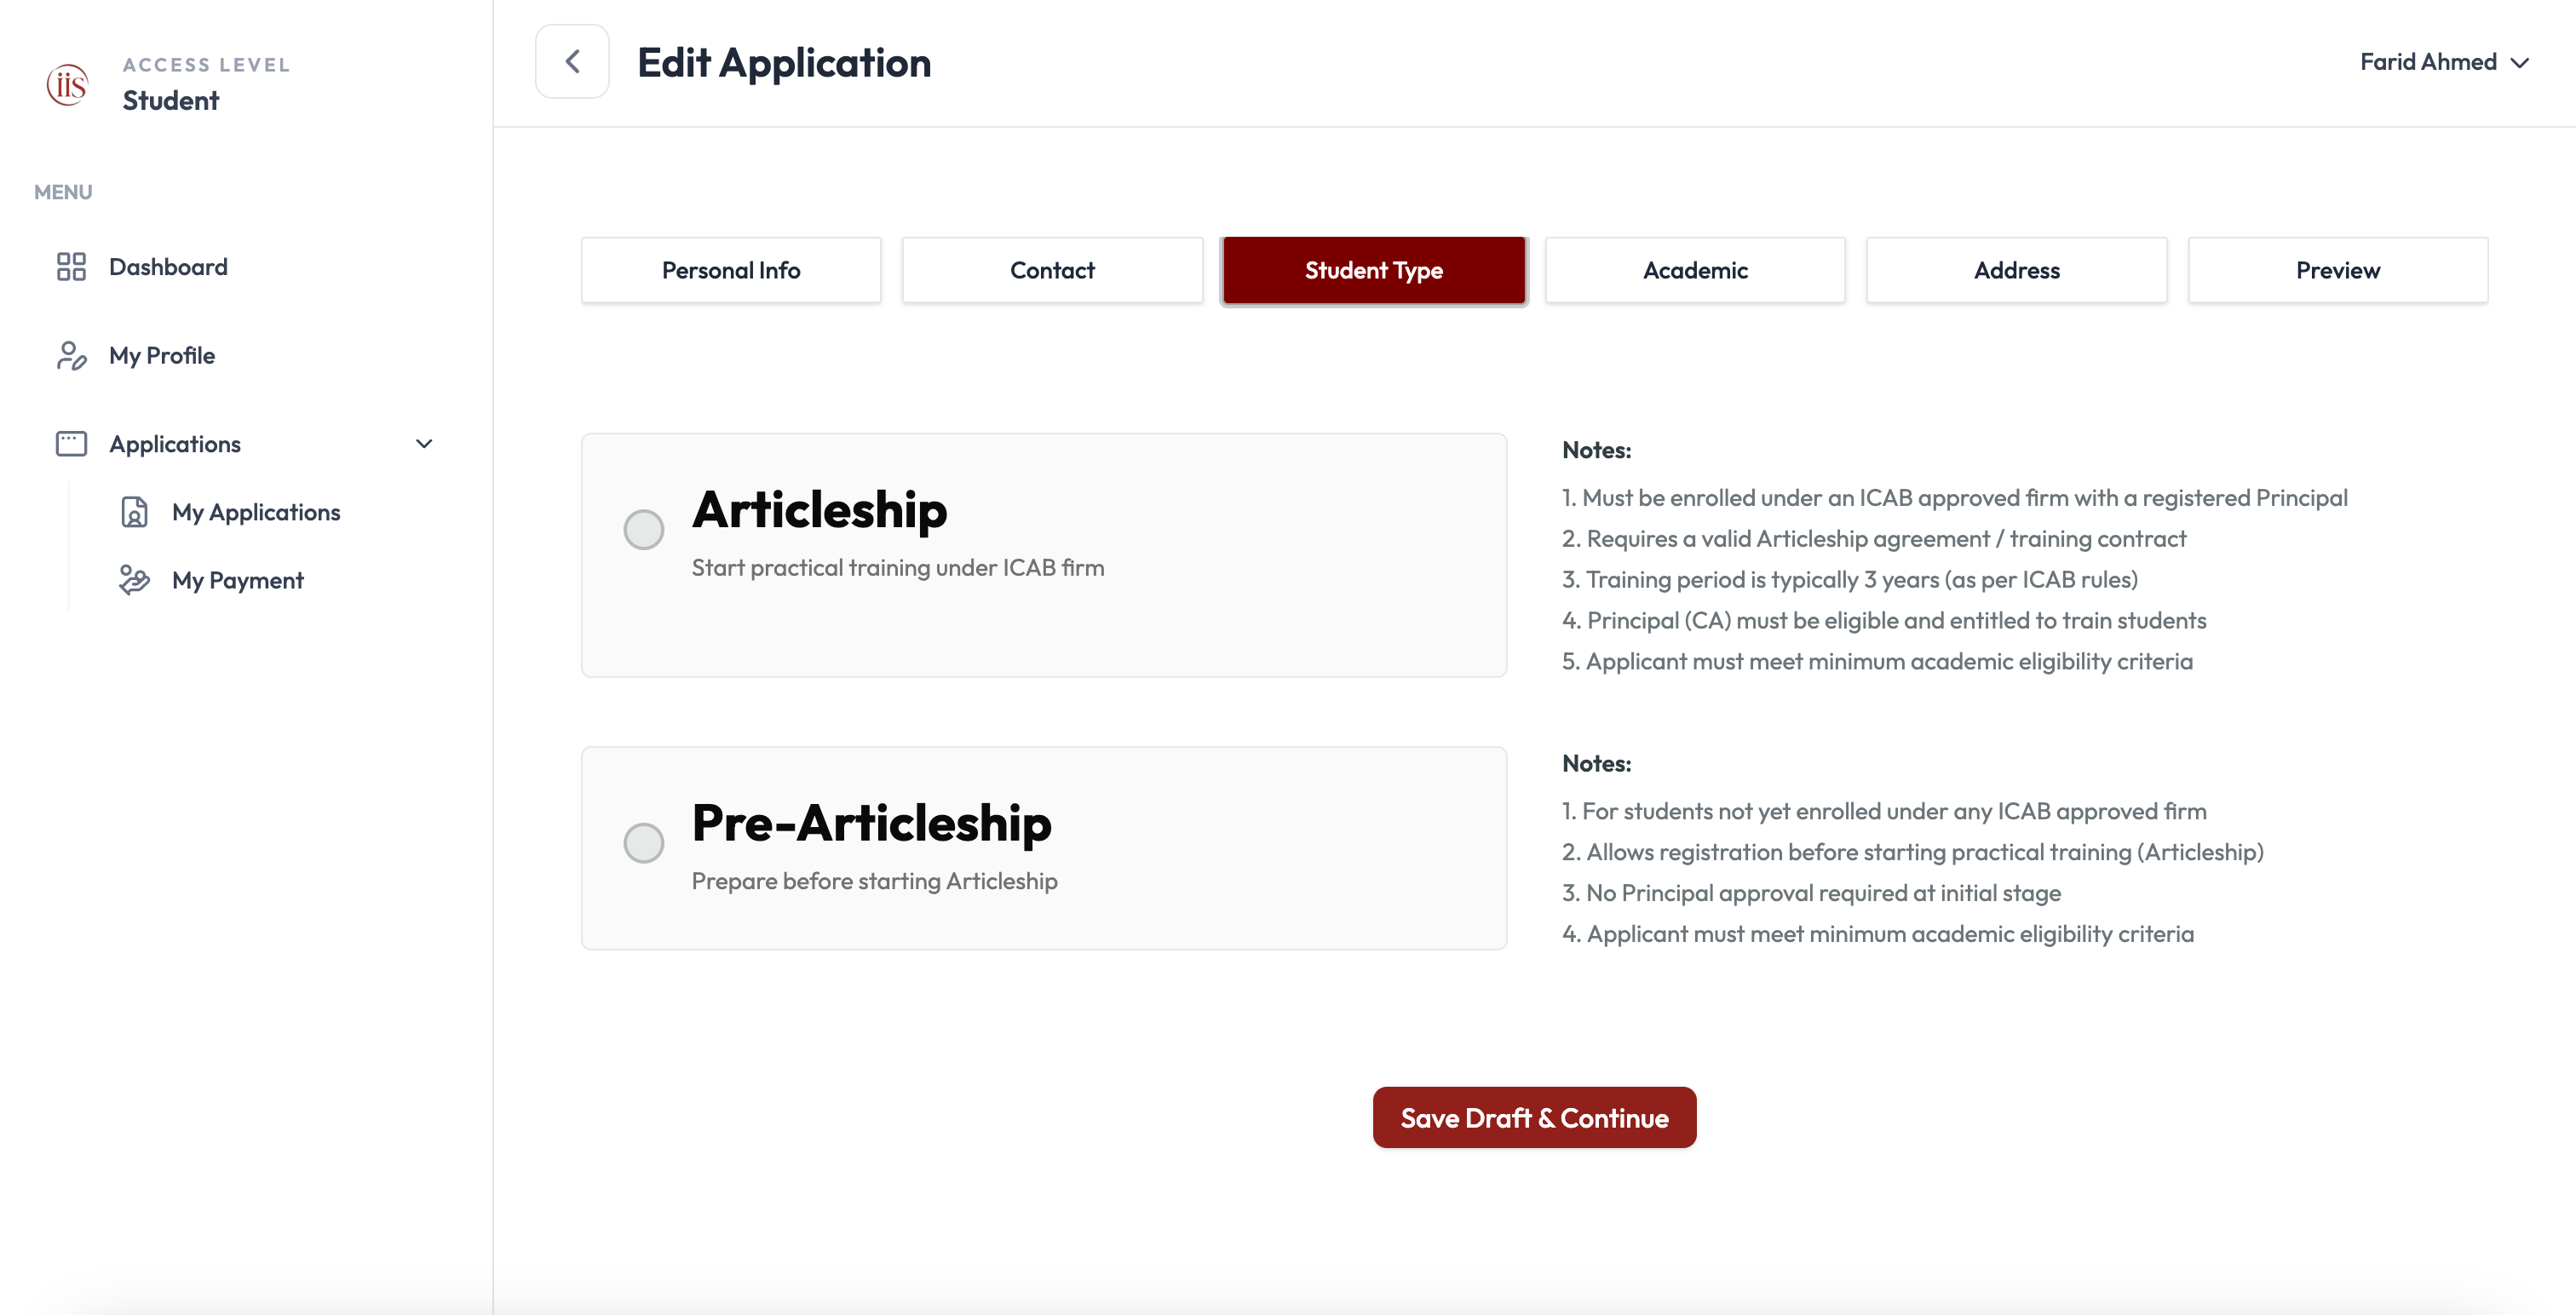
Read both options carefully
Articleship — start practical training under an ICAB firm. Choose this if you are already enrolled under an ICAB-approved firm with a registered Principal.
Pre-Articleship — prepare before starting Articleship. Choose this if you are not yet enrolled under any firm; no Principal approval is needed at this stage.
Select the option that matches you
Click the circle next to Articleship or Pre-Articleship.
If you selected Articleship
A few extra fields appear that you need to fill in:
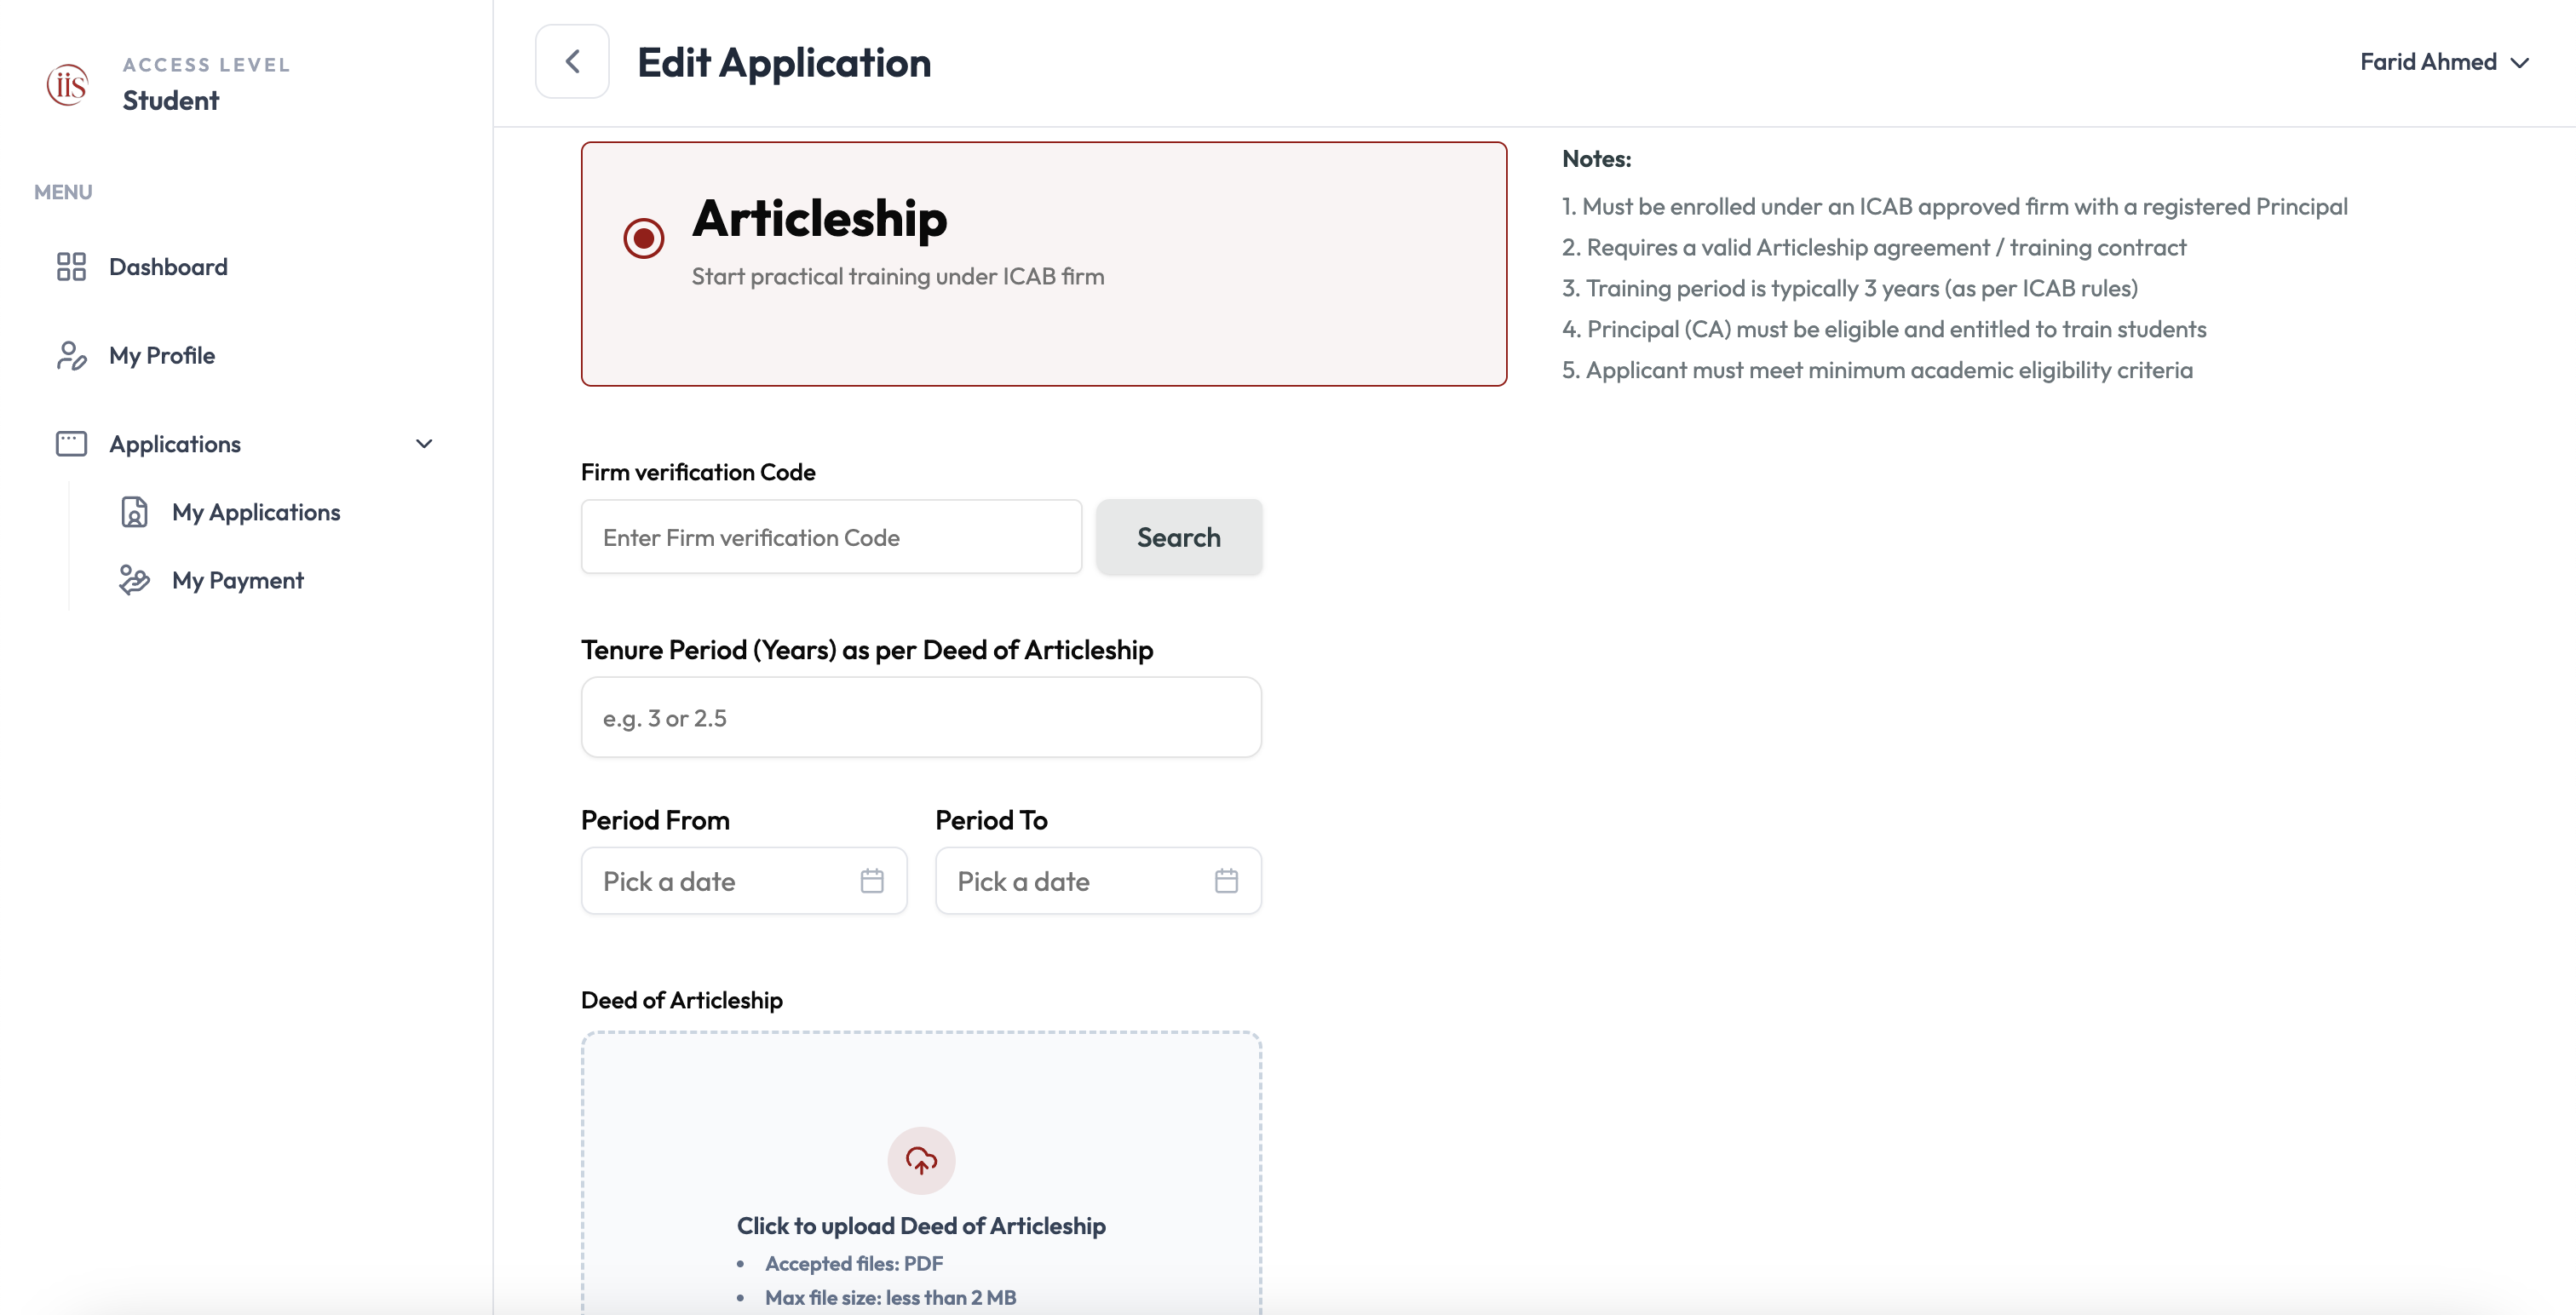
Enter your Firm Verification Code
Type the code your firm gave you into Firm verification Code, then select Search to confirm the firm.
Enter your Tenure Period
Fill in the Tenure Period (Years) as written on your Deed of Articleship (for example, 3 or 2.5), and pick the Period From and Period To dates.
Upload your Deed of Articleship
Click Click to upload Deed of Articleship. The file must be a PDF, under 2 MB.
If you selected Pre-Articleship
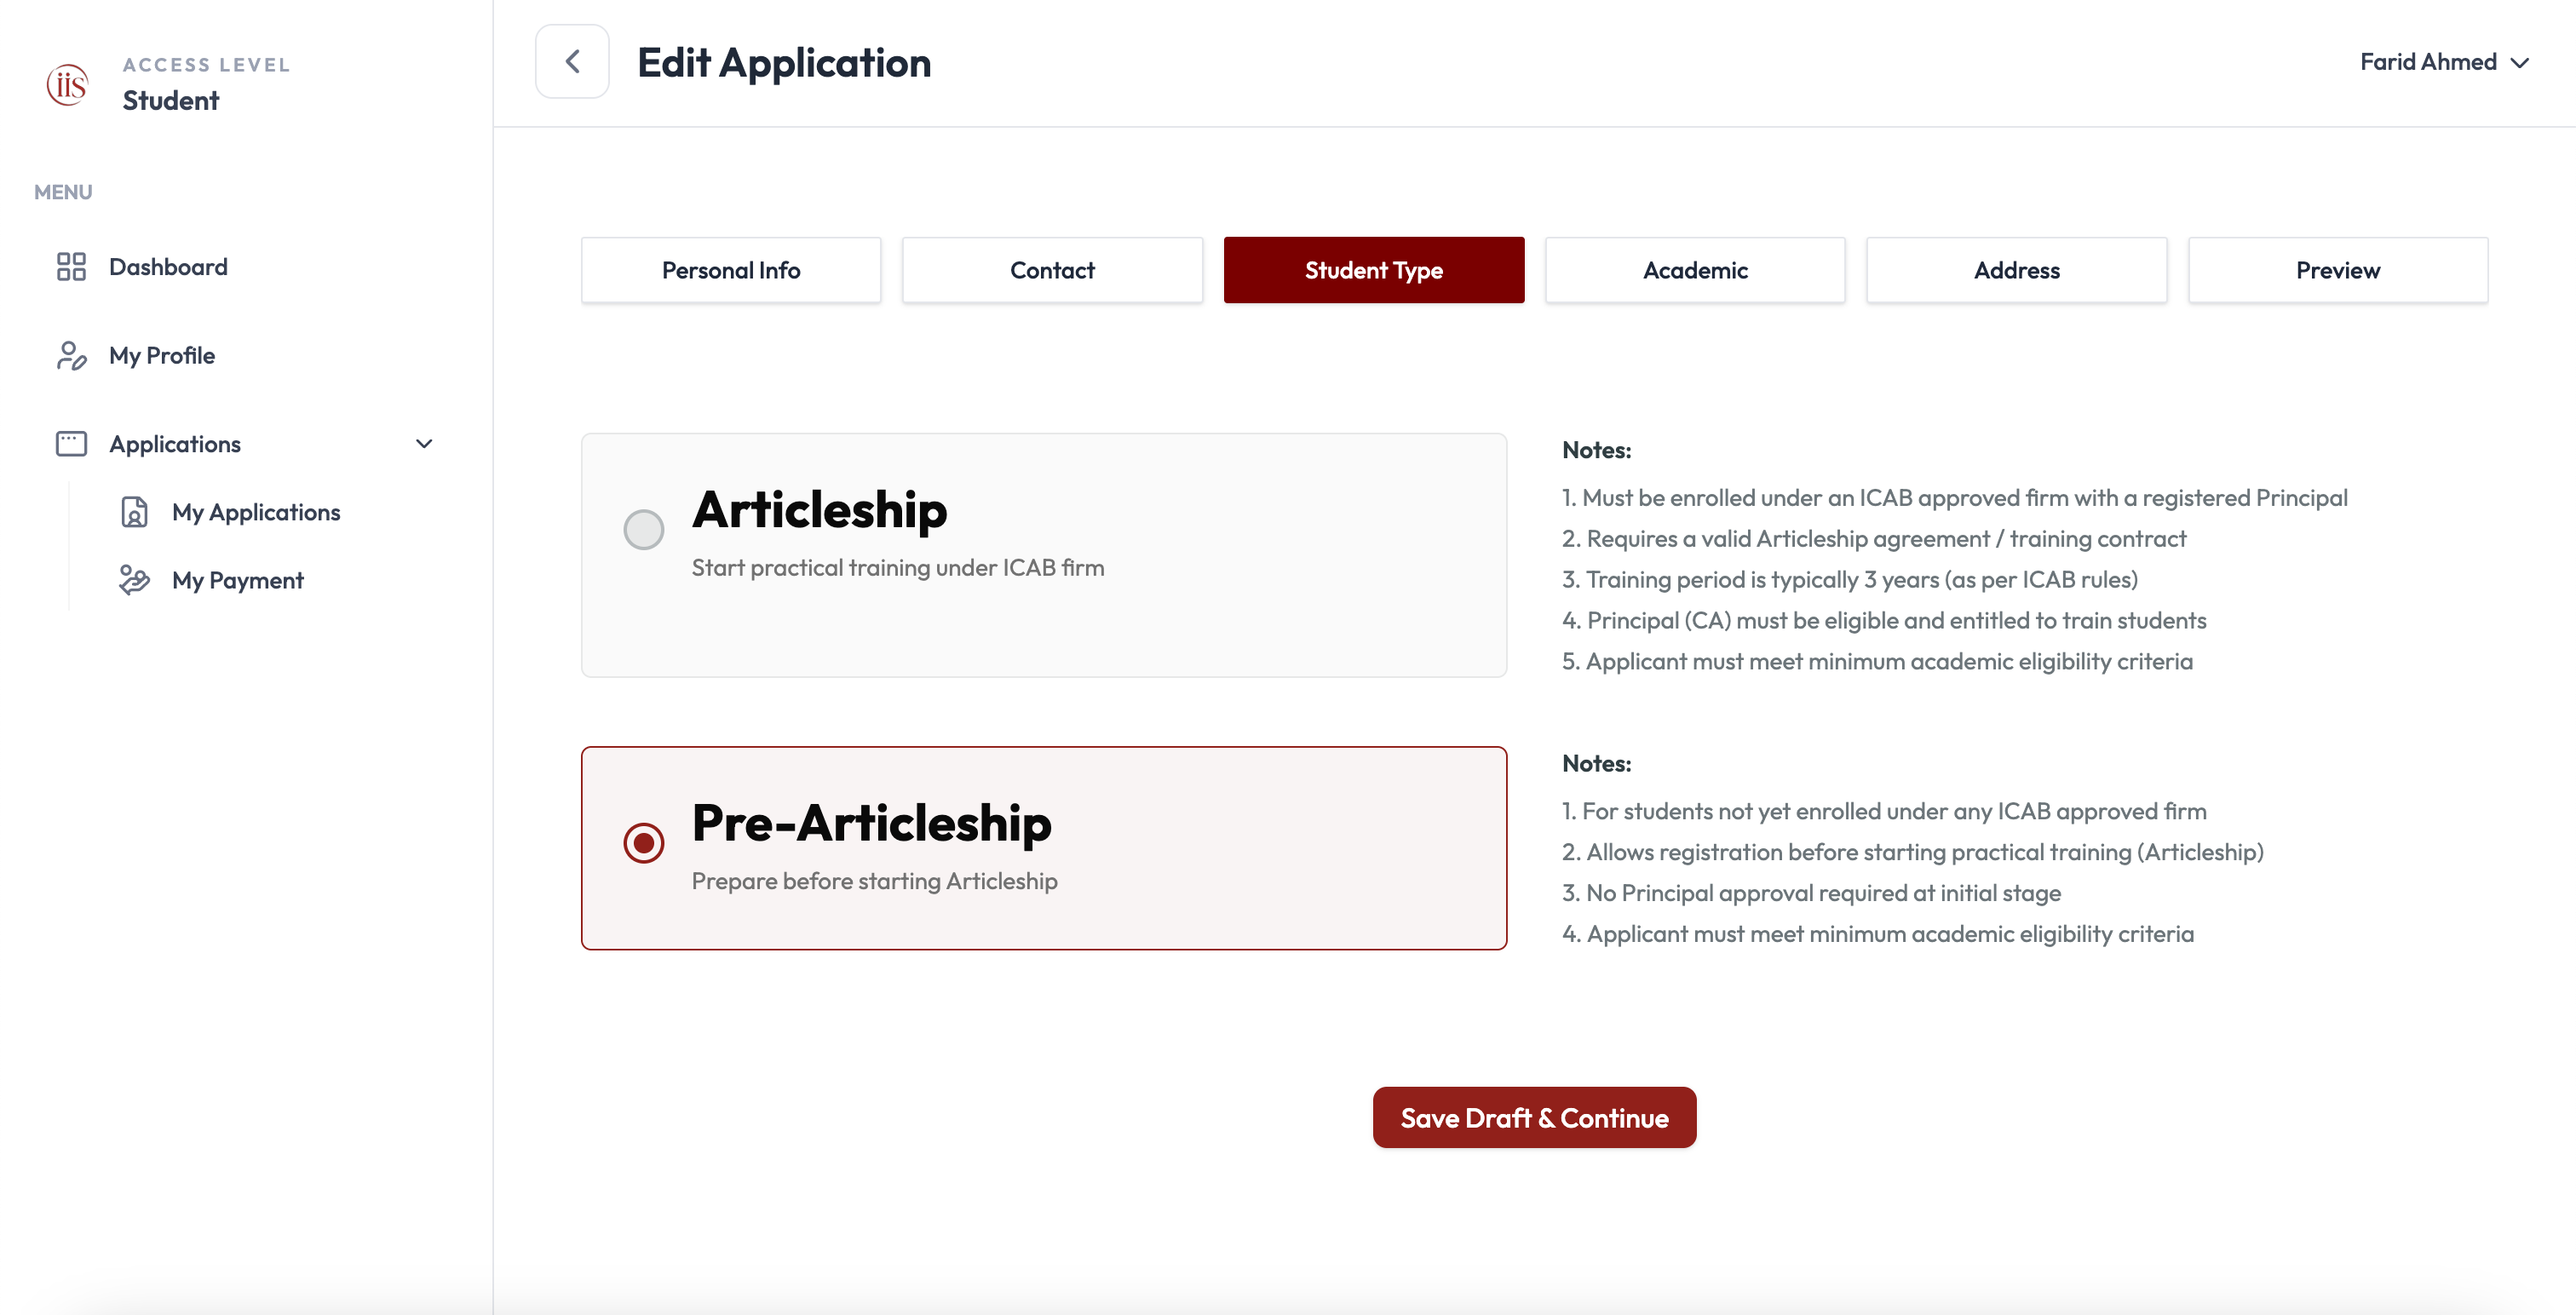
No extra fields appear — you don’t need a firm or Principal at this stage.
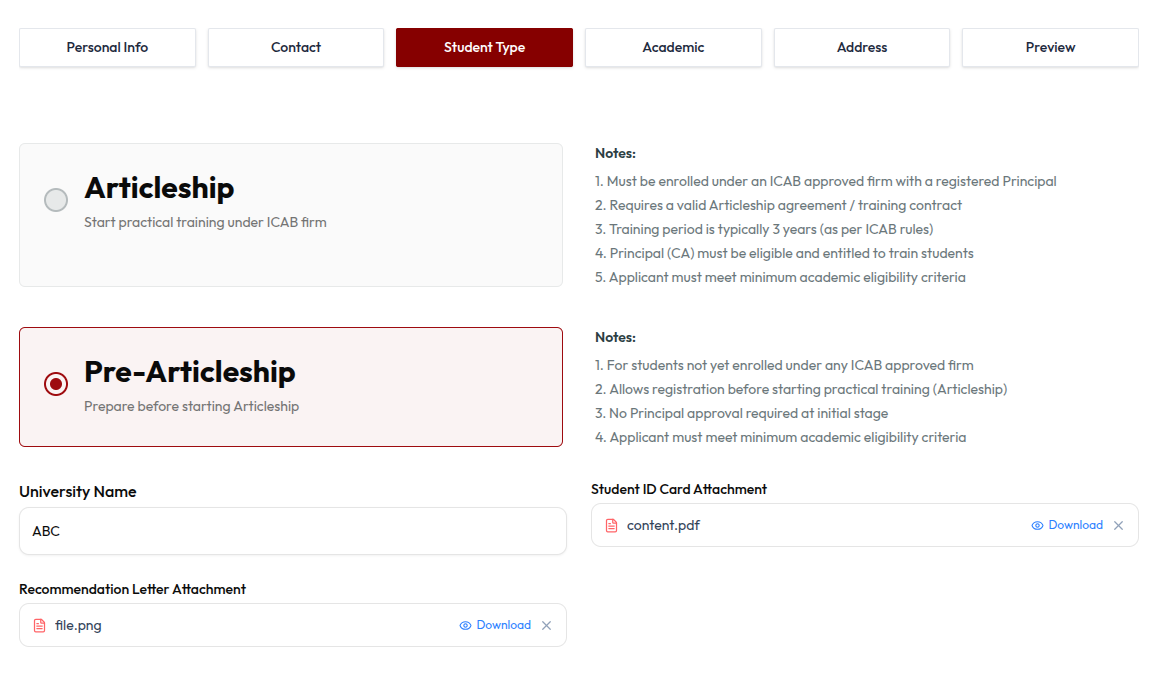
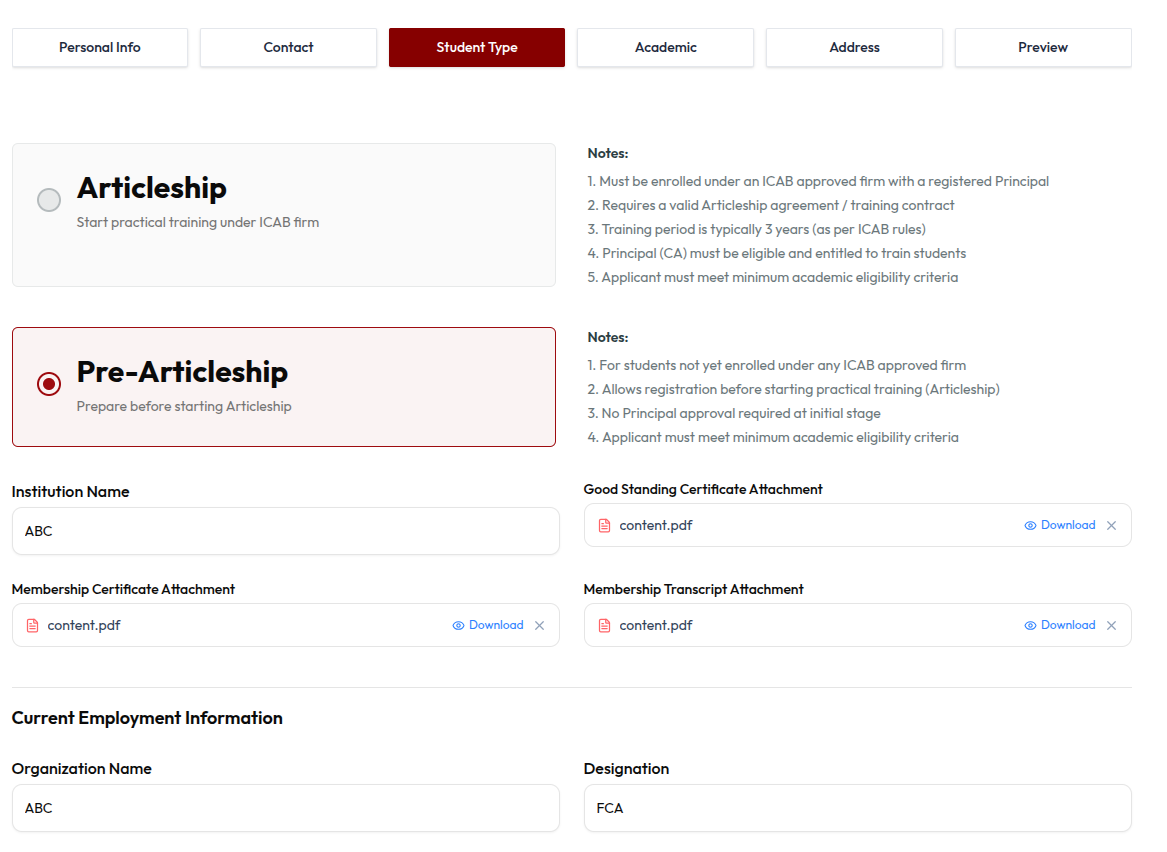
If you already have a firm and Principal lined up, choose Articleship. If you don’t yet, choose Pre-Articleship — you can move to Articleship later once you join a firm.
Select Save Draft & Continue to move to the Academic tab.
4. Academic
This tab records your academic qualifications, one at a time — for example, SSC, then HSC, then any degree.
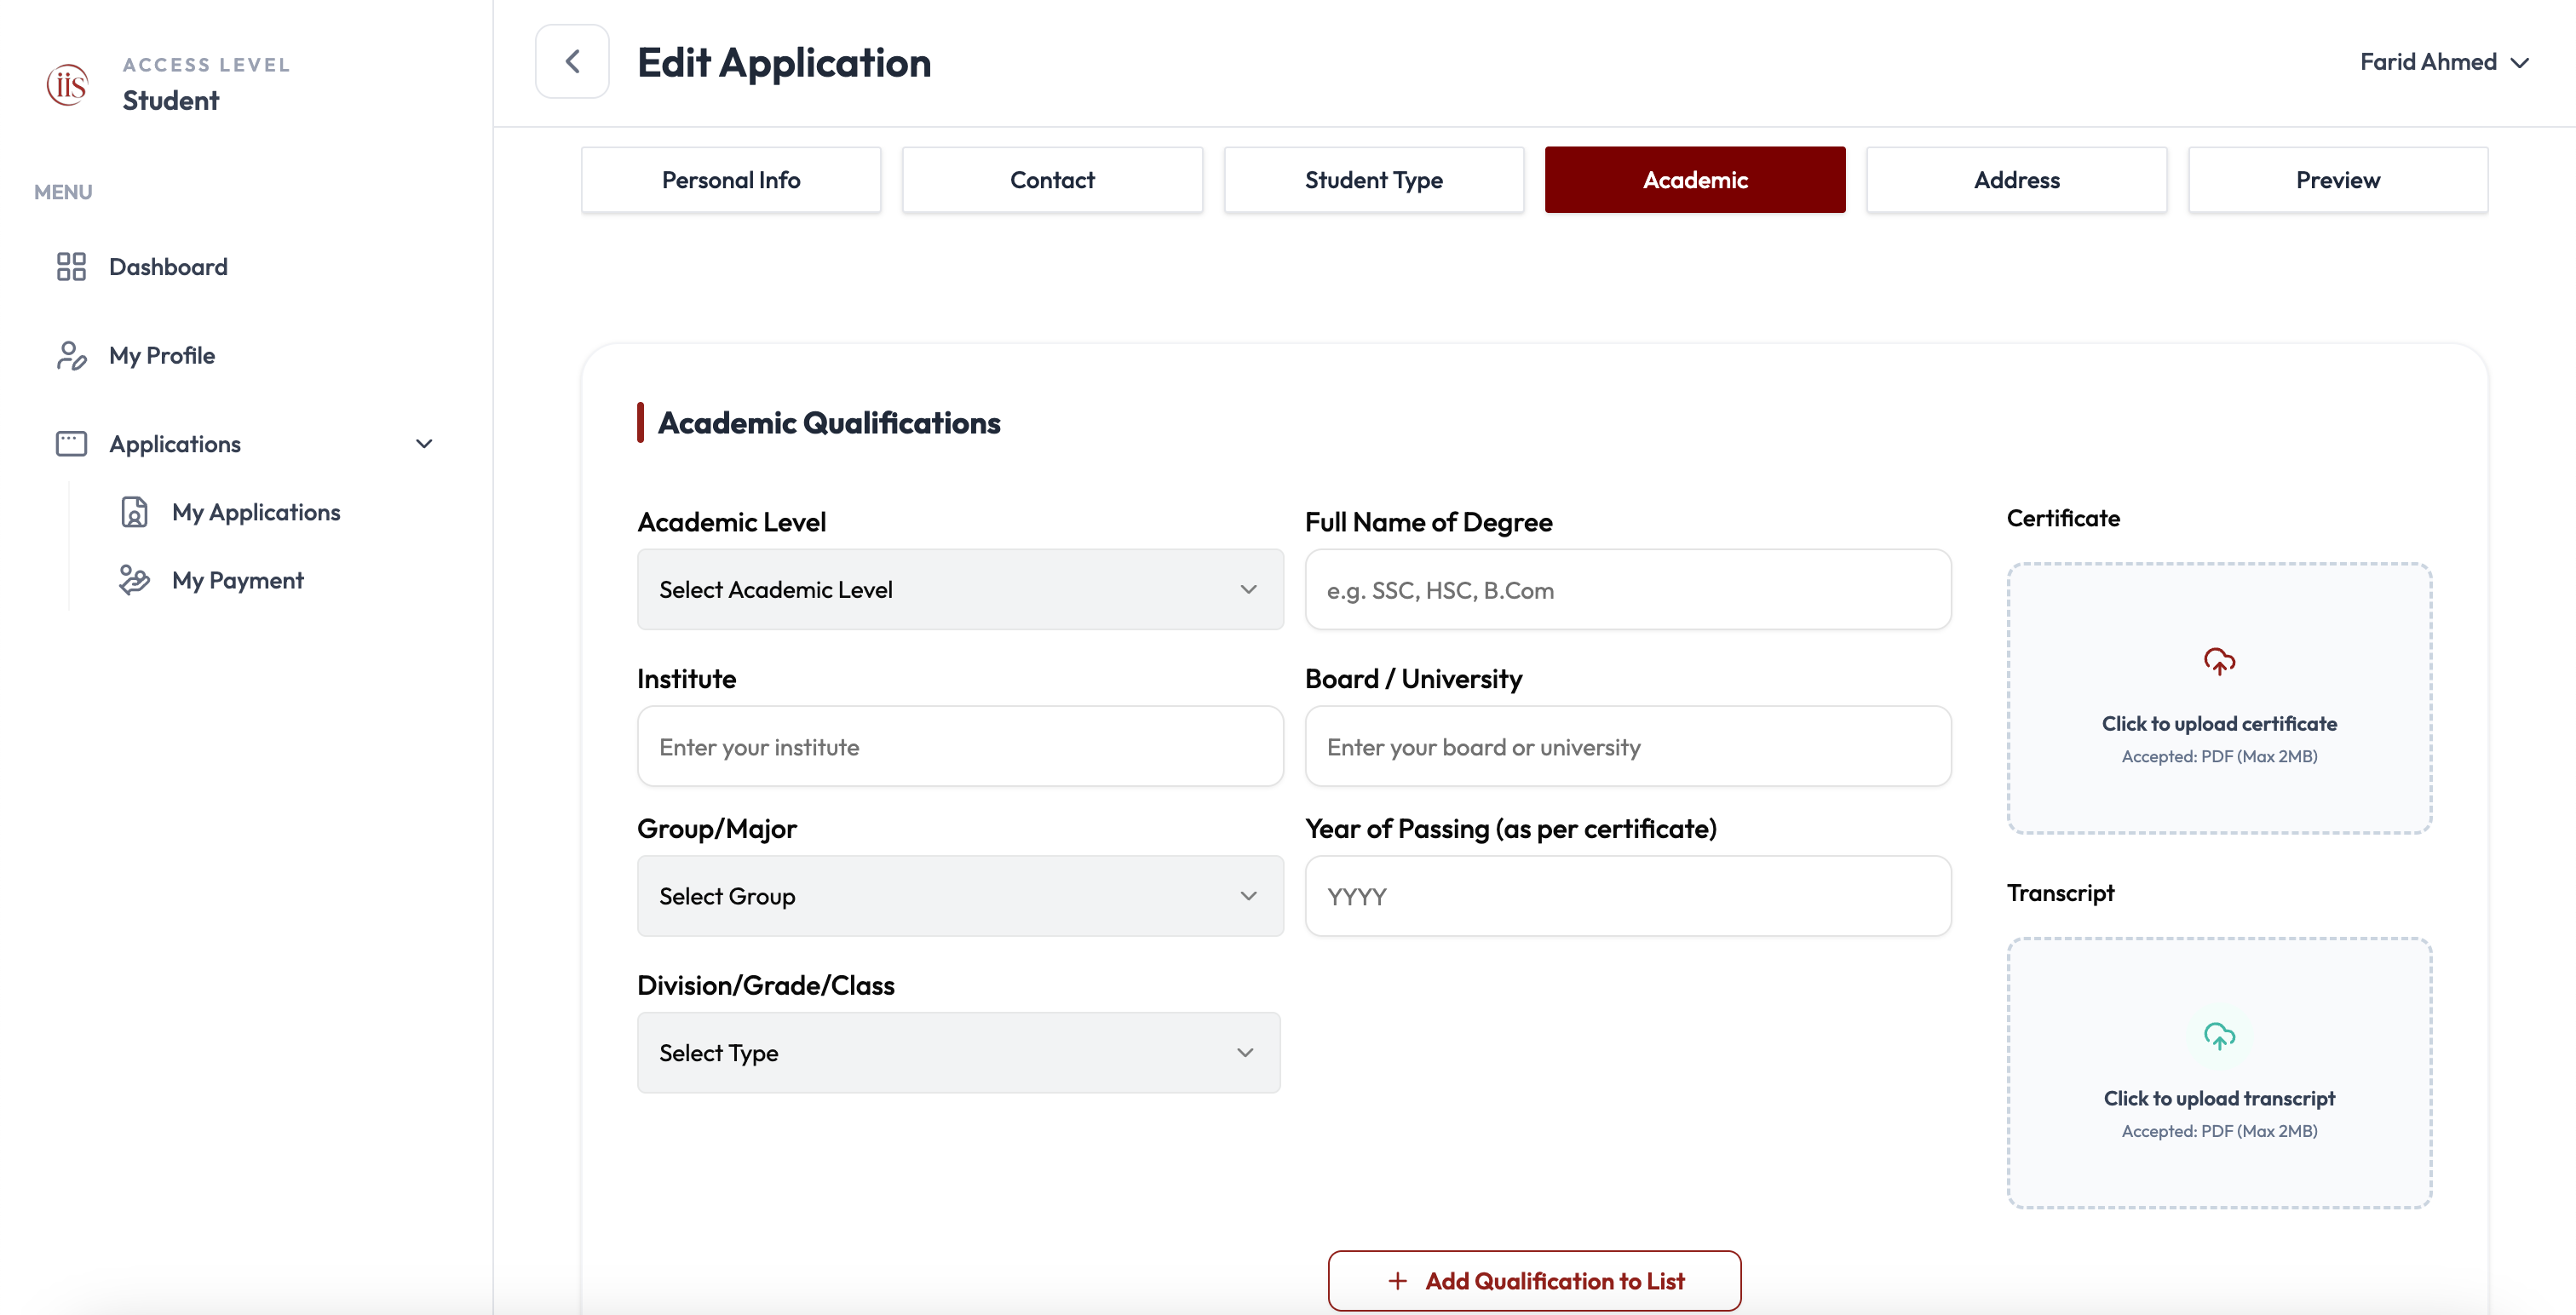
Select your Academic Level
Choose the level from the dropdown (for example, SSC, HSC, or Bachelor’s).
Fill in the degree details
Enter the Full Name of Degree (for example, SSC, HSC, B.Com), your Institute, and your Board / University.
Fill in Group/Major and result details
Choose your Group/Major, enter the Year of Passing as per your certificate, and choose your Division/Grade/Class.
Upload your Certificate and Transcript
Click to upload your Certificate and, if you have one, your Transcript. Both must be PDF, max 2 MB.
Select “Add Qualification to List”
This adds the qualification to your Academic Qualifications History table below.
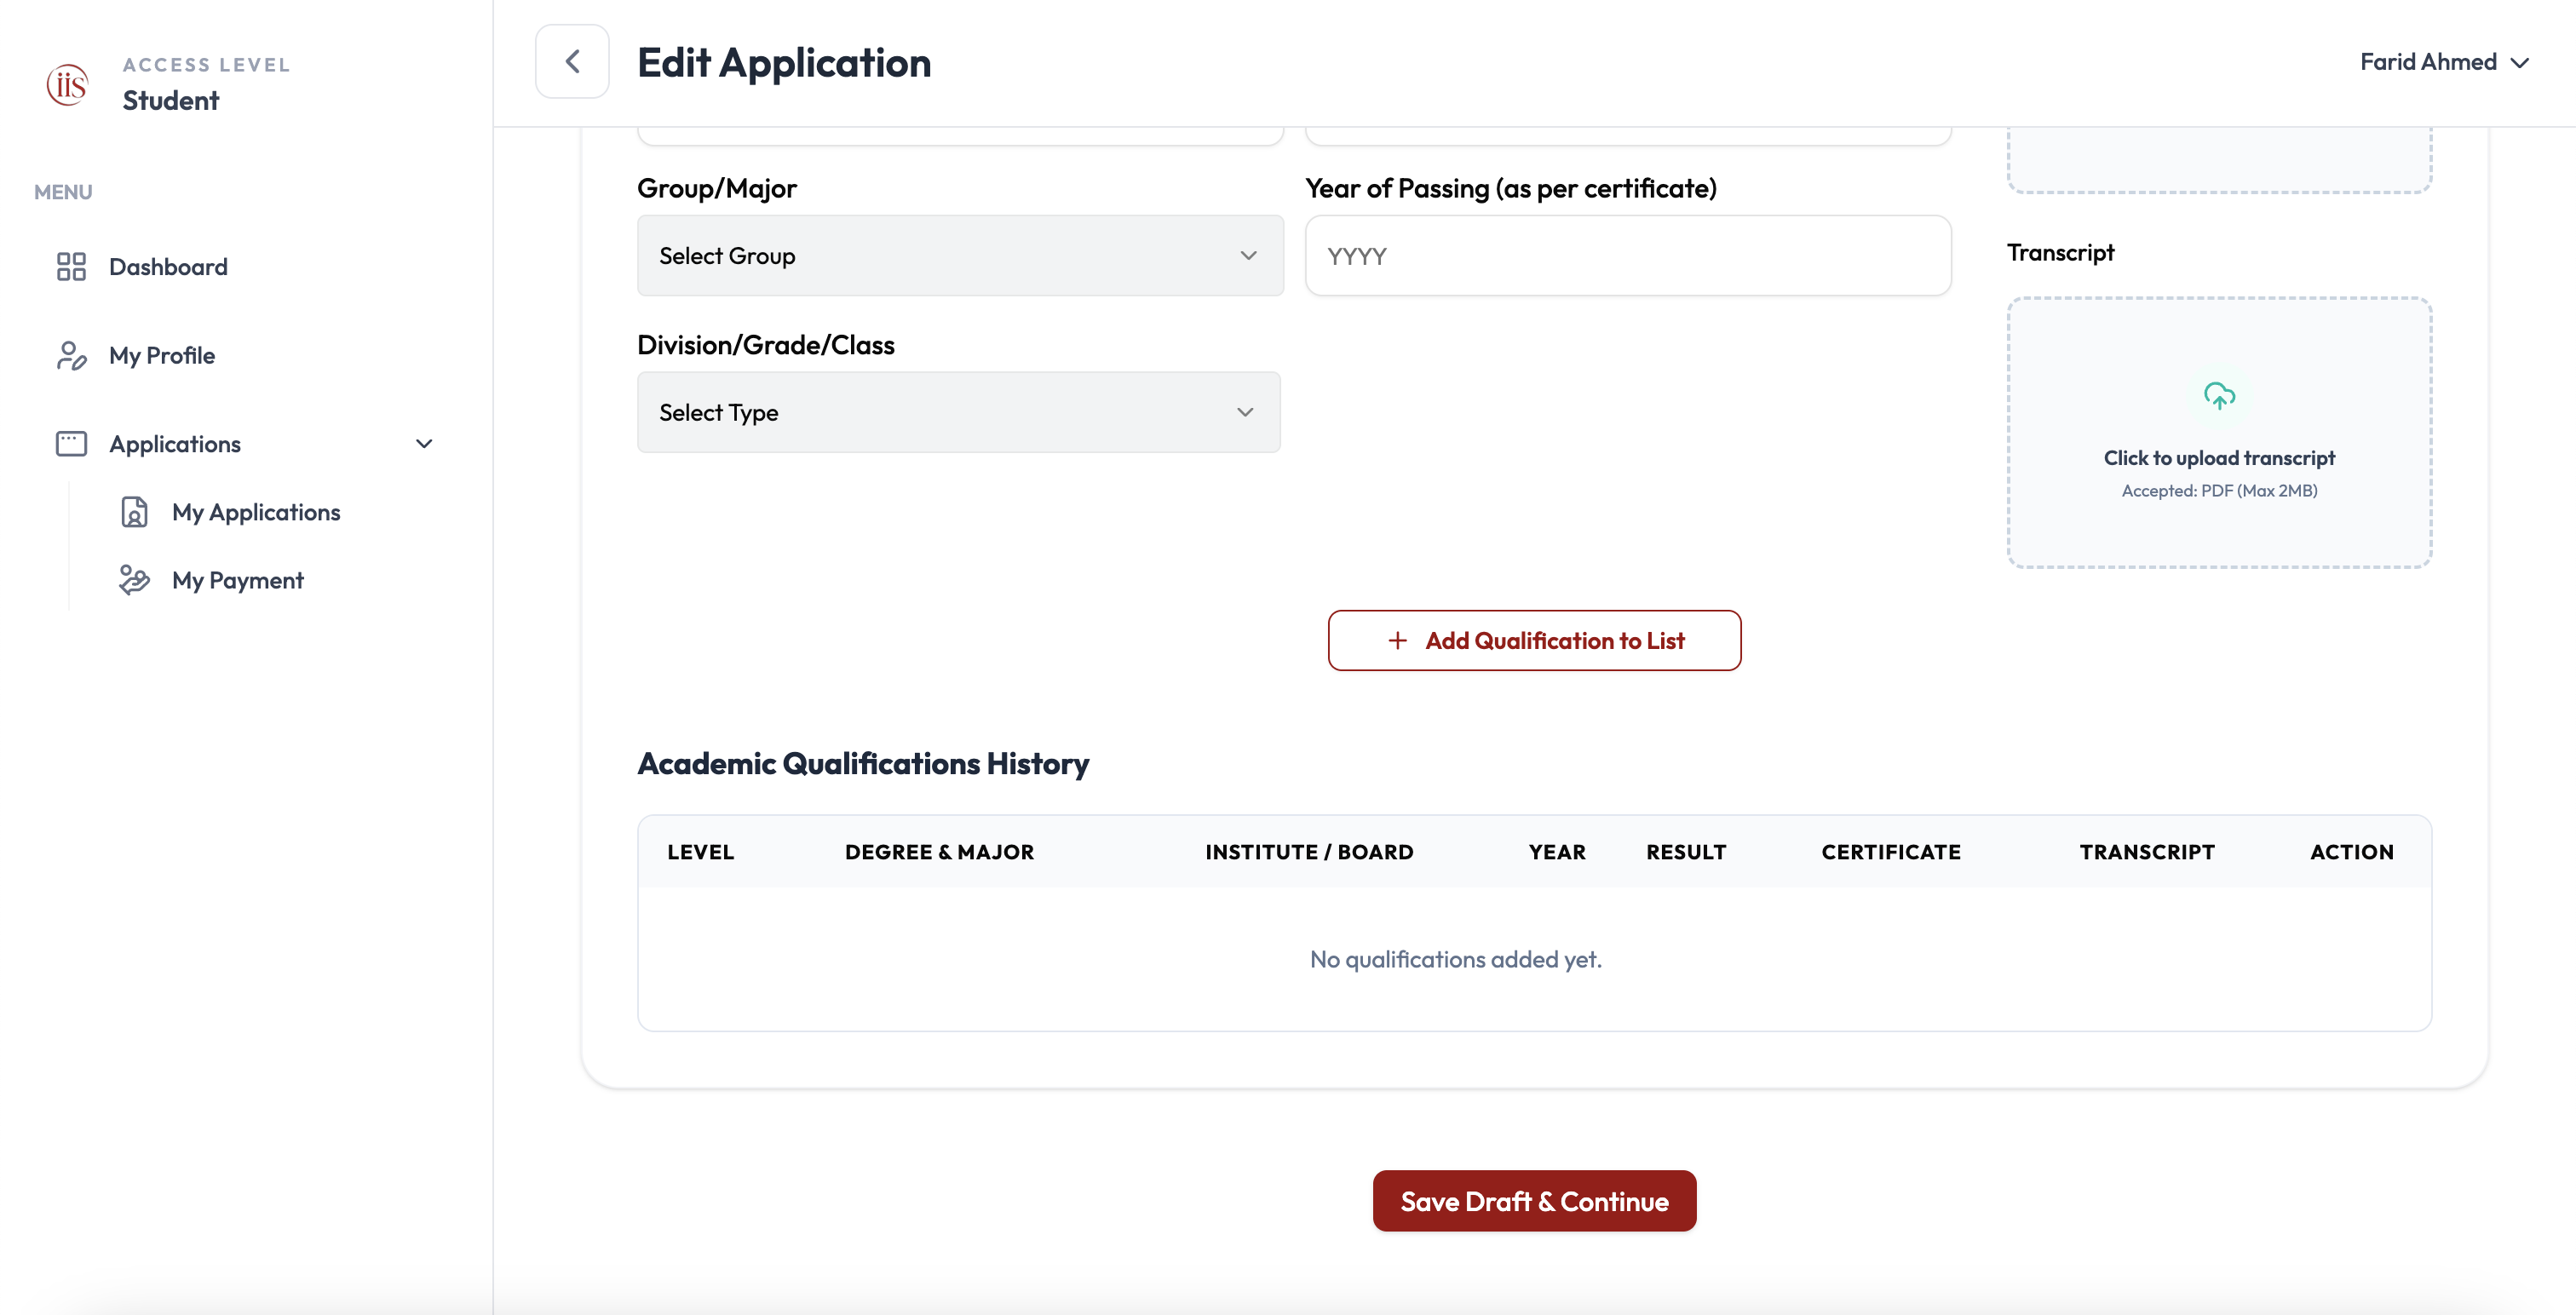
Repeat the steps above for each qualification you have (for example, SSC, then HSC, then a Bachelor’s degree) before selecting Save Draft & Continue.
5. Address
This tab records where you live permanently, and where ICAB should send official mail.
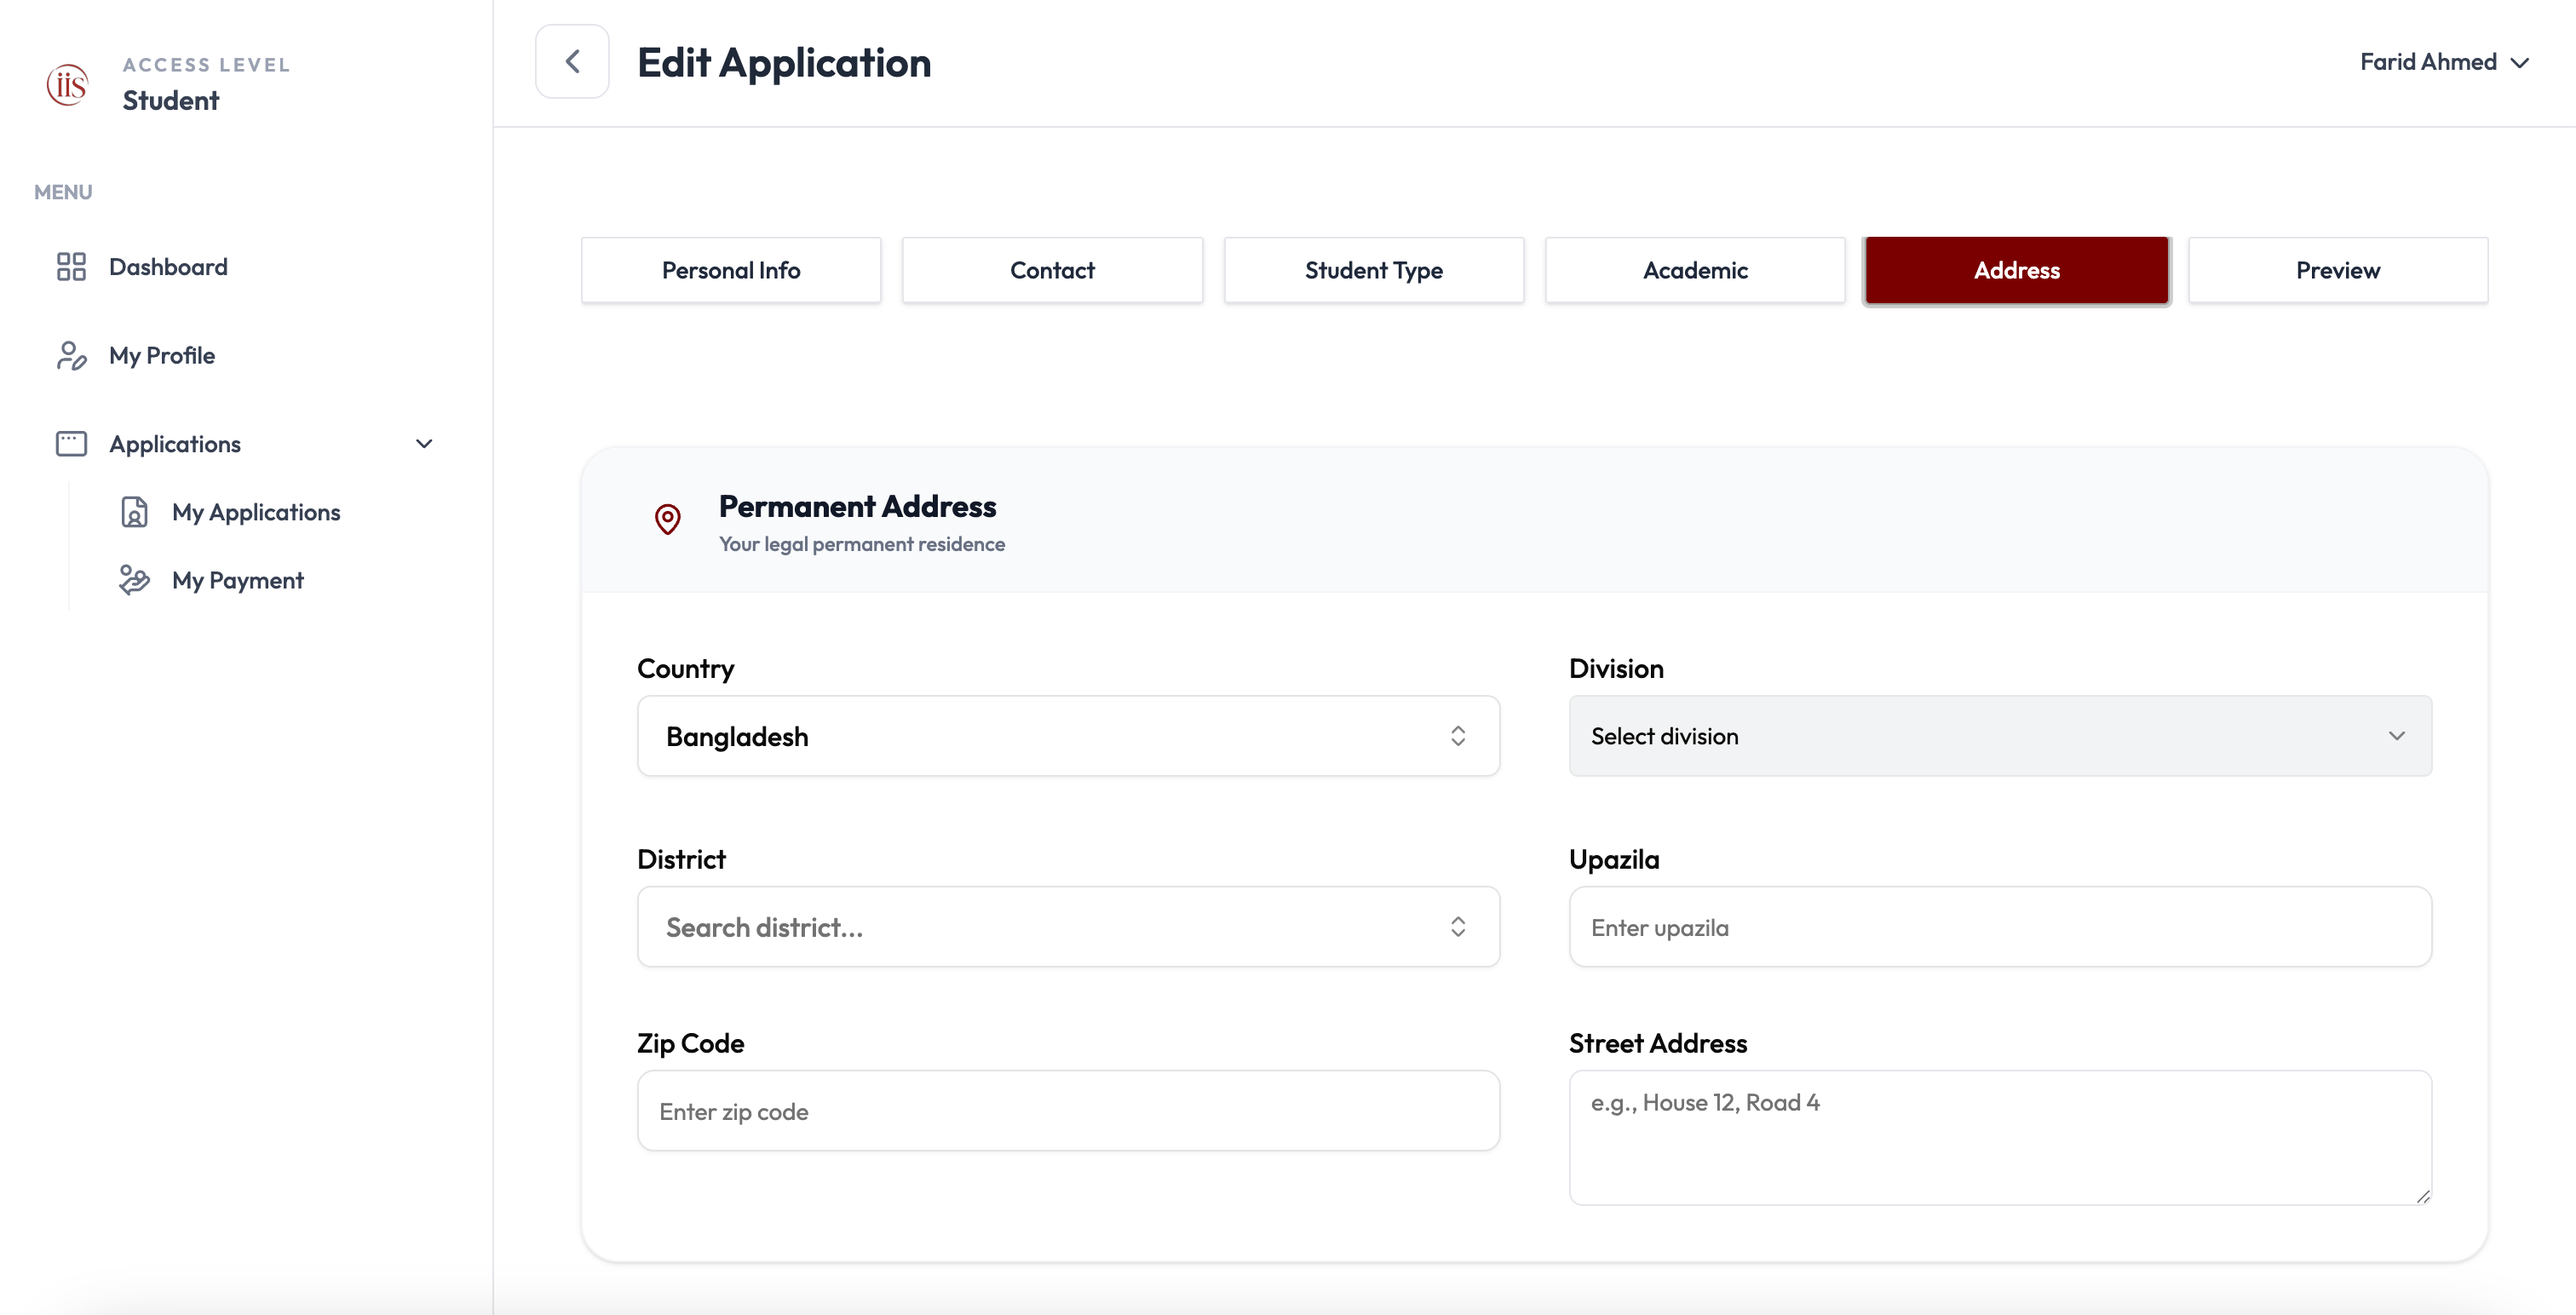
Fill in your Permanent Address
Fill in Country, Division, District, Upazila, Zip Code, and Street Address (for example, House 12, Road 4).
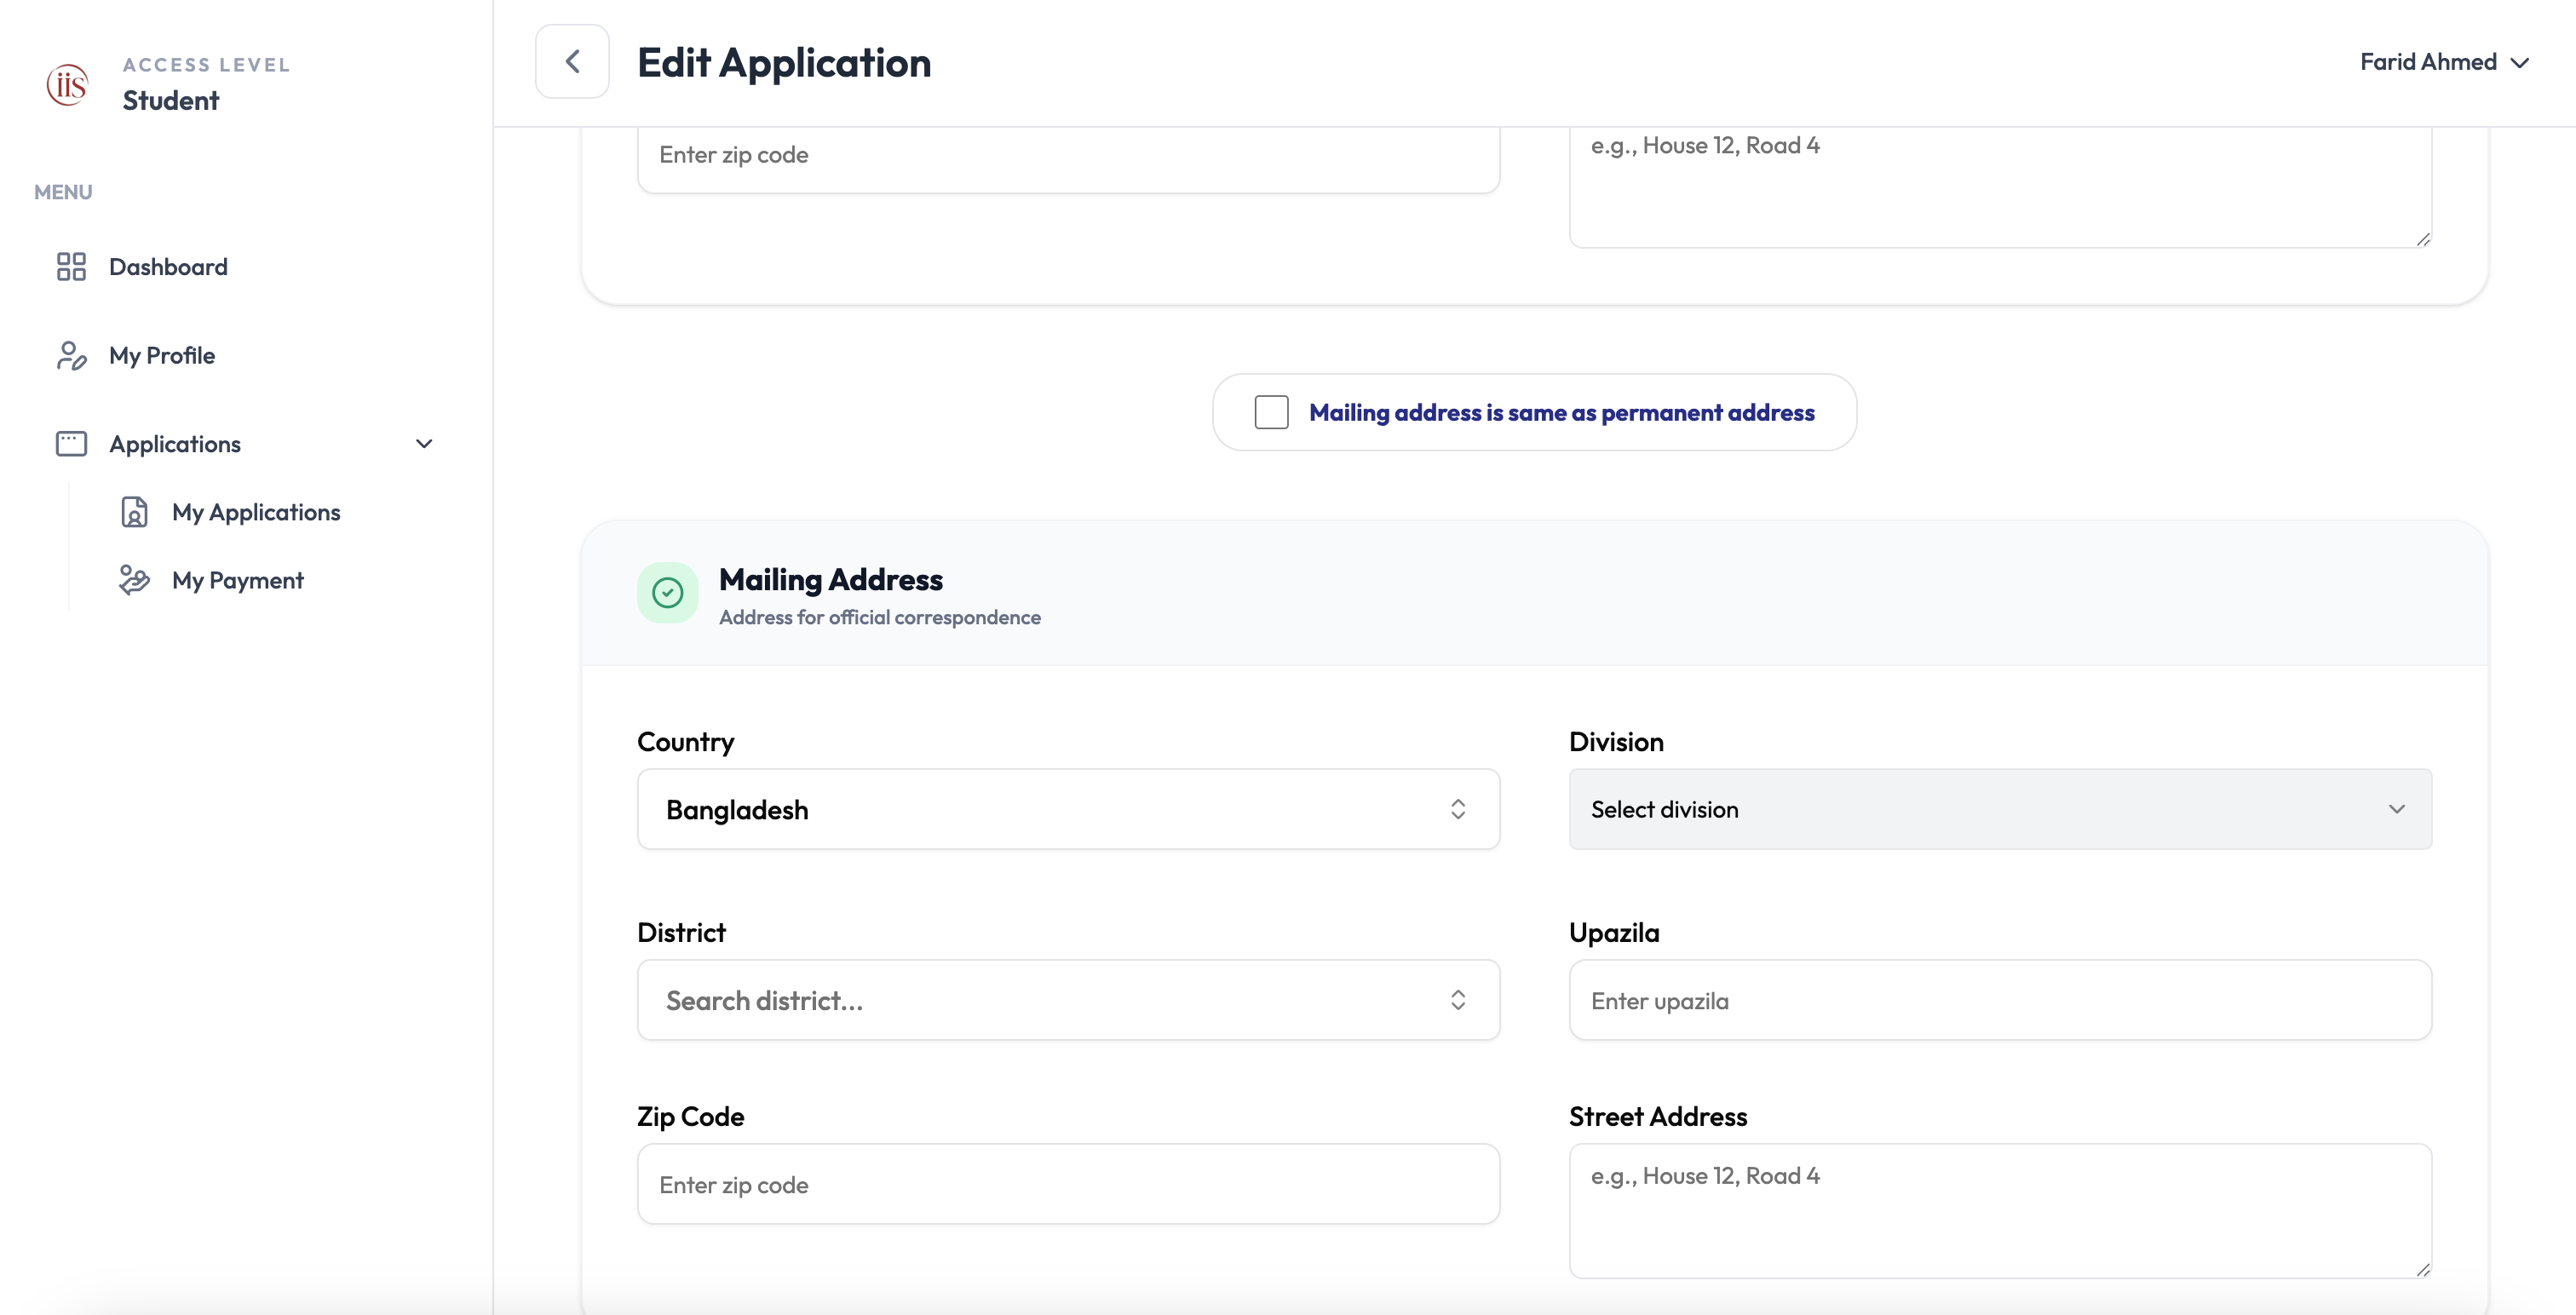
Same address, or different?
If your mailing address is the same as your permanent address, tick “Mailing address is same as permanent address” and skip to the next step. Otherwise, fill in the Mailing Address fields separately, the same way you did for Permanent Address.
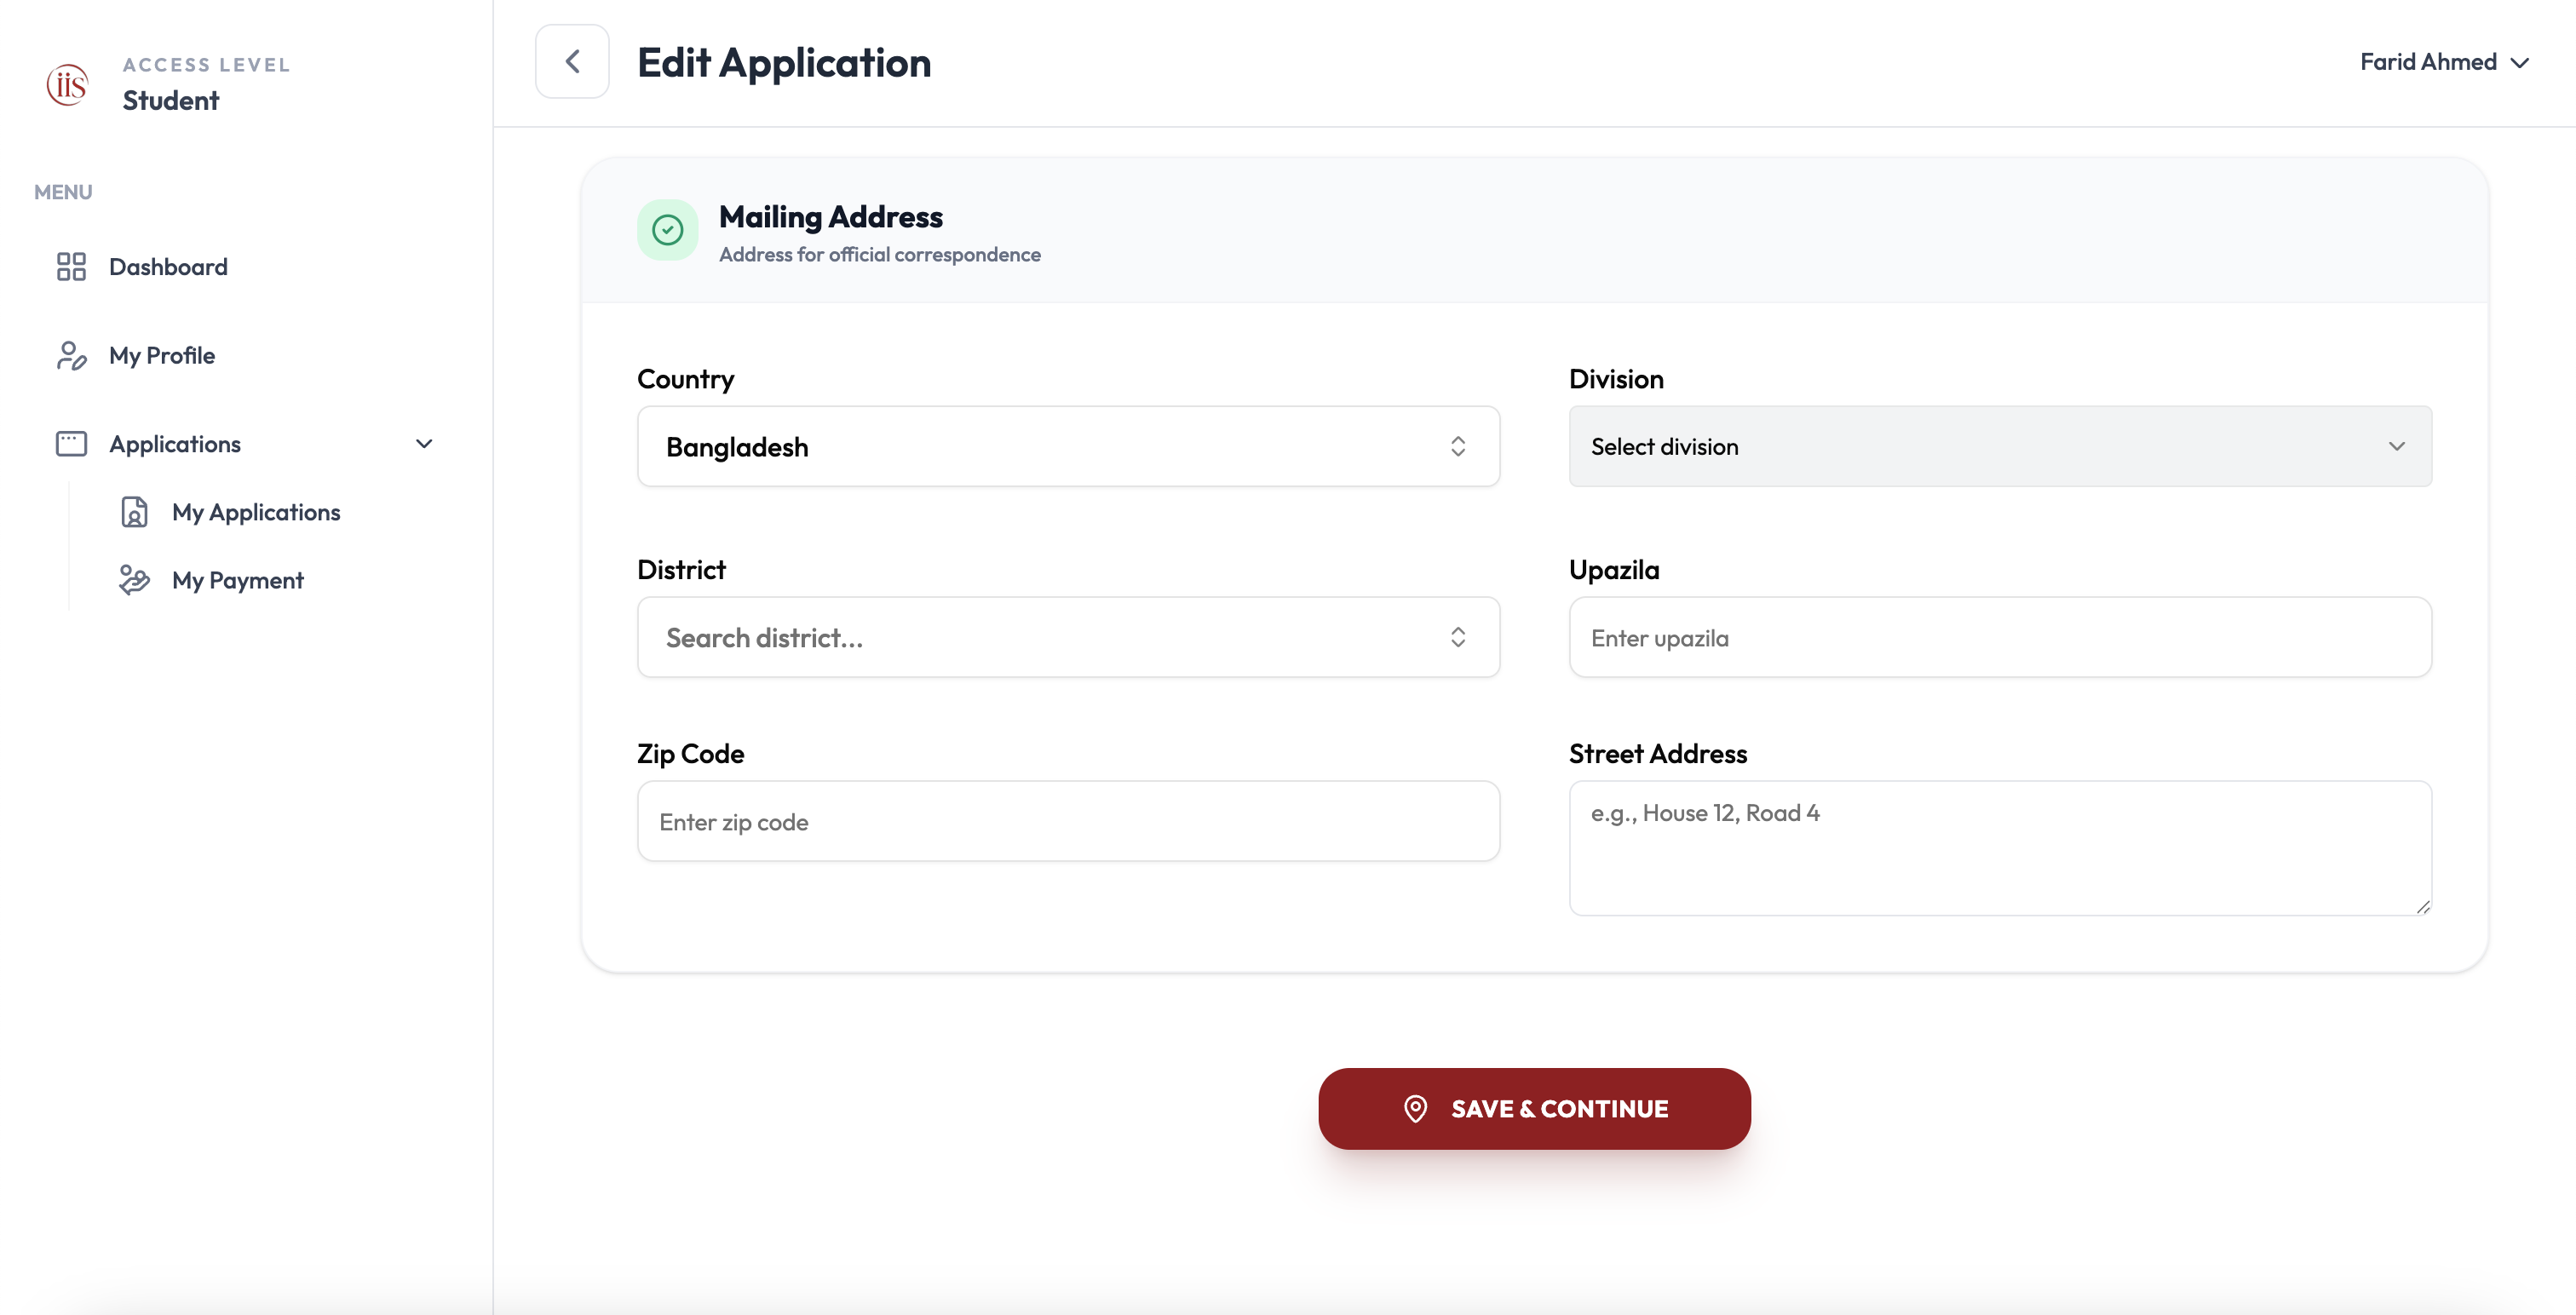
Select “Save & Continue”
This saves the Address tab and moves you to Preview, the final tab.
6. Preview
This is the last tab. It shows everything you’ve entered across all five previous tabs in one place, so you can check it before submitting.
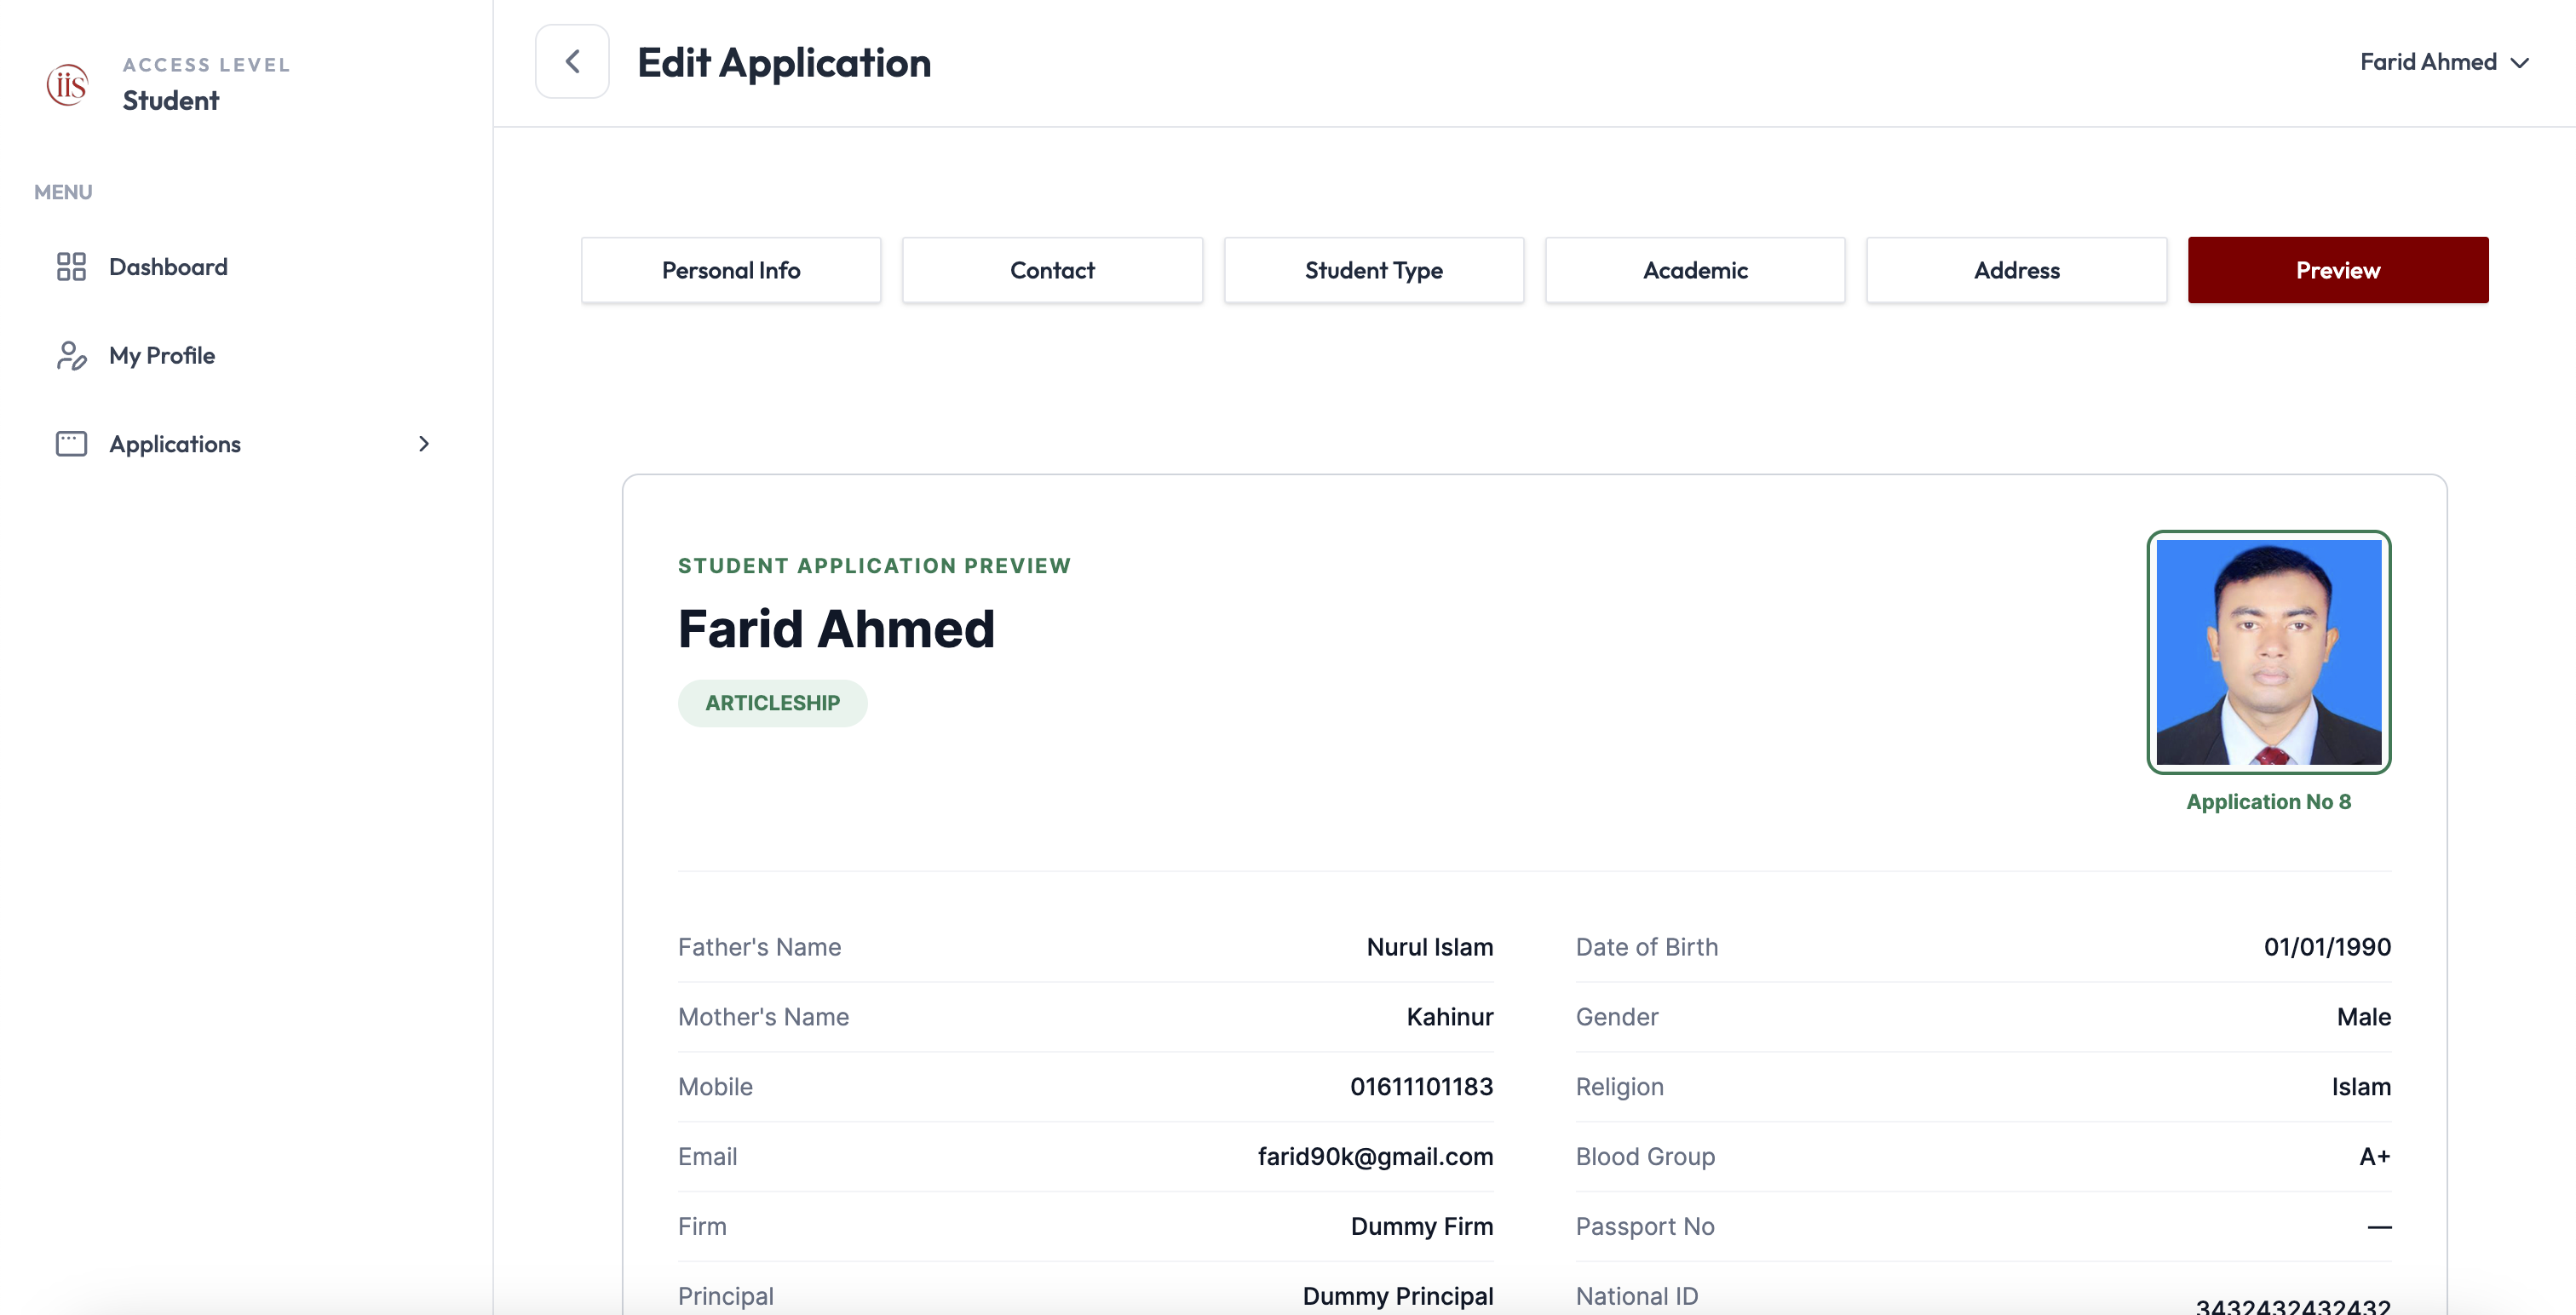
Check your photo and basic details
At the top, check your photo, name, student type badge, and application number. Below that, check your parents’ names, date of birth, contact details, and IDs.
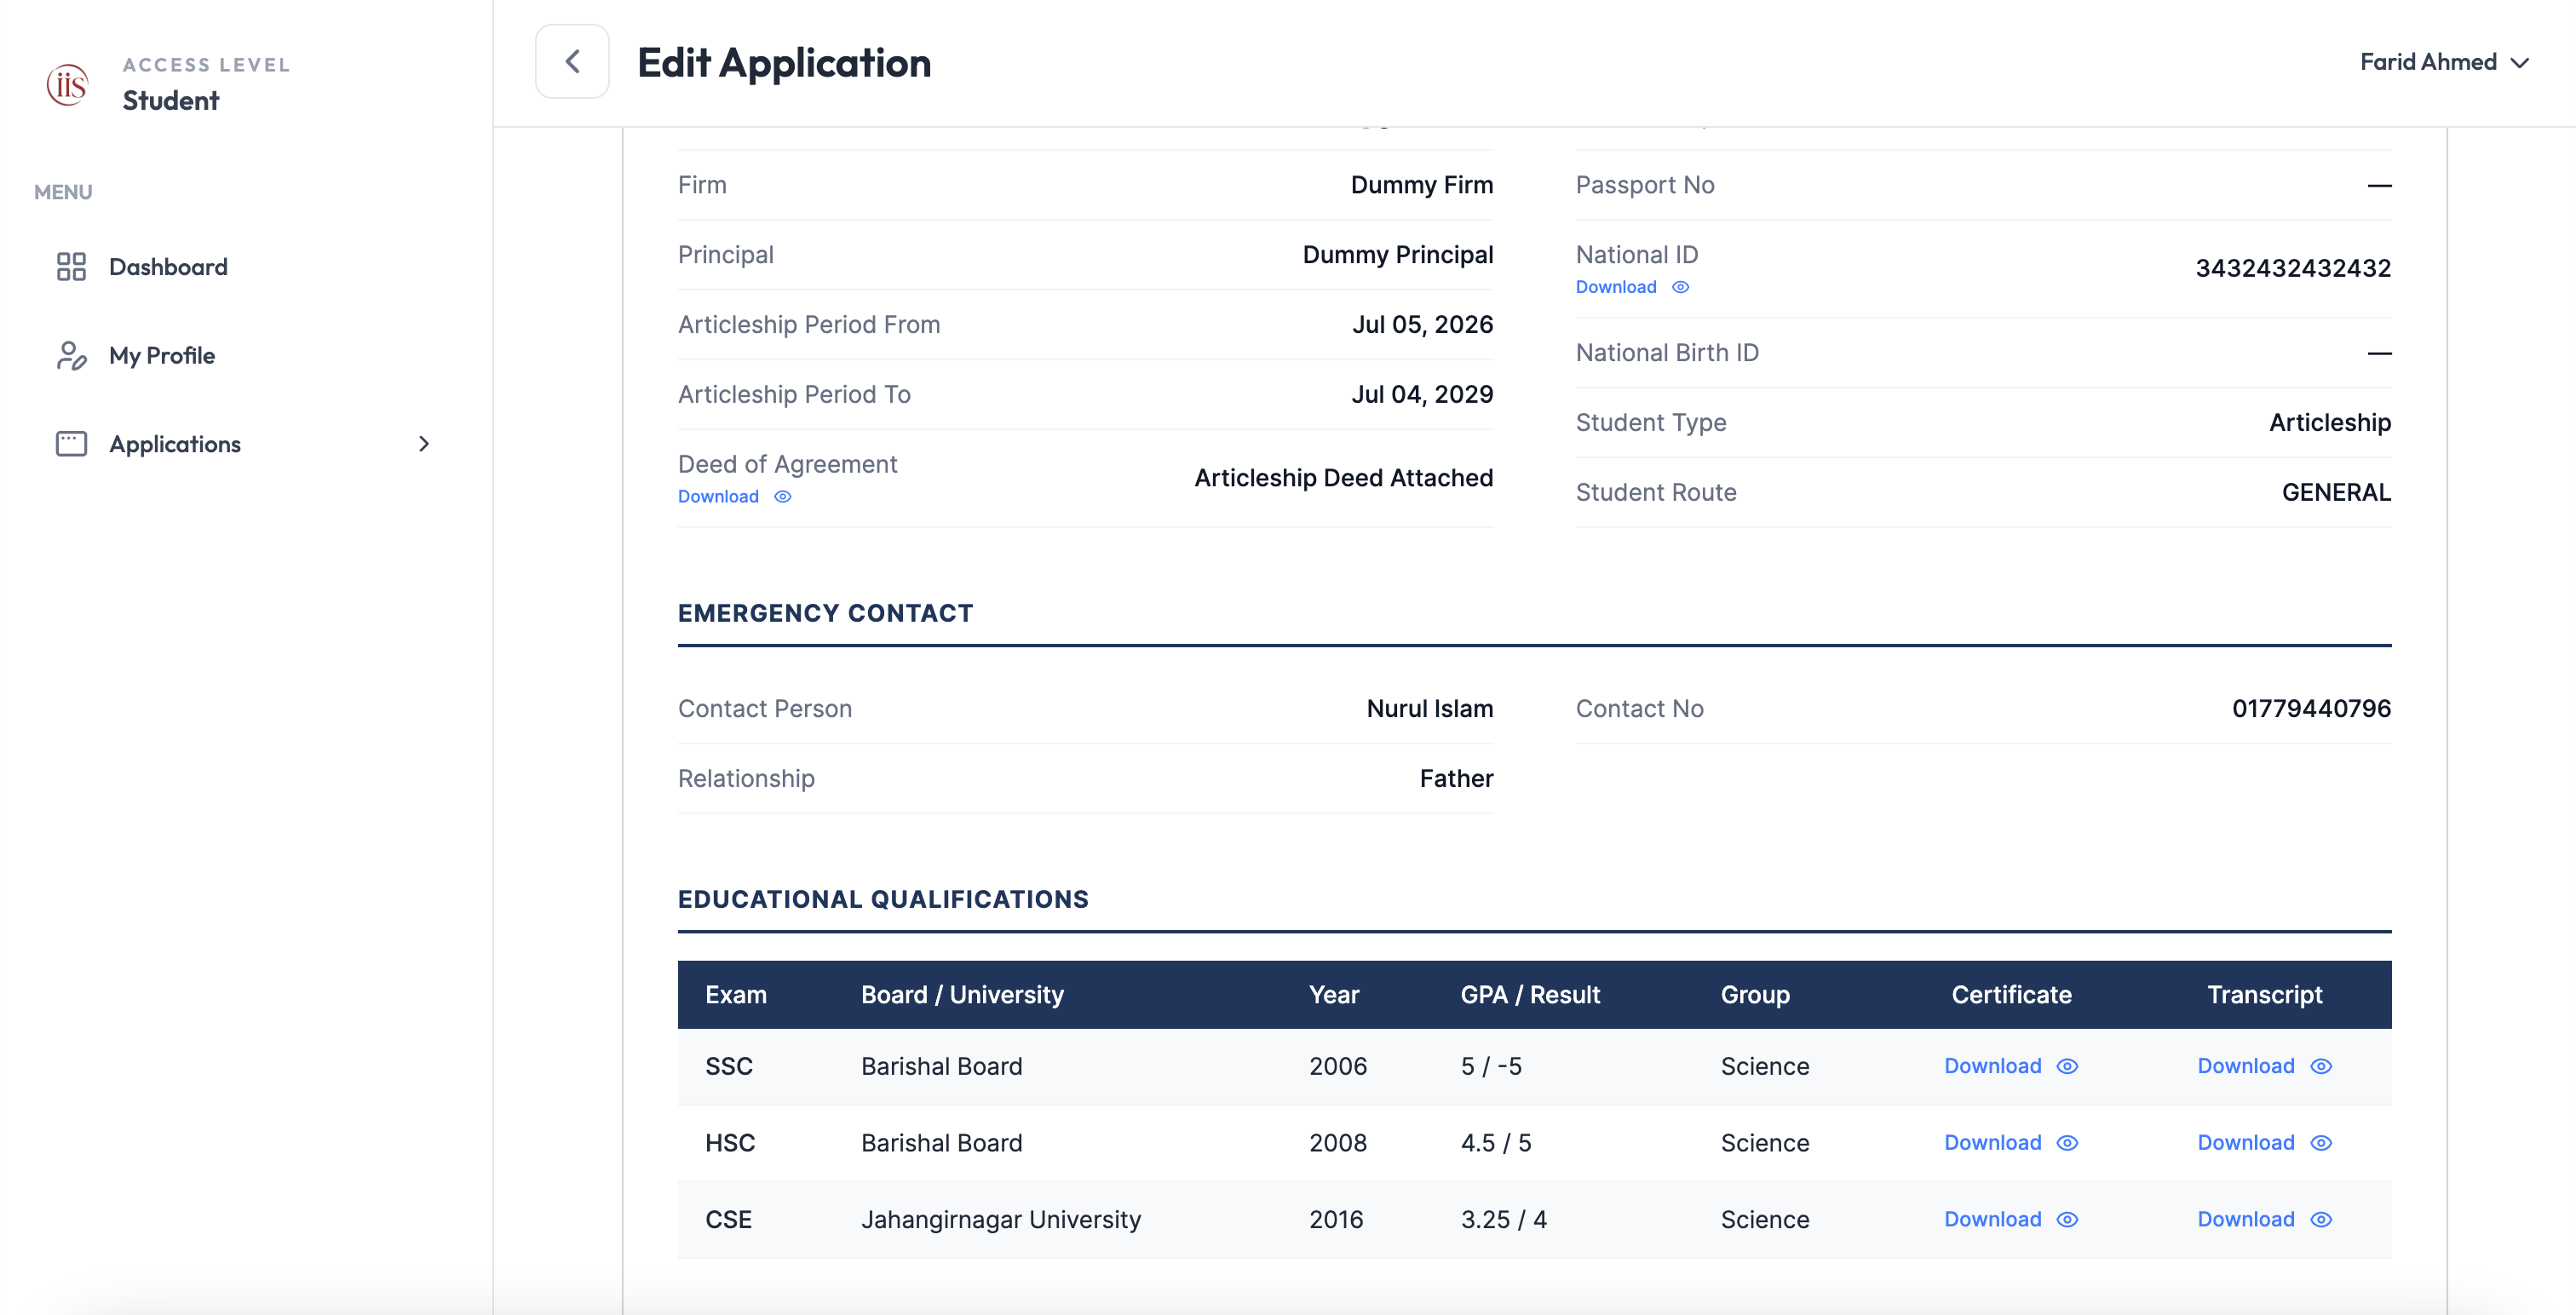
Check your Student Type details and Emergency Contact
If you selected Articleship, check the Firm, Principal, and Articleship Period dates. Then check your Emergency Contact details.
Check your Educational Qualifications
Check that every qualification you added (SSC, HSC, and so on) is listed correctly, with the right Certificate and Transcript attached.
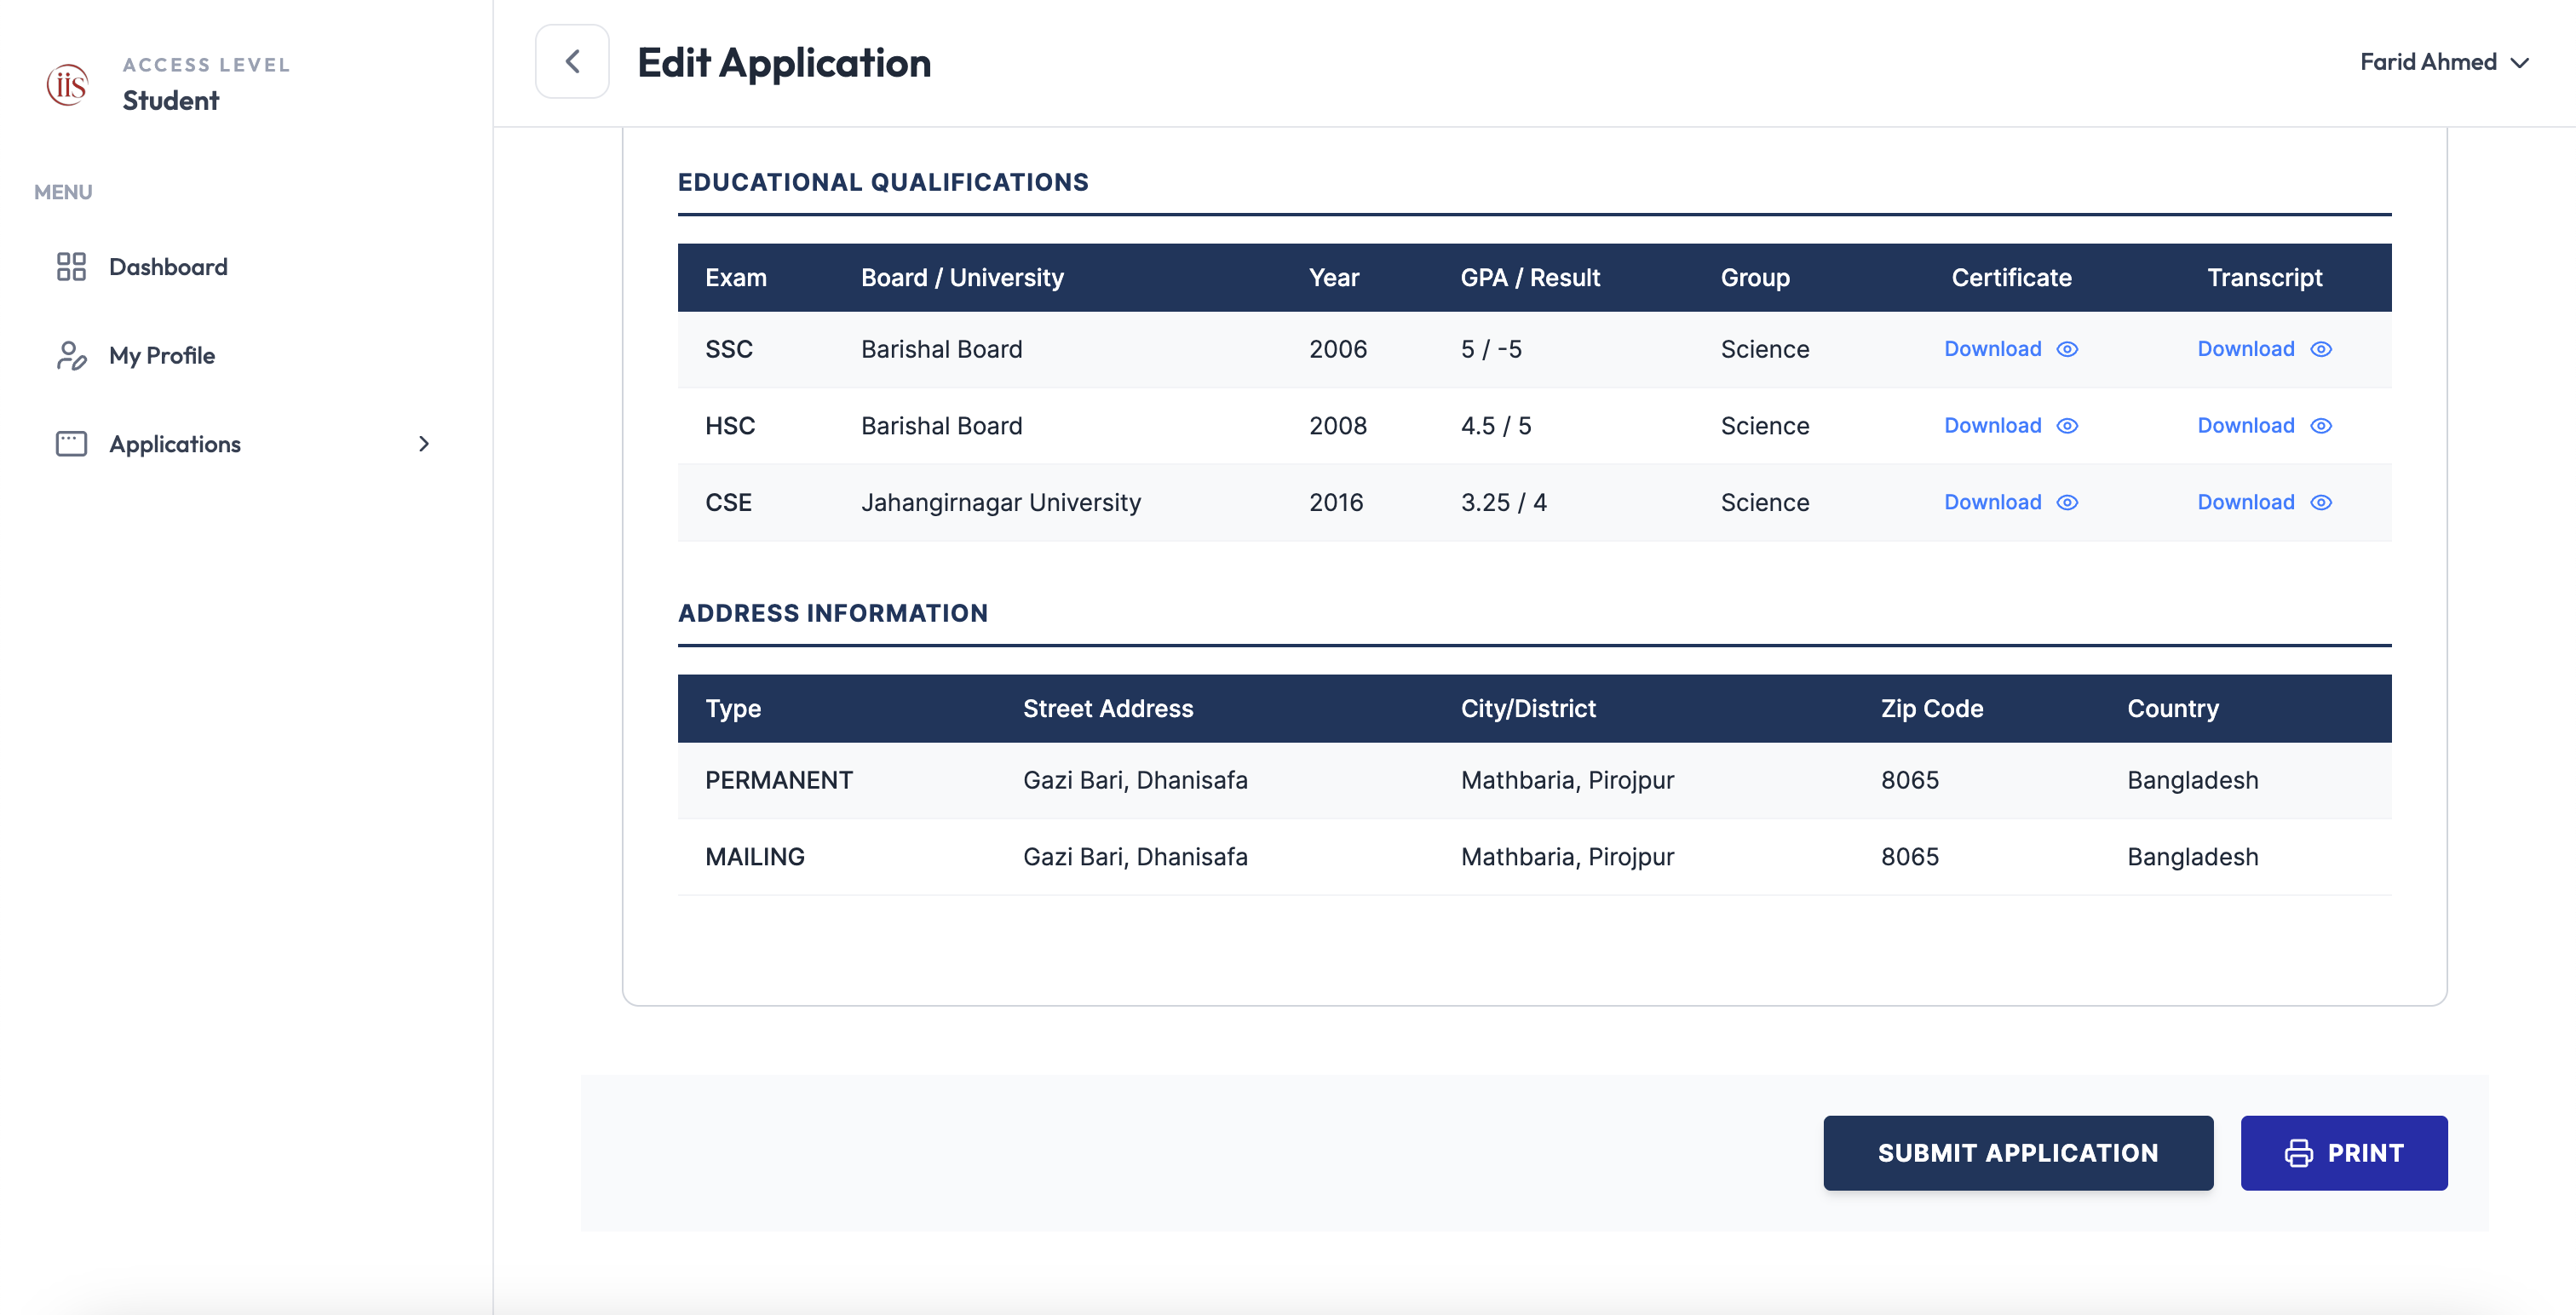
Check your Address Information
Check both your Permanent and Mailing addresses at the bottom of the preview.
Select “Submit Application”
Once everything looks correct, select Submit Application. You can also select Print to keep a copy for your records.
Once submitted, your application moves to Pending Approval status and enters the queue described in Student Approval Workflow.
Once submitted, some fields may be locked and require an approval workflow to change.
After submitting
Track the application’s progress from Student Profile, or follow up with the reviewer described in Student Approval Workflow.