Payment Status
Payment Status is the simple way to answer one question: did my payment go through? Here’s everything in plain steps.
The payment journey in 3 steps
1. Pay
You pay for an application or registration through the gateway when you submit it.
2. Confirm
The gateway confirms the payment back to IIS — this usually happens instantly.
3. Check
You can look back at any time to see whether a transaction is Paid or Cancelled.
You don’t request a payment status check — every transaction you make automatically appears in your payment history, updated in real time.
Step by step: checking a payment
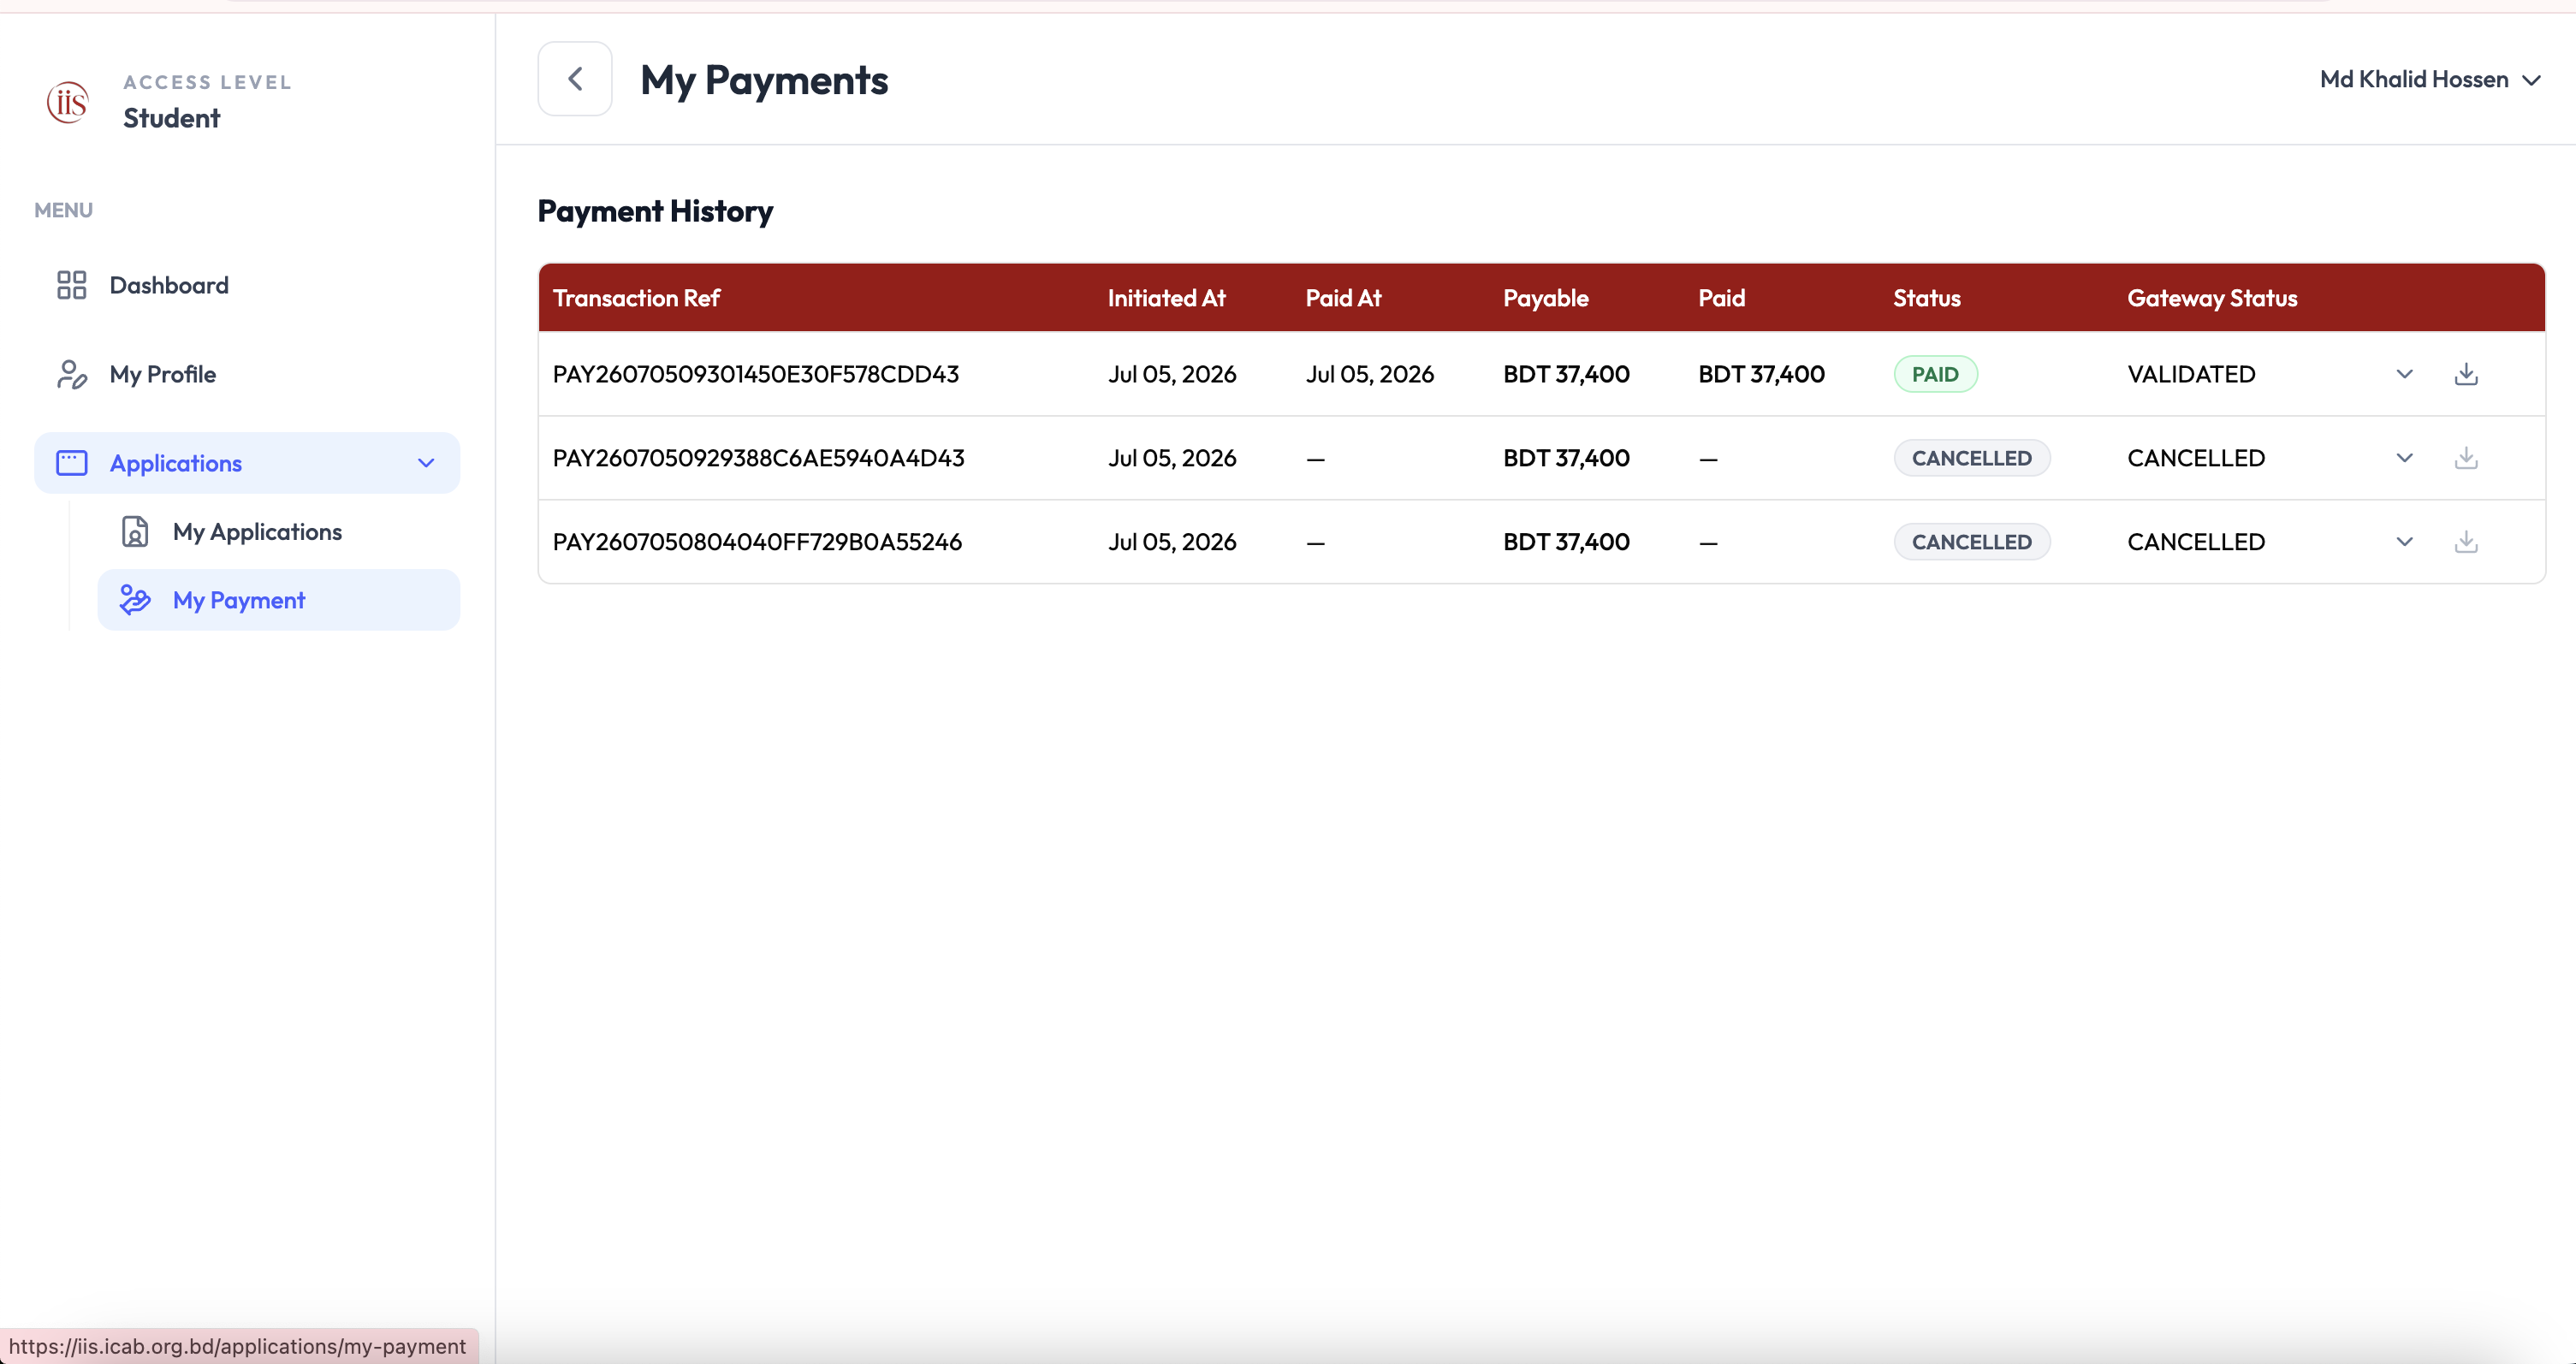
Open My Payment
In the sidebar, select Applications to expand it, then select My Payment. Full column-by-column detail lives on the Student Payment page.
Find the transaction
Look down the Transaction Ref column, or match it by the Initiated At date, to find the payment you’re checking.
Read the Status column
The Status and Gateway Status columns tell you the outcome (see below).
What the two outcomes mean
- Paid — the payment succeeded and was validated by the gateway. Paid At and Paid amount are filled in. Nothing more to do.
- Cancelled — the payment did not go through (cancelled or failed at the gateway). Paid At and Paid stay blank (—). Go back to the related application and pay again — a new transaction reference will be created.
If you paid but don’t see it in My Payment after a few minutes, don’t pay again straight away — refresh the page first, then contact support with the bank/gateway reference if it’s still missing.