Getting Started
This guide explains how to sign in to the ICAB Information System (IIS) and find your way around the dashboard before you start any of the workflows covered elsewhere in this manual.
Who uses IIS
IIS is used by several kinds of users, each of whom sees a different menu after signing in:
- Students — registration, applications, certificates, and their own profile.
- Principals / Firms — managing articled students registered under their firm.
- ACA Members — membership records and related applications.
- Back-office staff / Admins — approvals, payment reconciliation, and record maintenance.
Your sidebar is generated from your account’s assigned role and permissions, so it will not look identical to a colleague’s in a different role.
Signing in
The IIS portal greets you with “Start your ICAB CA journey” and two paths: create a new student account, or log in if you’re already registered. New students should see Student Registration for account creation and OTP verification. This section is the login guide for everyone — students, members, firm’s representatives, and ICAB back-office staff.
Select Login
On the IIS portal landing page, select the Login button in the top-right corner.
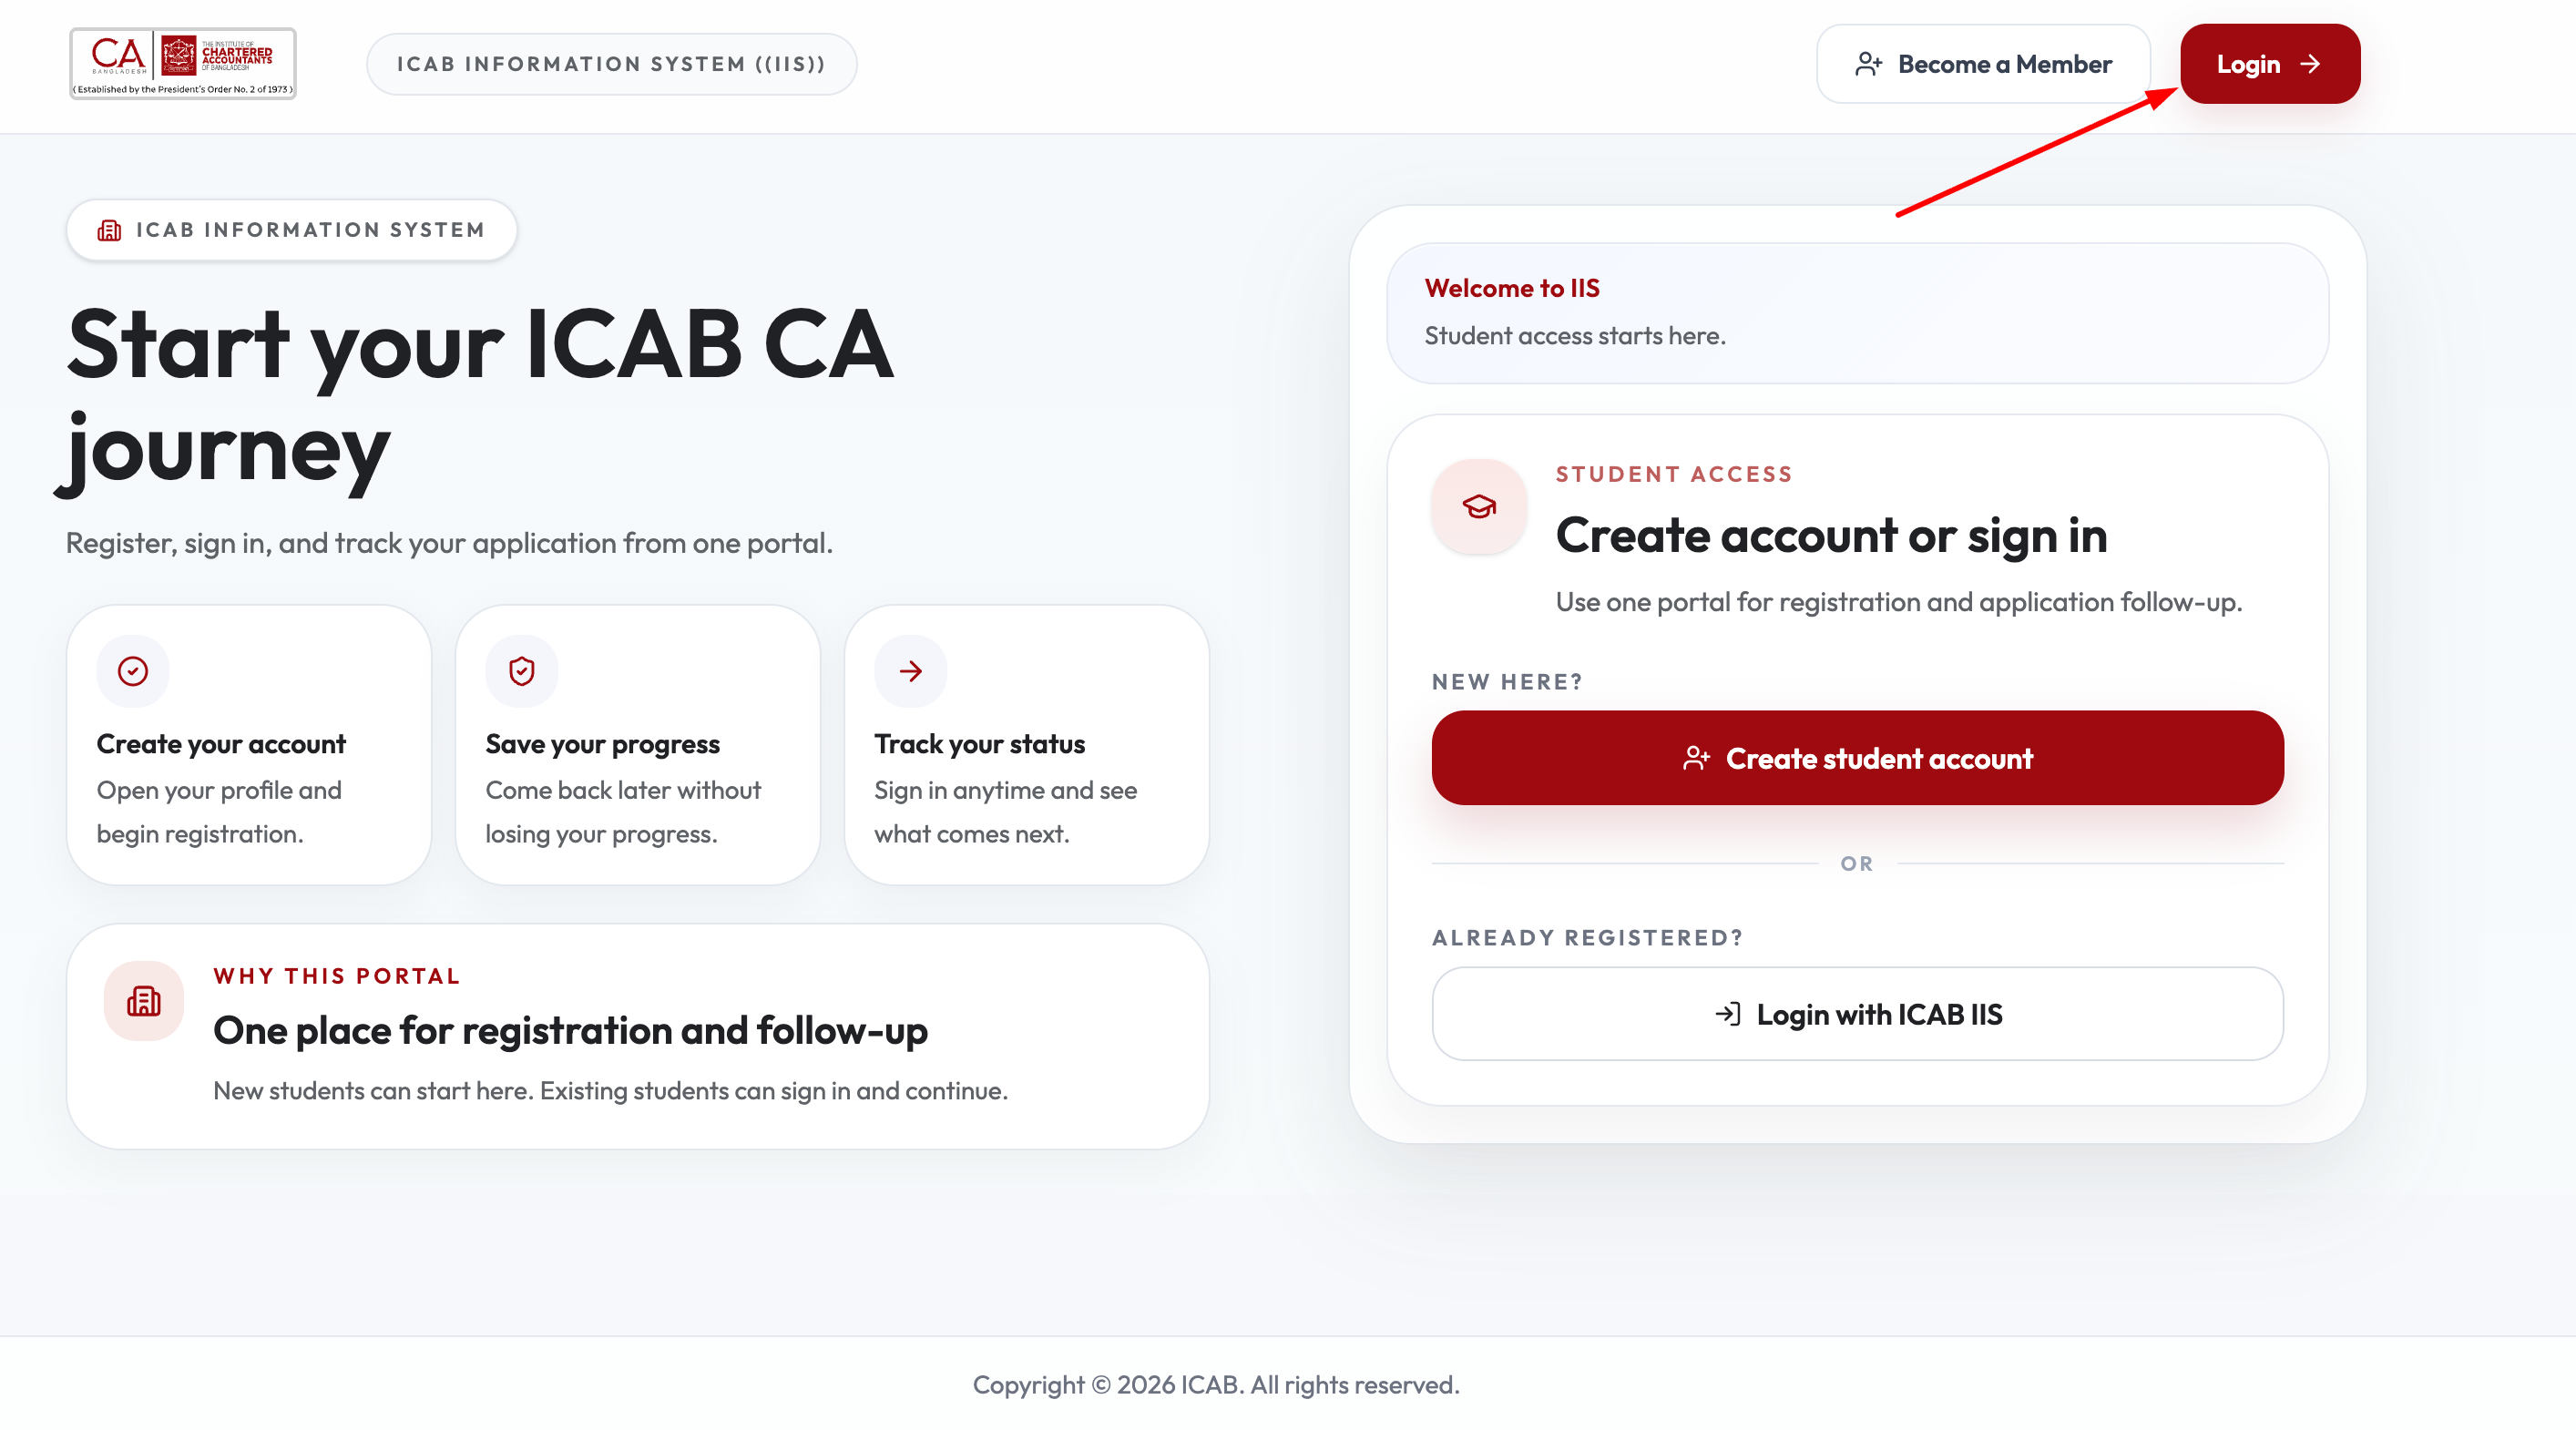
IIS landing page — select “Login” in the top-right corner Choose your User Type
The Log In screen shows four boxes: Member, Student, Firm’s Representative, and ICAB Backoffice. Select the one that matches you, then fill in Mobile / Reg No. and Password.
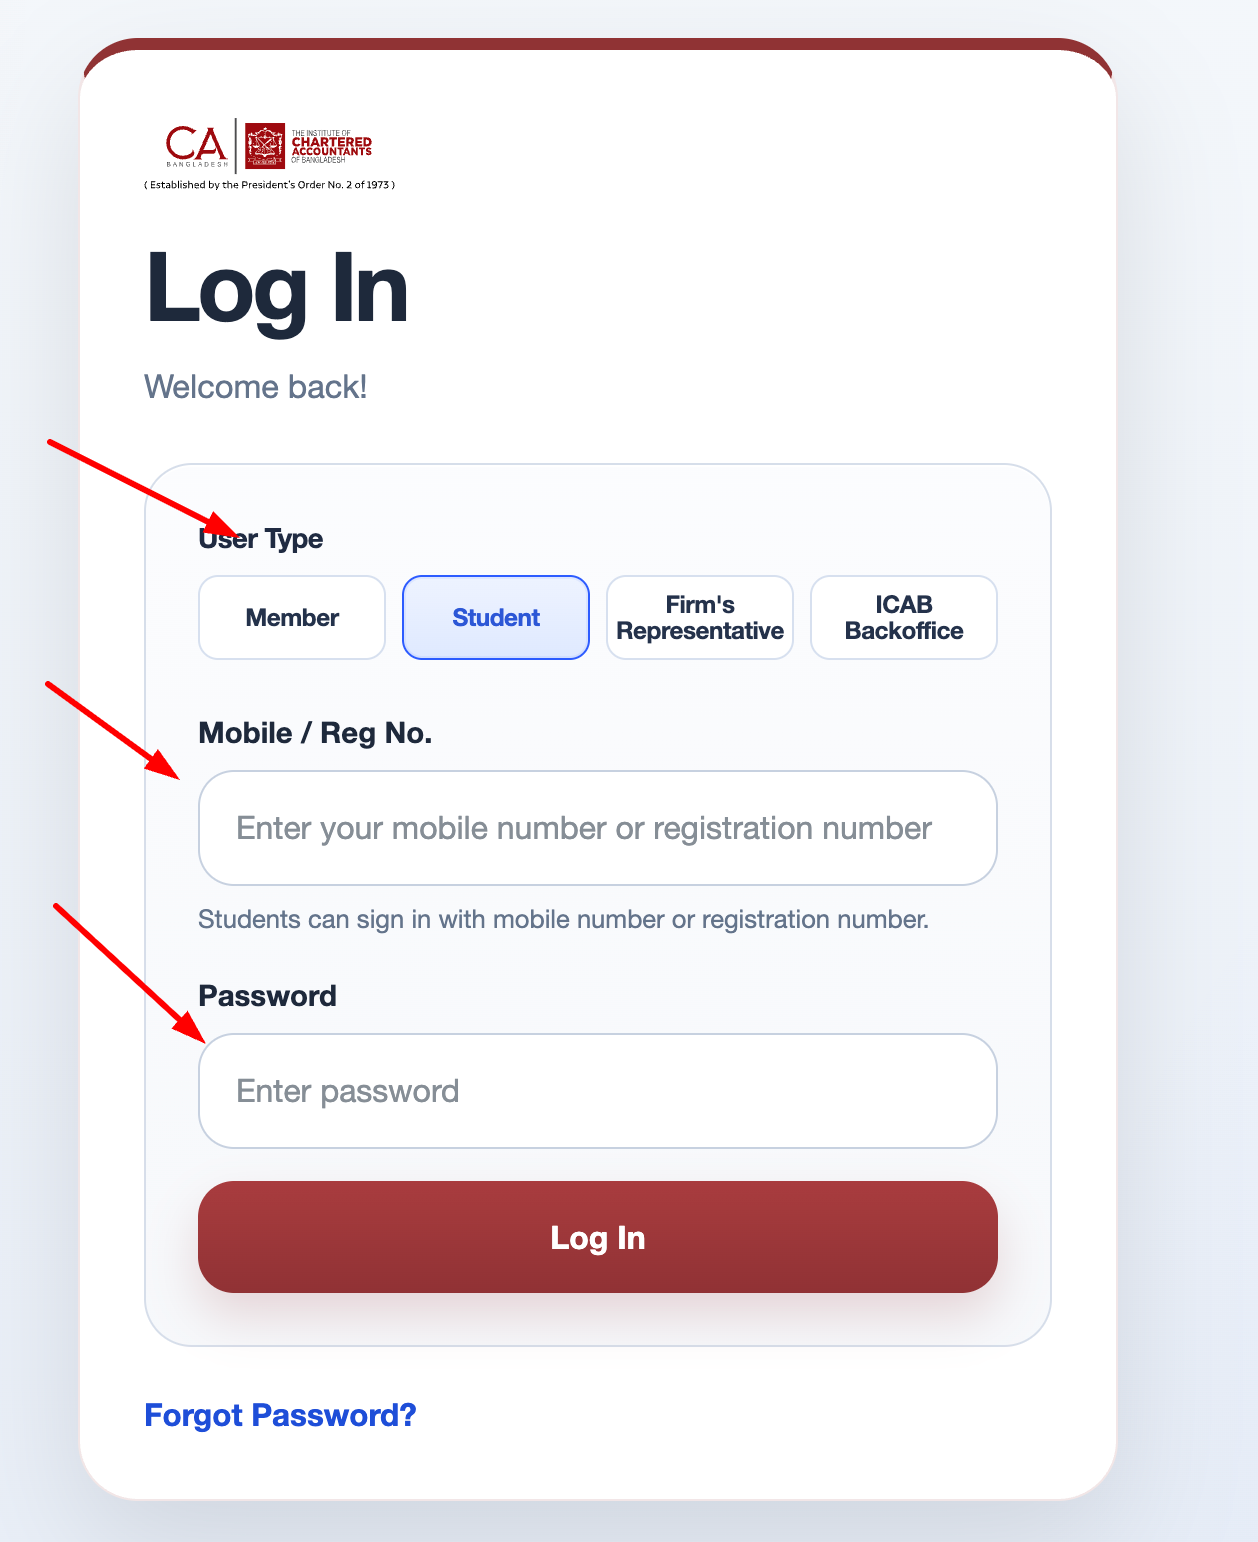
Choose your User Type, then enter Mobile / Reg No. and Password Select Log In
Double-check your details, then select the Log In button.
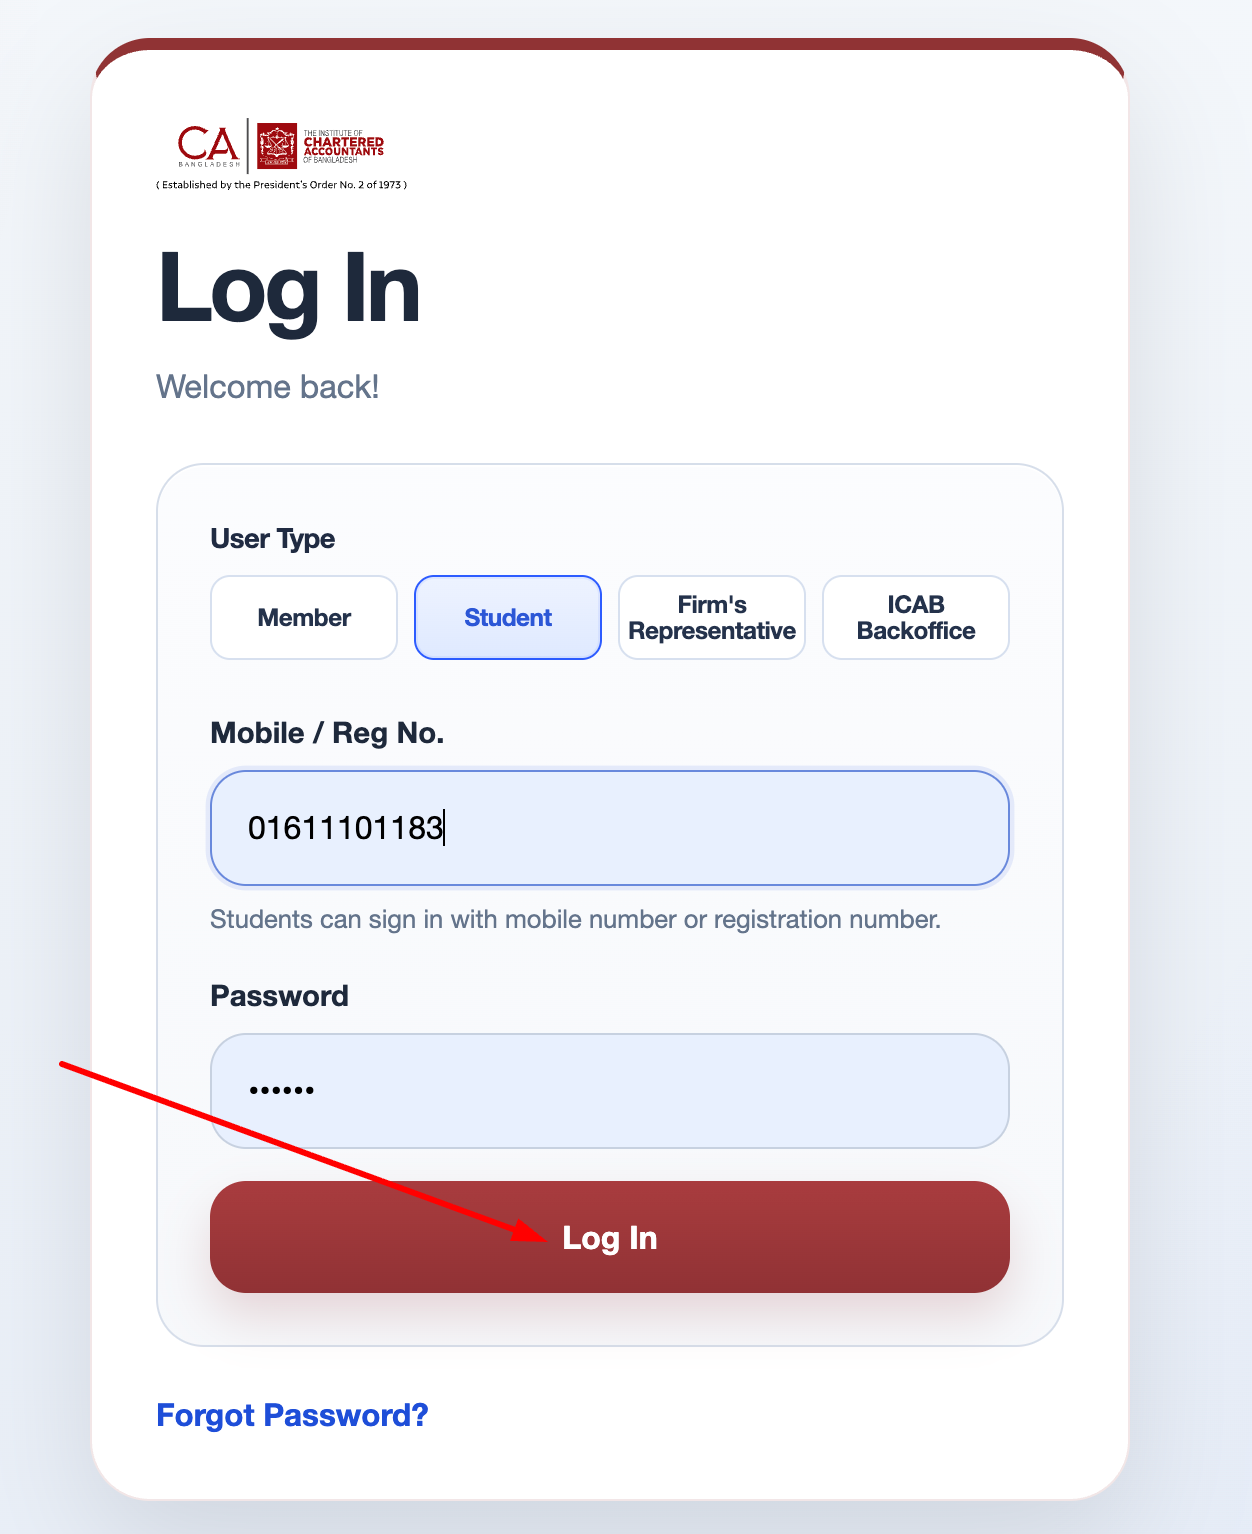
Enter your details and select “Log In” Land on your dashboard
After signing in, IIS loads your profile and role-based menu and takes you to the dashboard overview. Students see a sidebar with Dashboard, My Profile, and Applications — and a banner to continue any incomplete application.
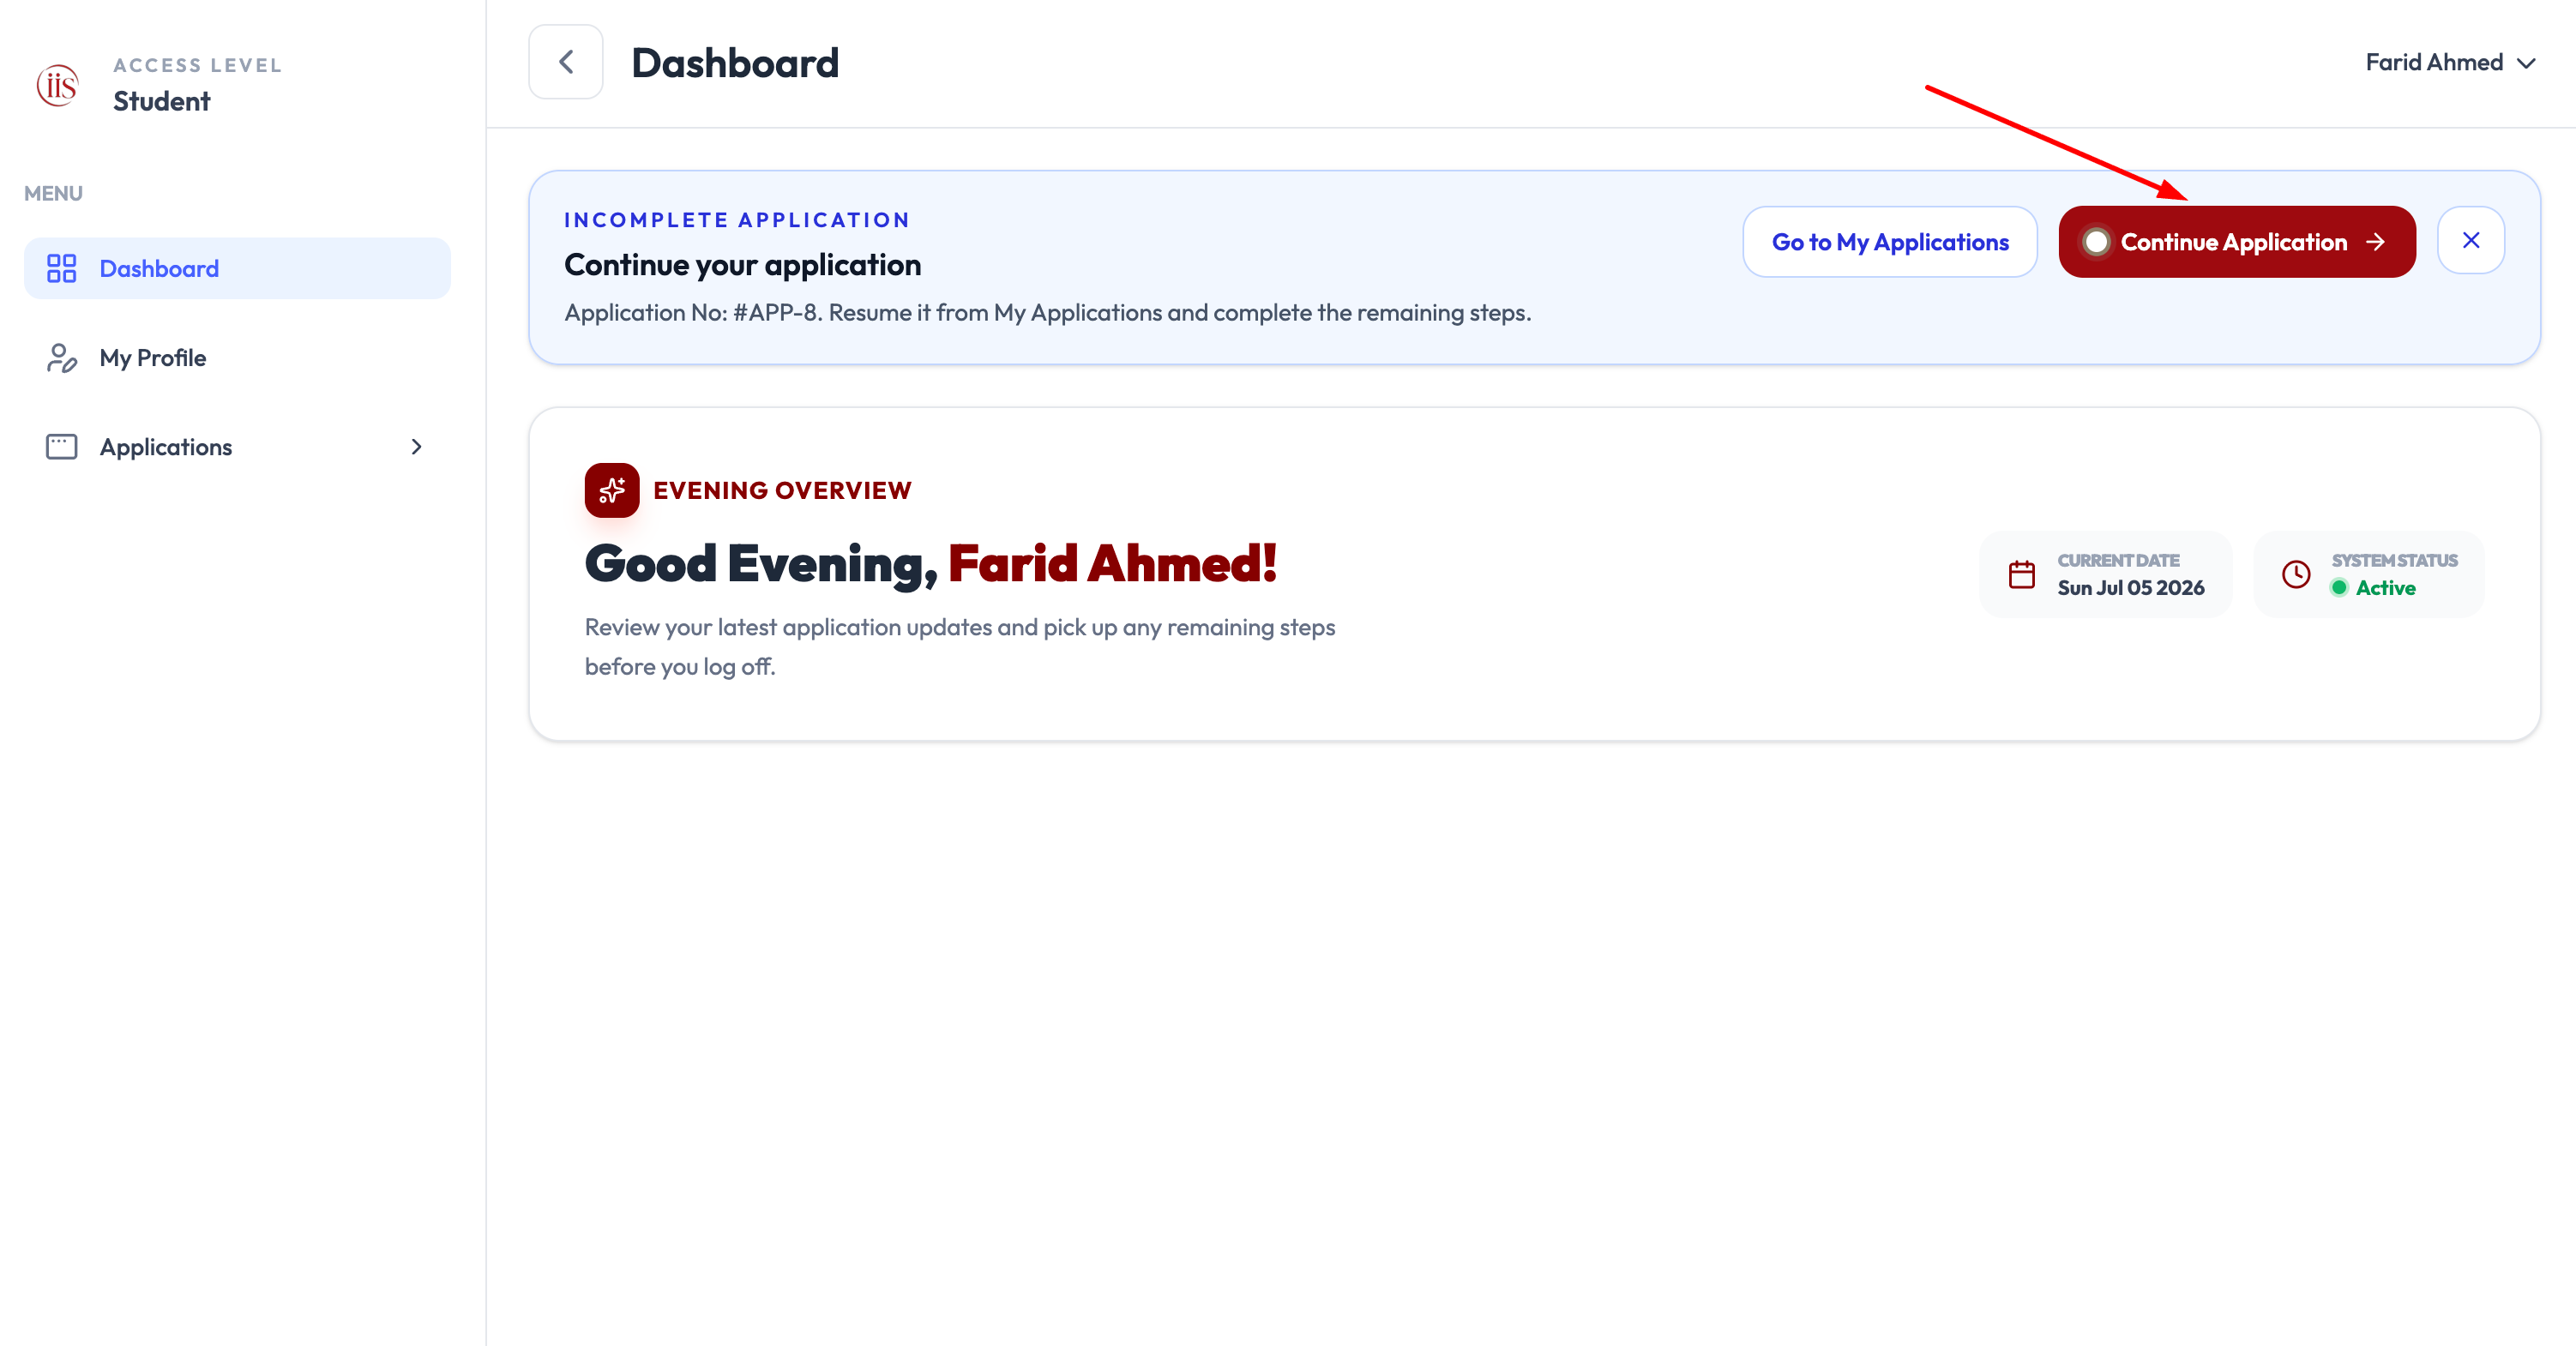
Student dashboard — continue an incomplete application from here 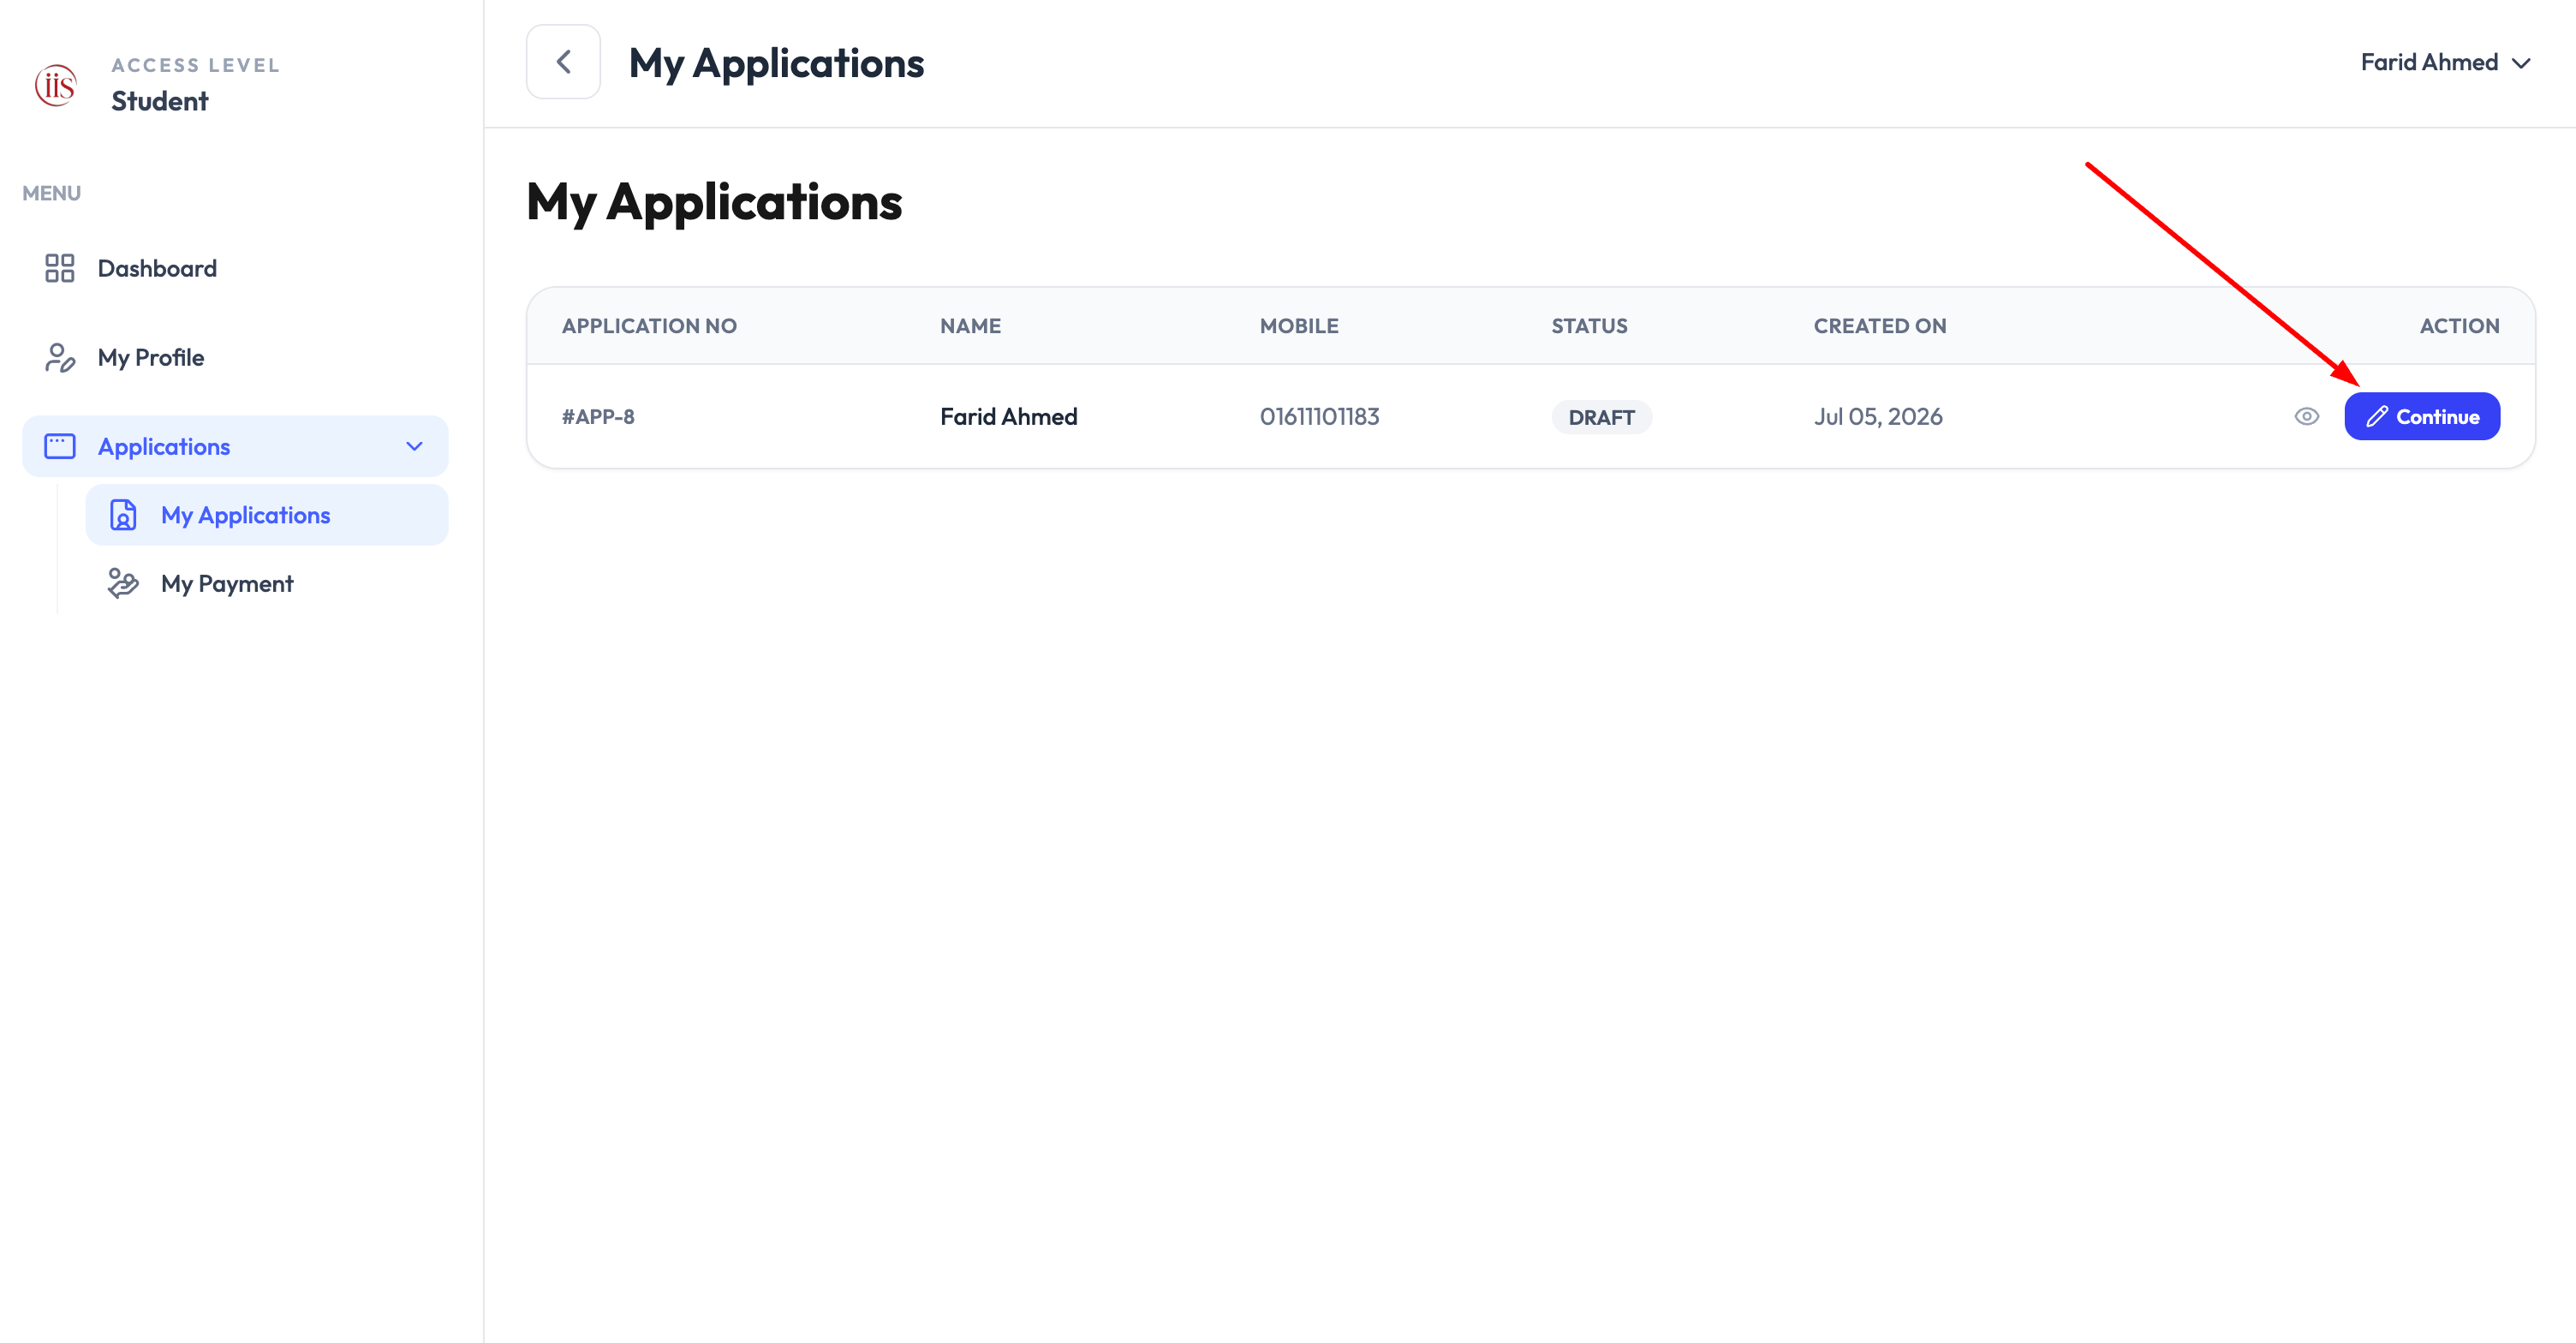
Selecting “Applications” opens your My Applications list
Select Forgot Password? below the Log In button on the login screen to reset it.
The header also has a Become a Member link for ACA membership applications, which is a different flow from student registration.
Touring the dashboard
Once signed in, the workspace is split into three consistent areas on every page:
- Header — product logo, notifications, and your account menu (profile, theme, sign out).
- Sidebar — your role-based navigation menu, grouped by function.
- Main panel — the page content for whatever you have selected, such as a form, a list, or a record preview.
Your account menu
Click your avatar in the top-right corner to update your profile, switch between light and dark appearance, or sign out of IIS.
Next steps
Once you are comfortable navigating IIS, continue to the guide that matches what you need to do: