Authorised Representative
An Authorised Representative can act on a principal’s behalf for firm and student tasks in IIS — useful when the principal cannot handle every approval or registration personally.
Opening Authorised Representative
Go to Authorised Representative
In the sidebar, select Authorised Representative.
Review the list
The page lists every representative created for your firm, with their contact details, position, and status.
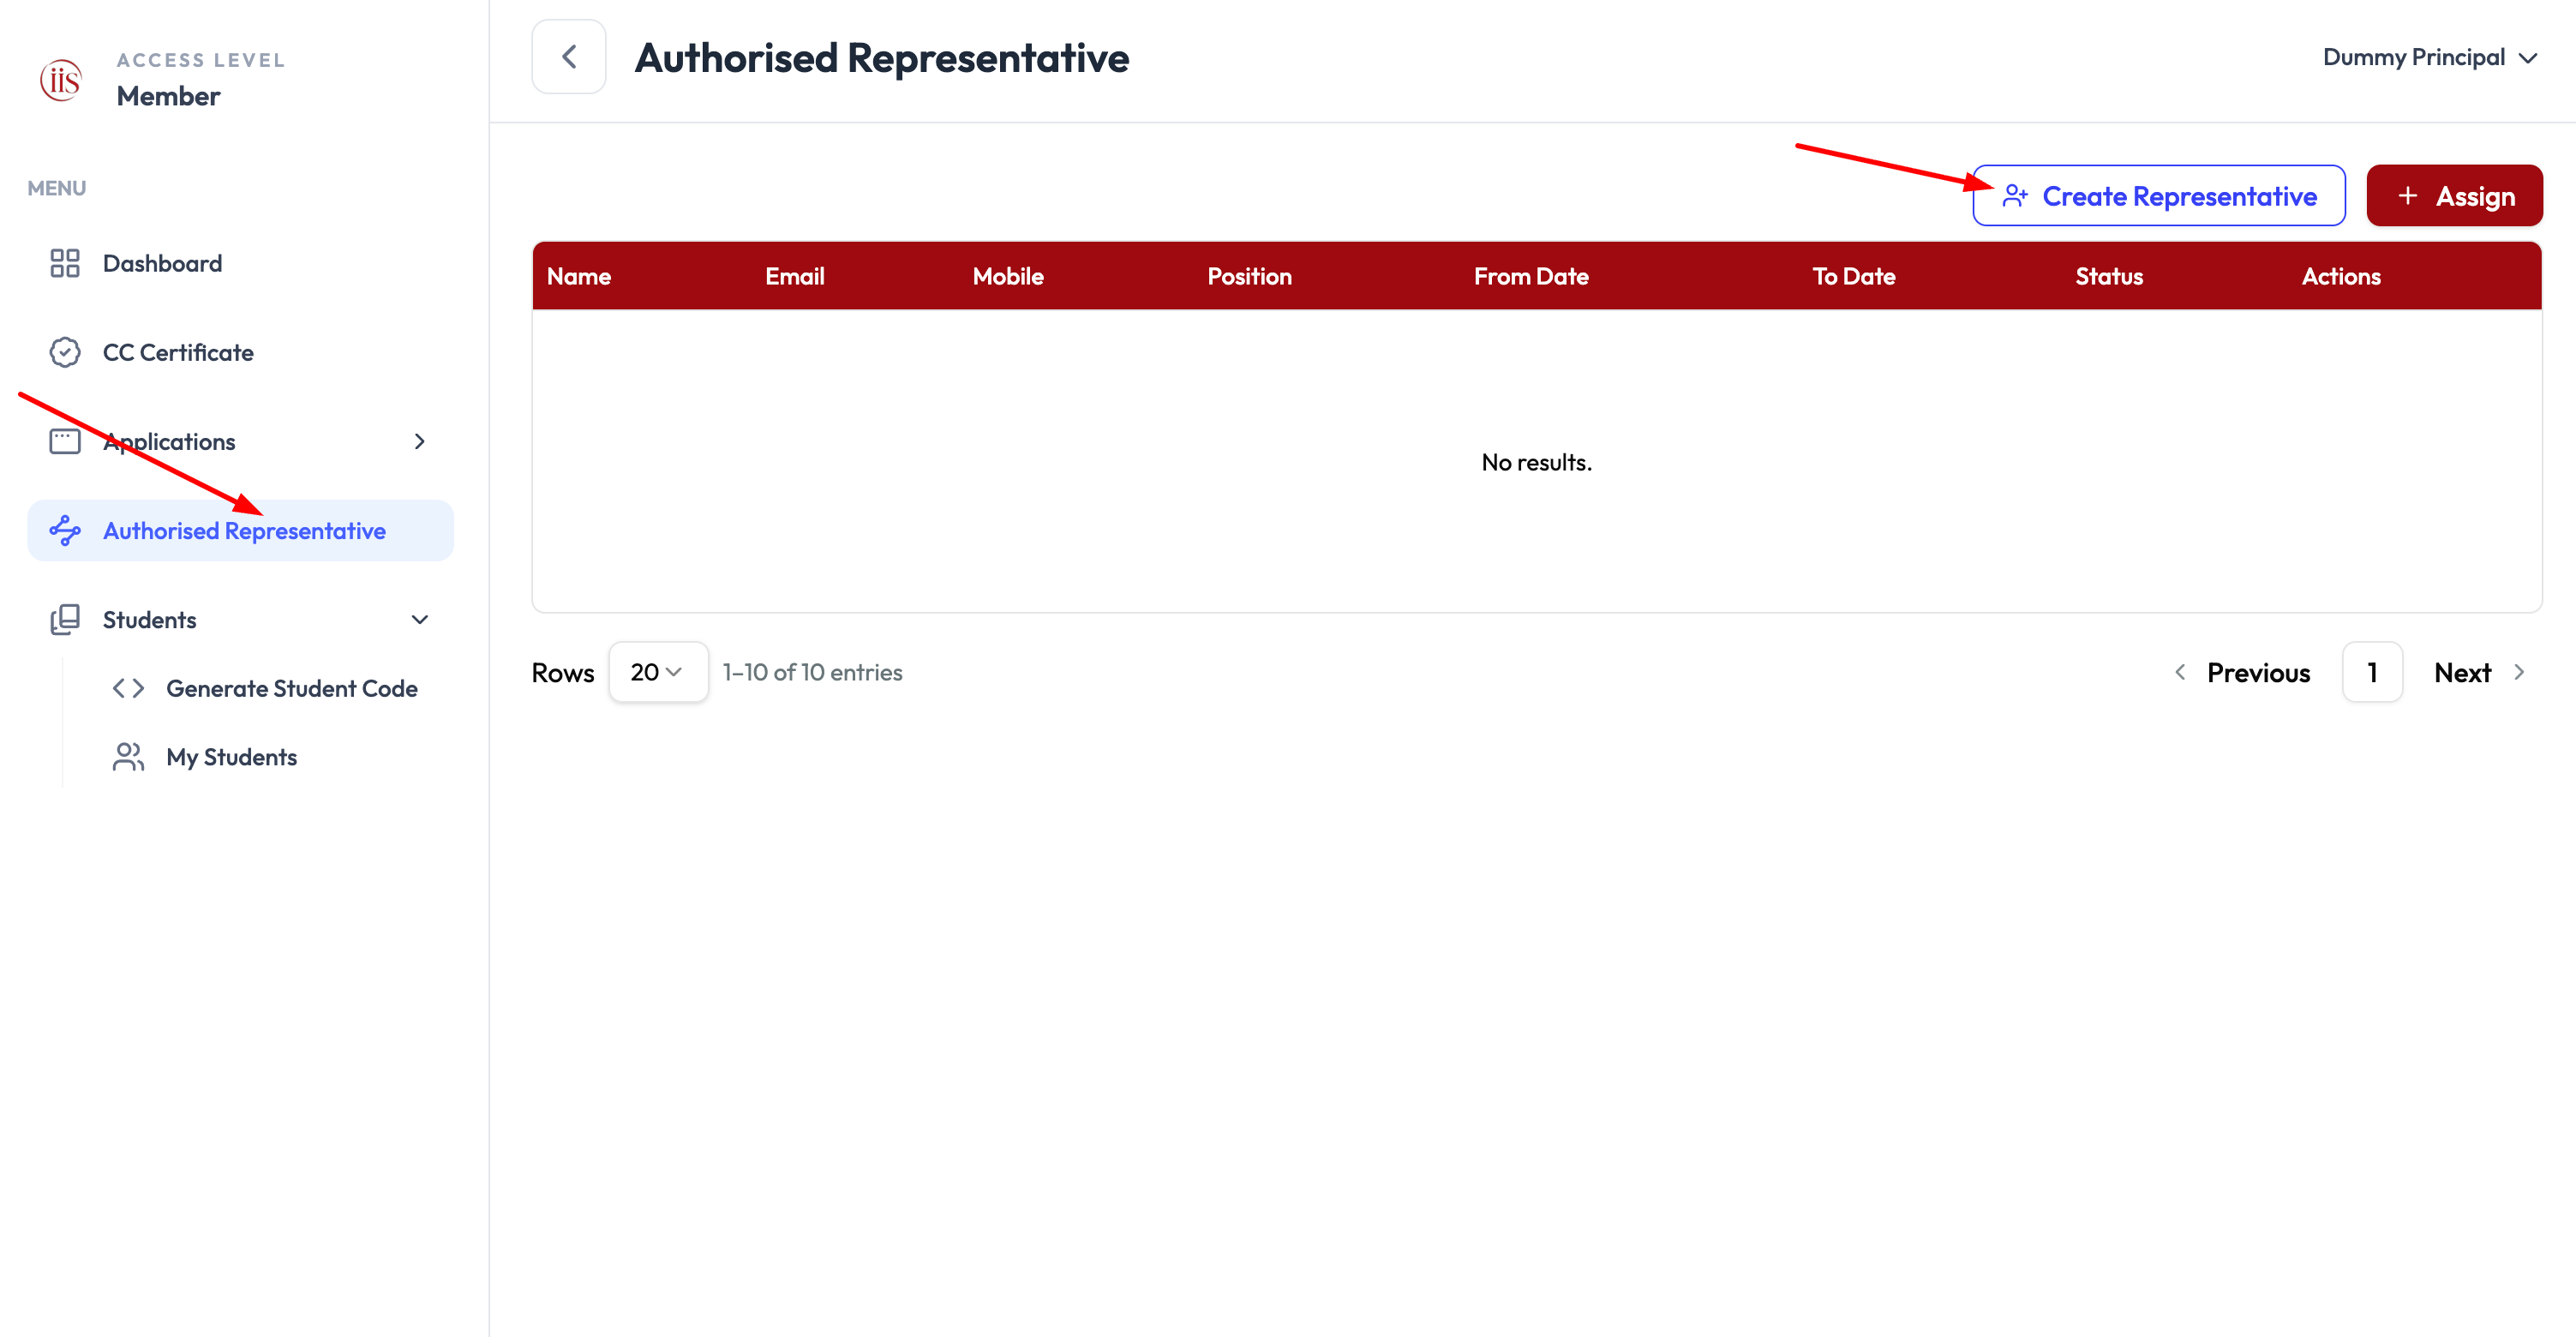
Authorised Representative — the “Create Representative” and “Assign” buttons sit above the table
Reading the list
Each row shows:
- Name, Email, and Mobile — the representative’s contact details.
- Position — their role or title at the firm.
- From Date and To Date — the period they are authorised to act as your representative.
- Status — whether the representative is currently active.
- Actions — options to edit or remove the representative.
Creating a new representative
Select Create Representative
Select the Create Representative button above the table to open the dialog.
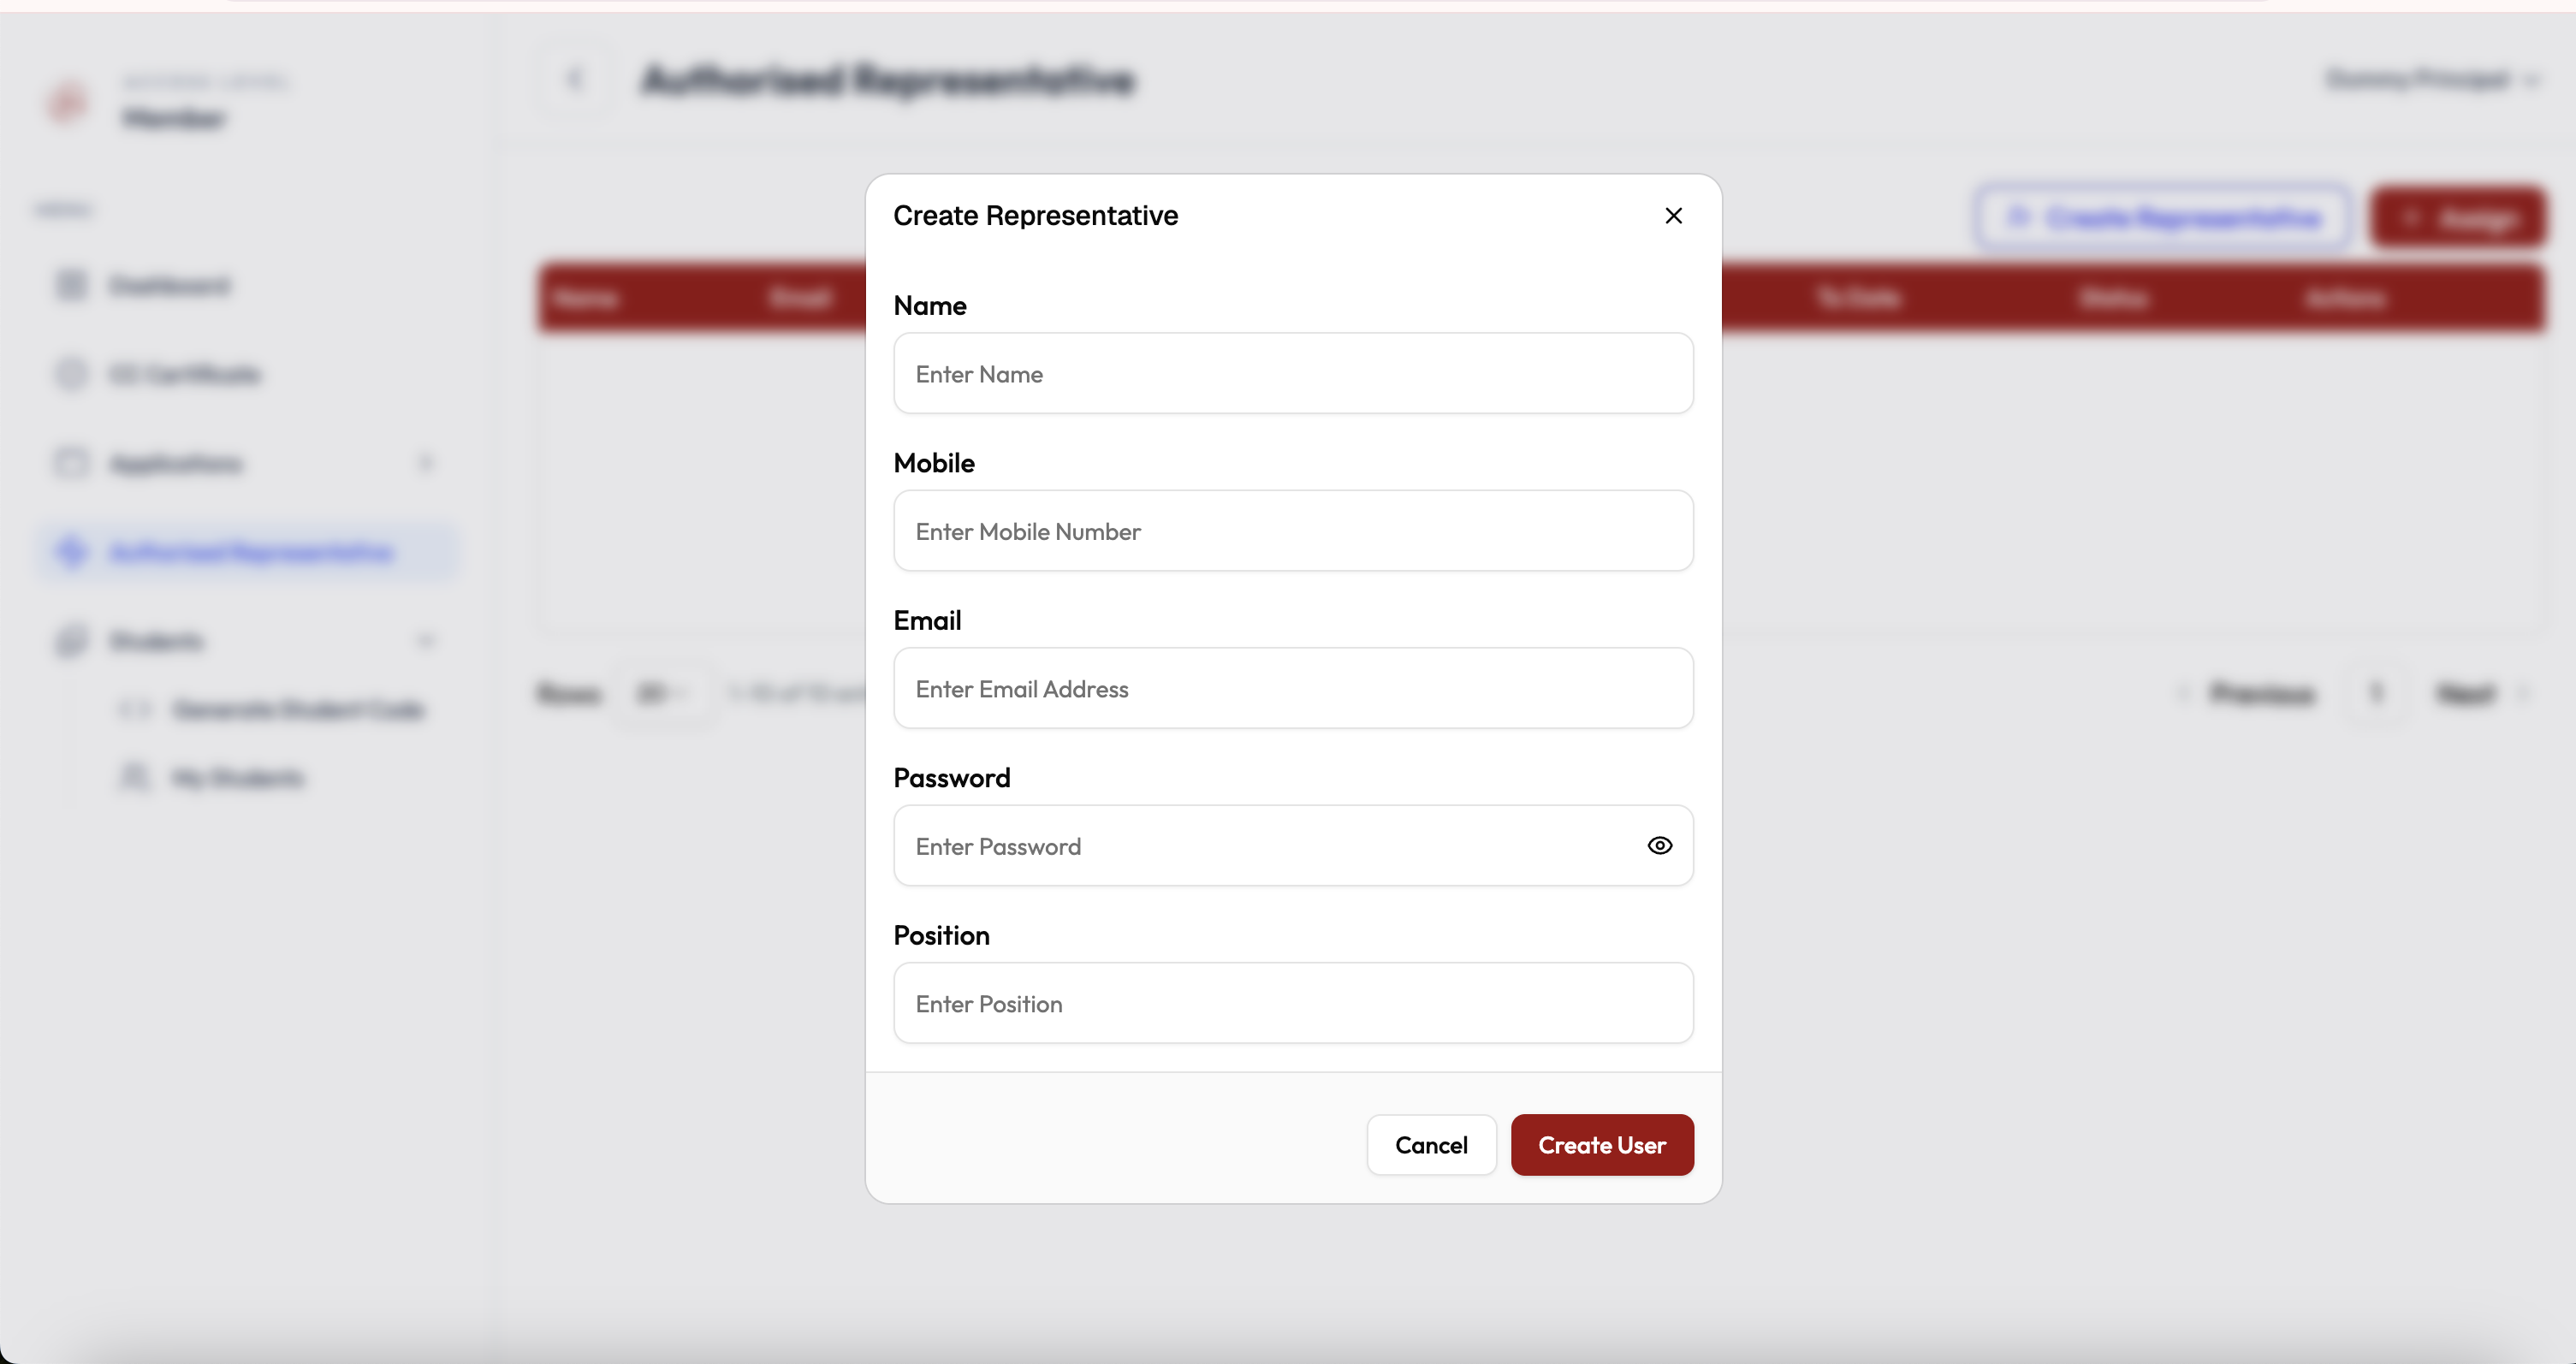
The Create Representative dialog Fill in the representative’s details
Enter Name, Mobile, Email, a Password for their account, and their Position. Select the eye icon to check the password as you type.
Select Create User
Select the red Create User button to create the account, or Cancel to close the dialog without saving.
Assigning an existing representative
If you already created a representative account and just need to authorise them for a new period, select Assign instead of Create Representative, then choose the representative and set their From Date and To Date.
Once assigned, a representative can act on approvals and registrations on your behalf — only create or assign representatives you trust, and set a To Date so access ends automatically.
Once assigned, a representative can review and act on registrations the same way a principal does — see Student Approval Workflow.