Student Approval Workflow
Reviewers use this workflow to approve or reject student registrations, and to look back through a student’s approval history.
Articleship registration — full process flow
This is the complete path an Articleship registration takes, from student signup through final approval. The colored bar on each step shows who is responsible for it.
Create a student account on the IIS portal and verify the mobile number by OTP.
Sign in with the mobile number / registration number and password just created.
Complete Personal Info, Student Type, Contact, Academic, and Address — see Student Registration.
For Articleship, enter the firm verification code and select Search to confirm the firm on the Student Type tab.
Review everything on the Preview tab, then select Submit Application.
The firm’s authorised representative checks the submitted application and documents.
The Principal gives final firm-side approval to take the student on for training.
Pay the registration fee — see Payment Status.
ICAB’s Registration Department checks the application data and documents for accuracy and completeness.
The Registration Department gives final approval and the student’s registration becomes active.
At steps 6, 7, 9, and 10, the reviewer can either move the application forward, reject it, or send it back to the student marked for resubmission. A resubmission returns to the student, who corrects the flagged information and submits again from step 5.
Reviewing pending registrations
Approval Queue — step by step for Principal & Authorised Representative
As a Principal or an Authorised Representative, this is exactly what you’ll see and click, in order, when a student submits an Articleship application.
Open Applications → Approval Queue
In the sidebar, select Applications to expand it, then select Approval Queue.
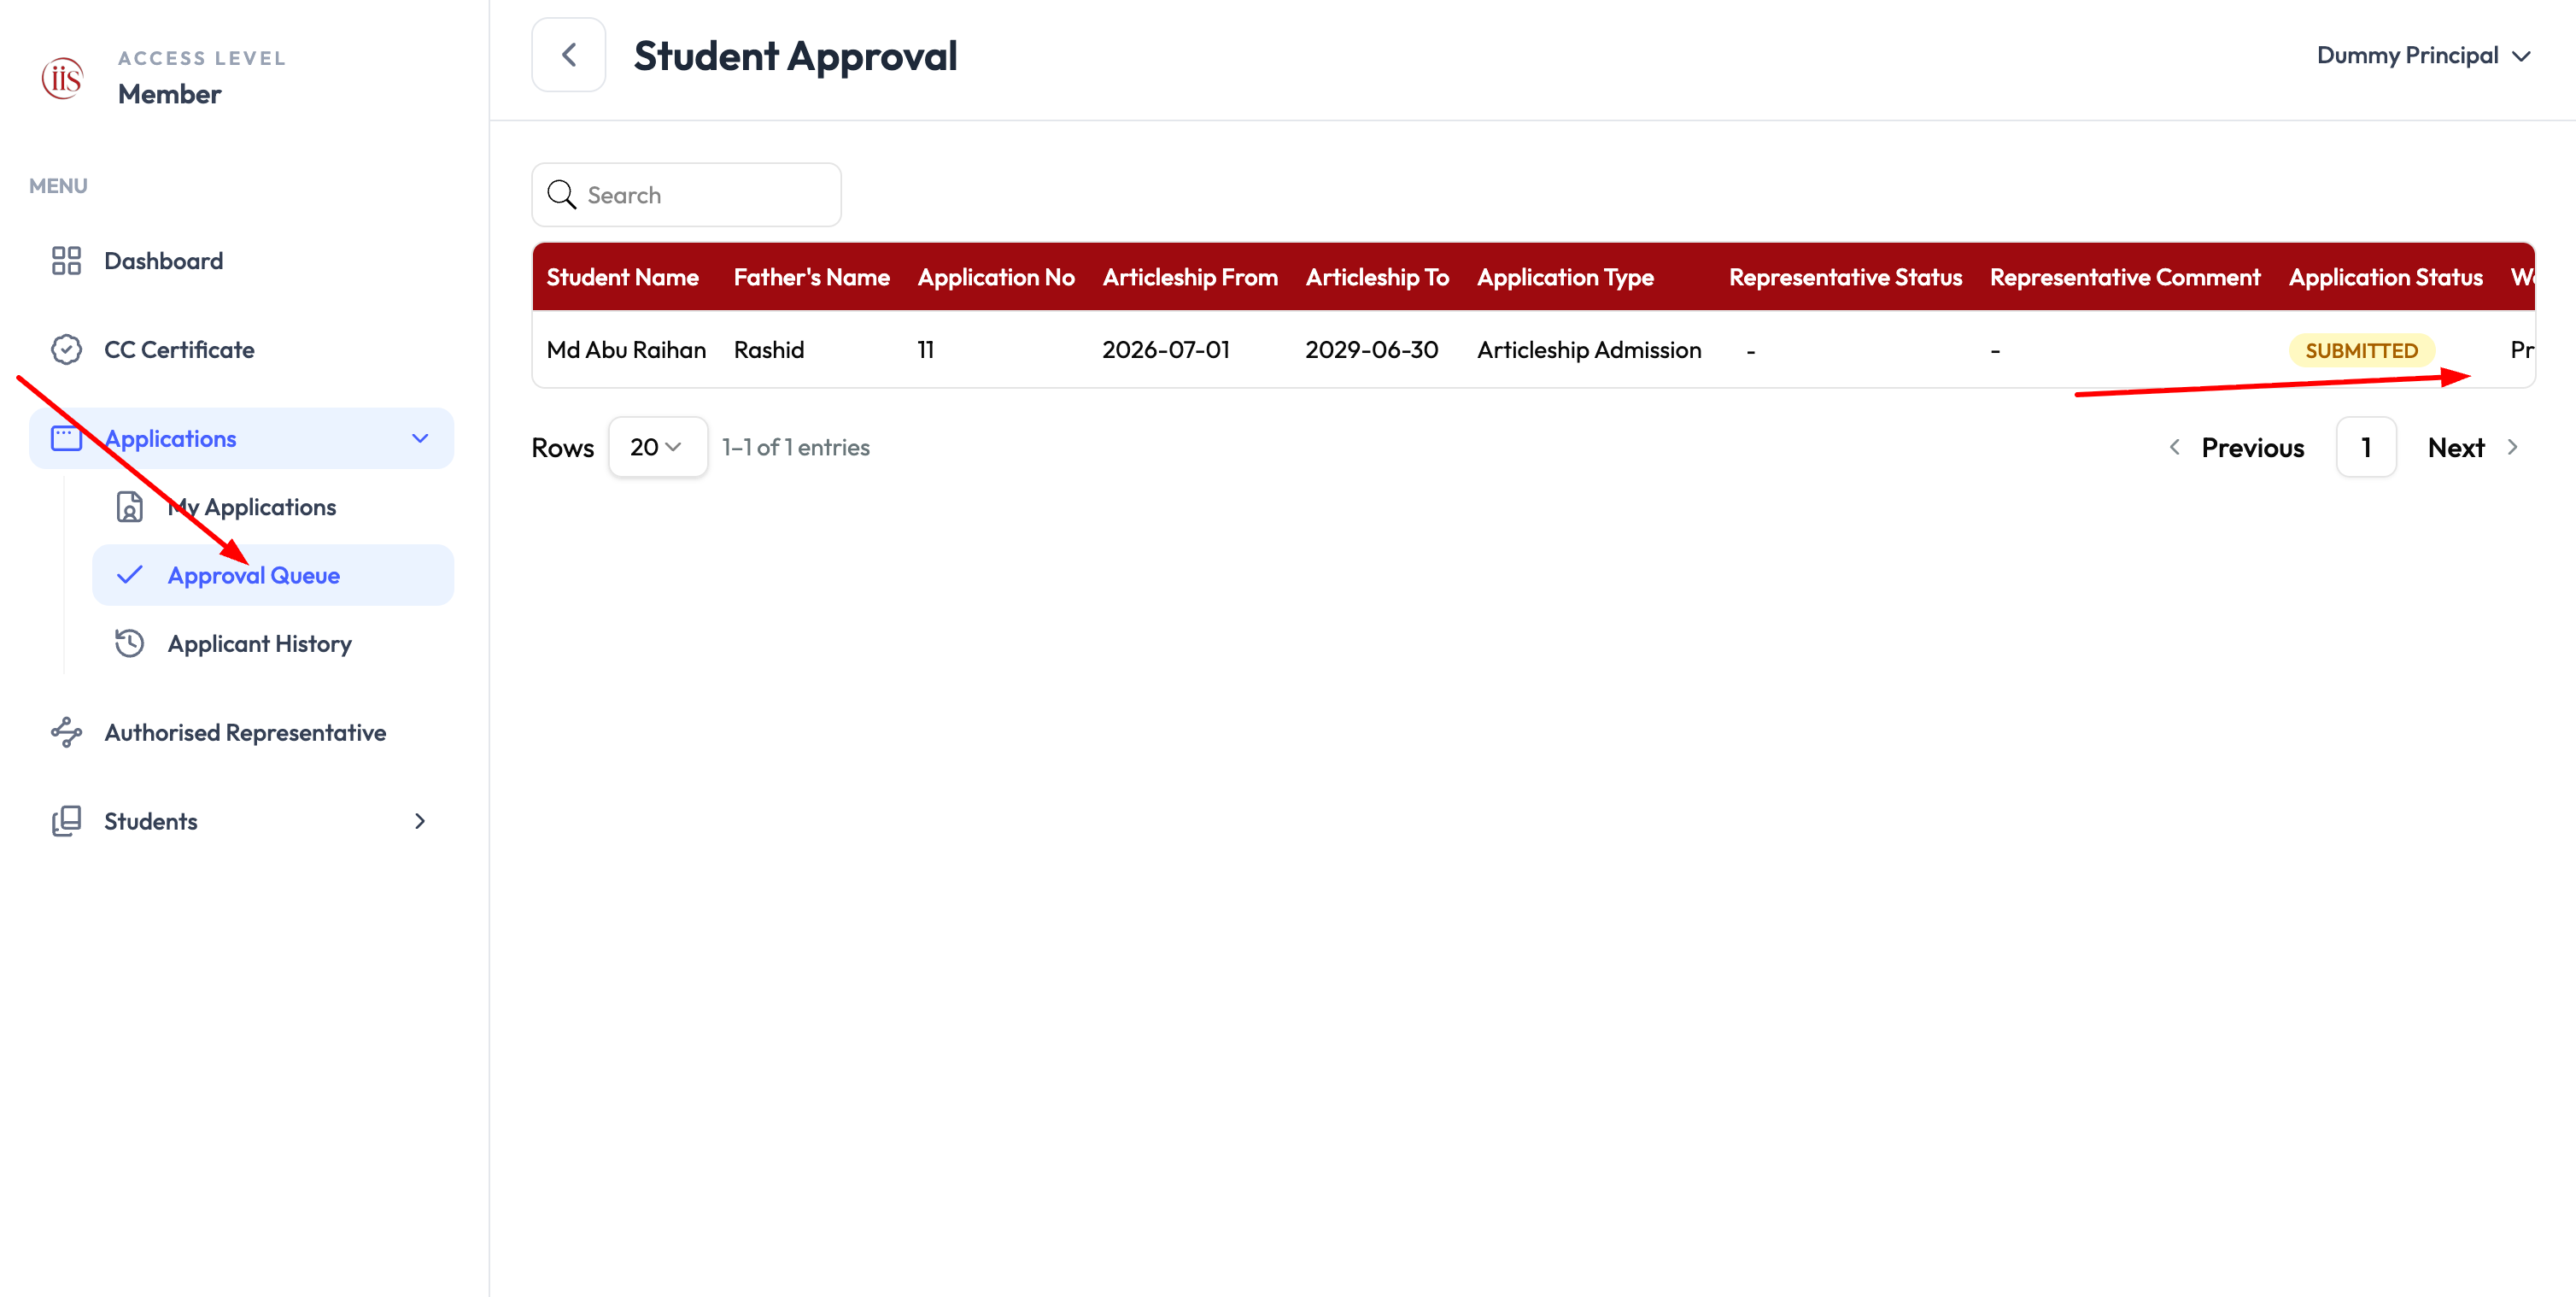
Sidebar → Applications → Approval Queue Read the queue table
Each row is one student’s application. You’ll see Student Name, Father’s Name, Application No, Articleship From/To, Application Type, Representative Status, Representative Comment, Application Status (e.g. Submitted), and Workflow Status (e.g. Principal Review).
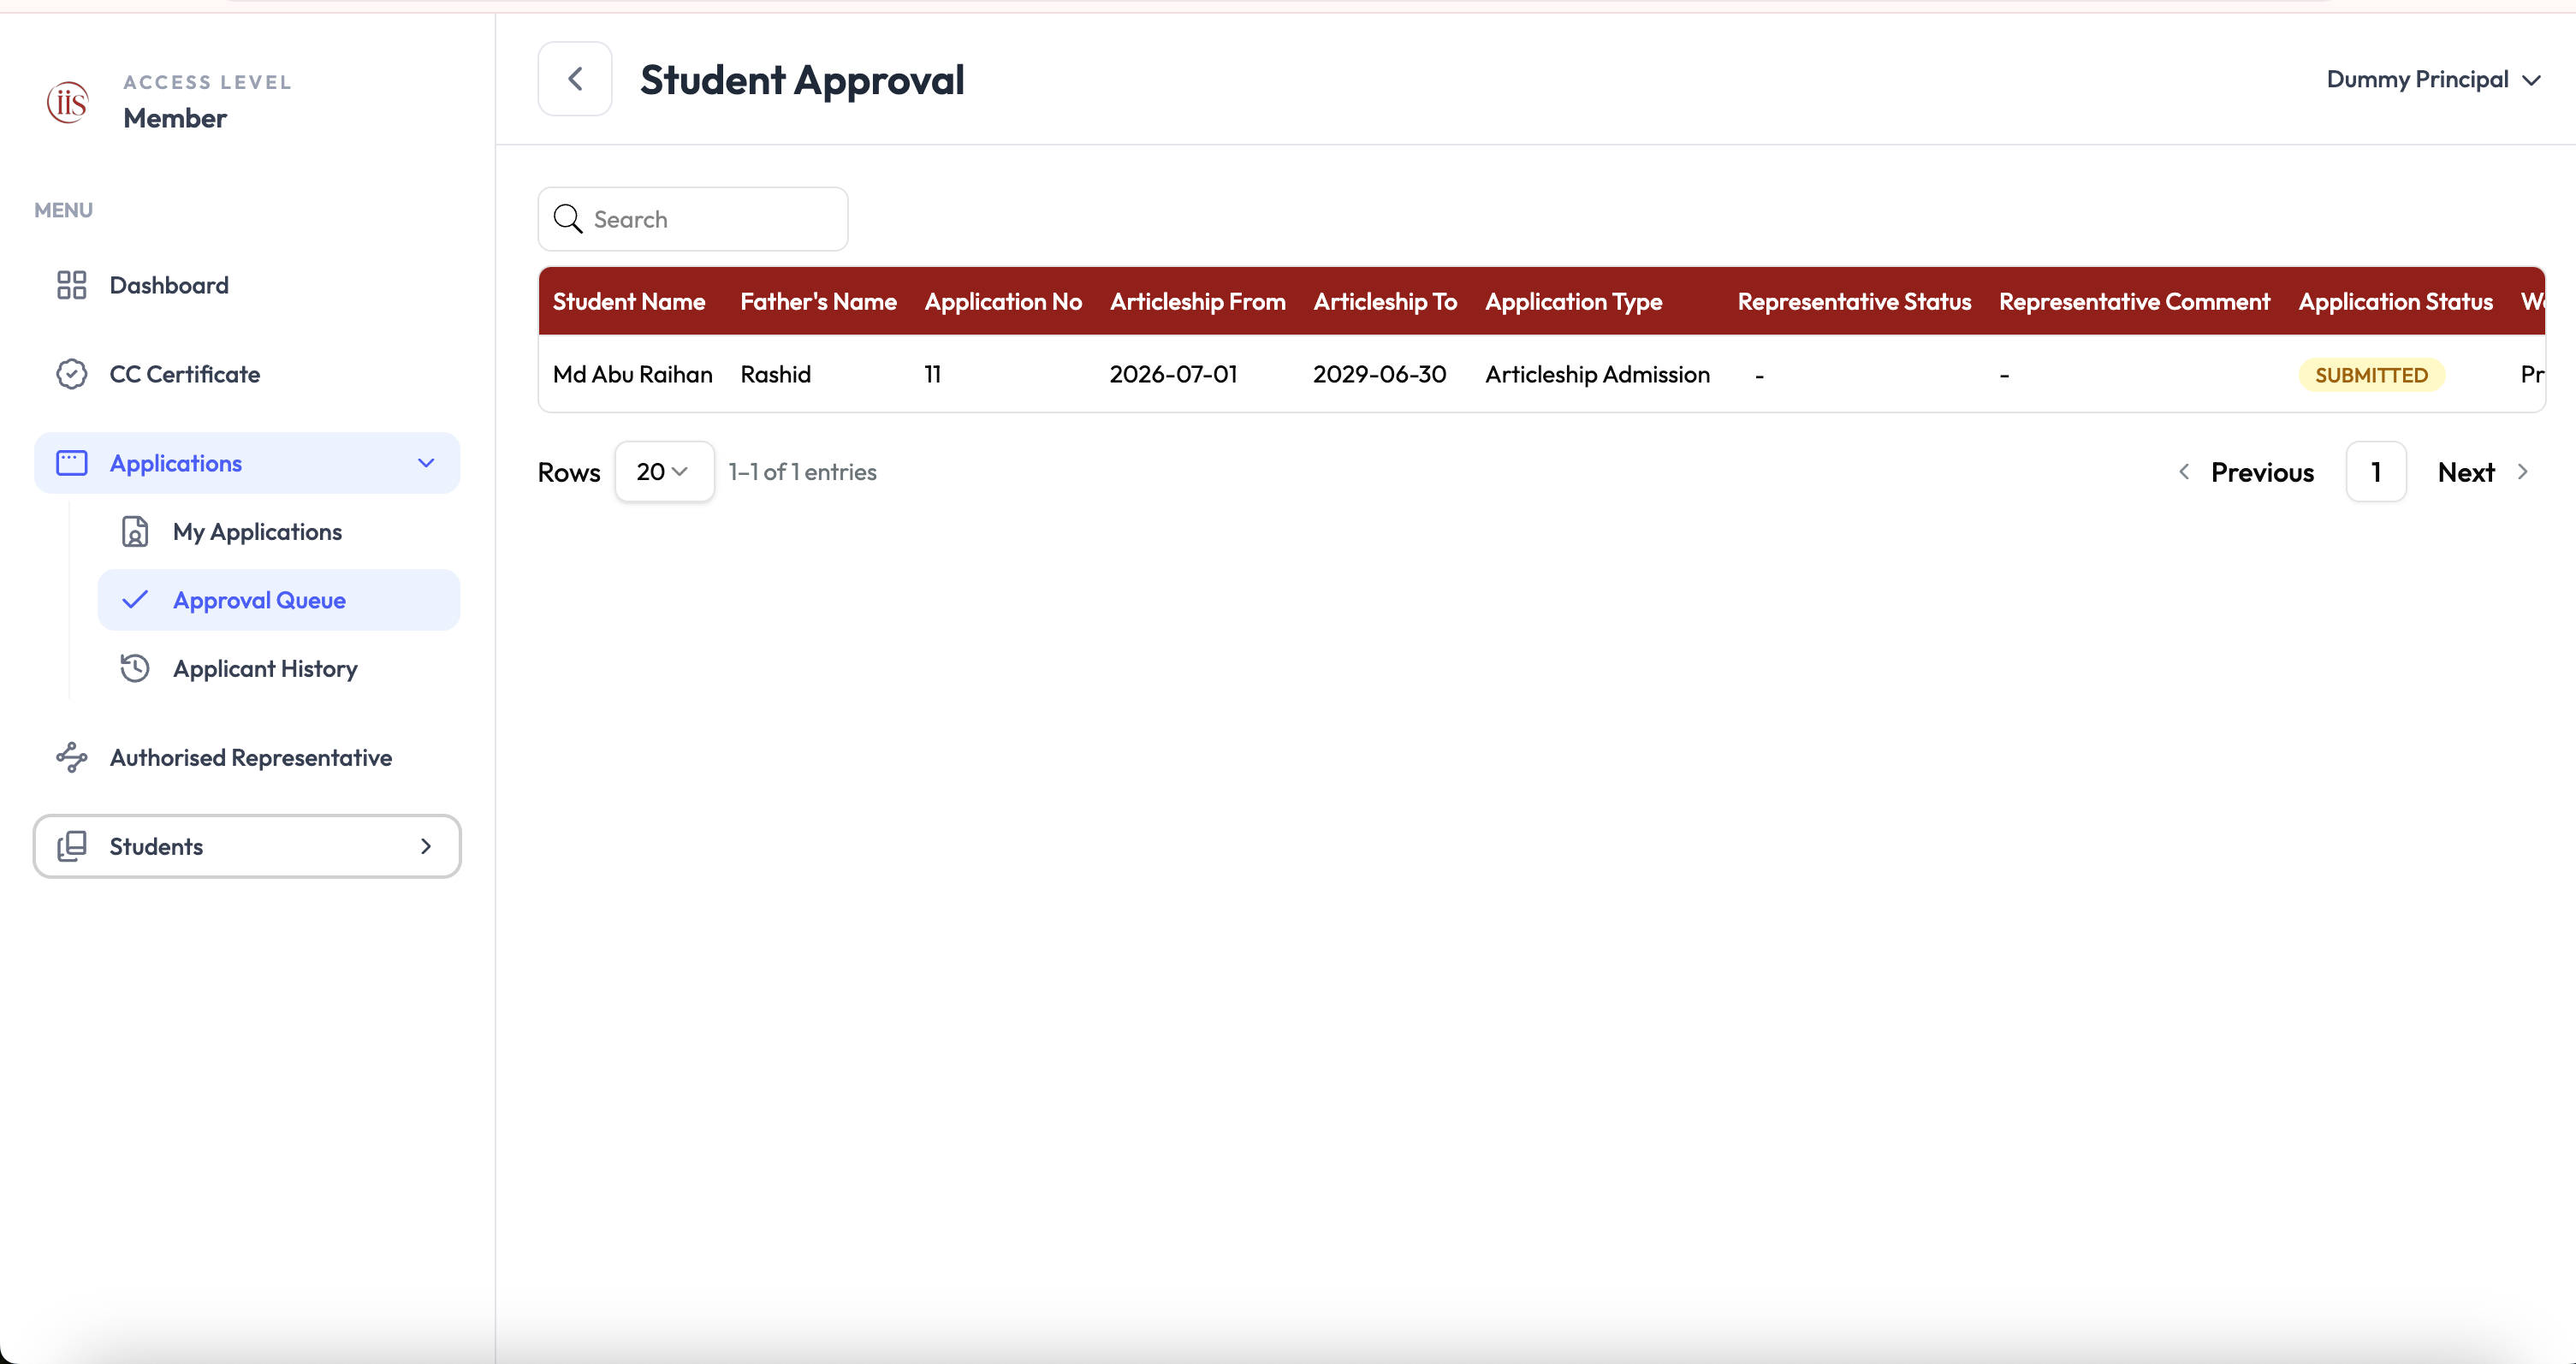
Student Approval — the Approval Queue table Open the application
Scroll right to the Preview column and select the eye icon on the student’s row.
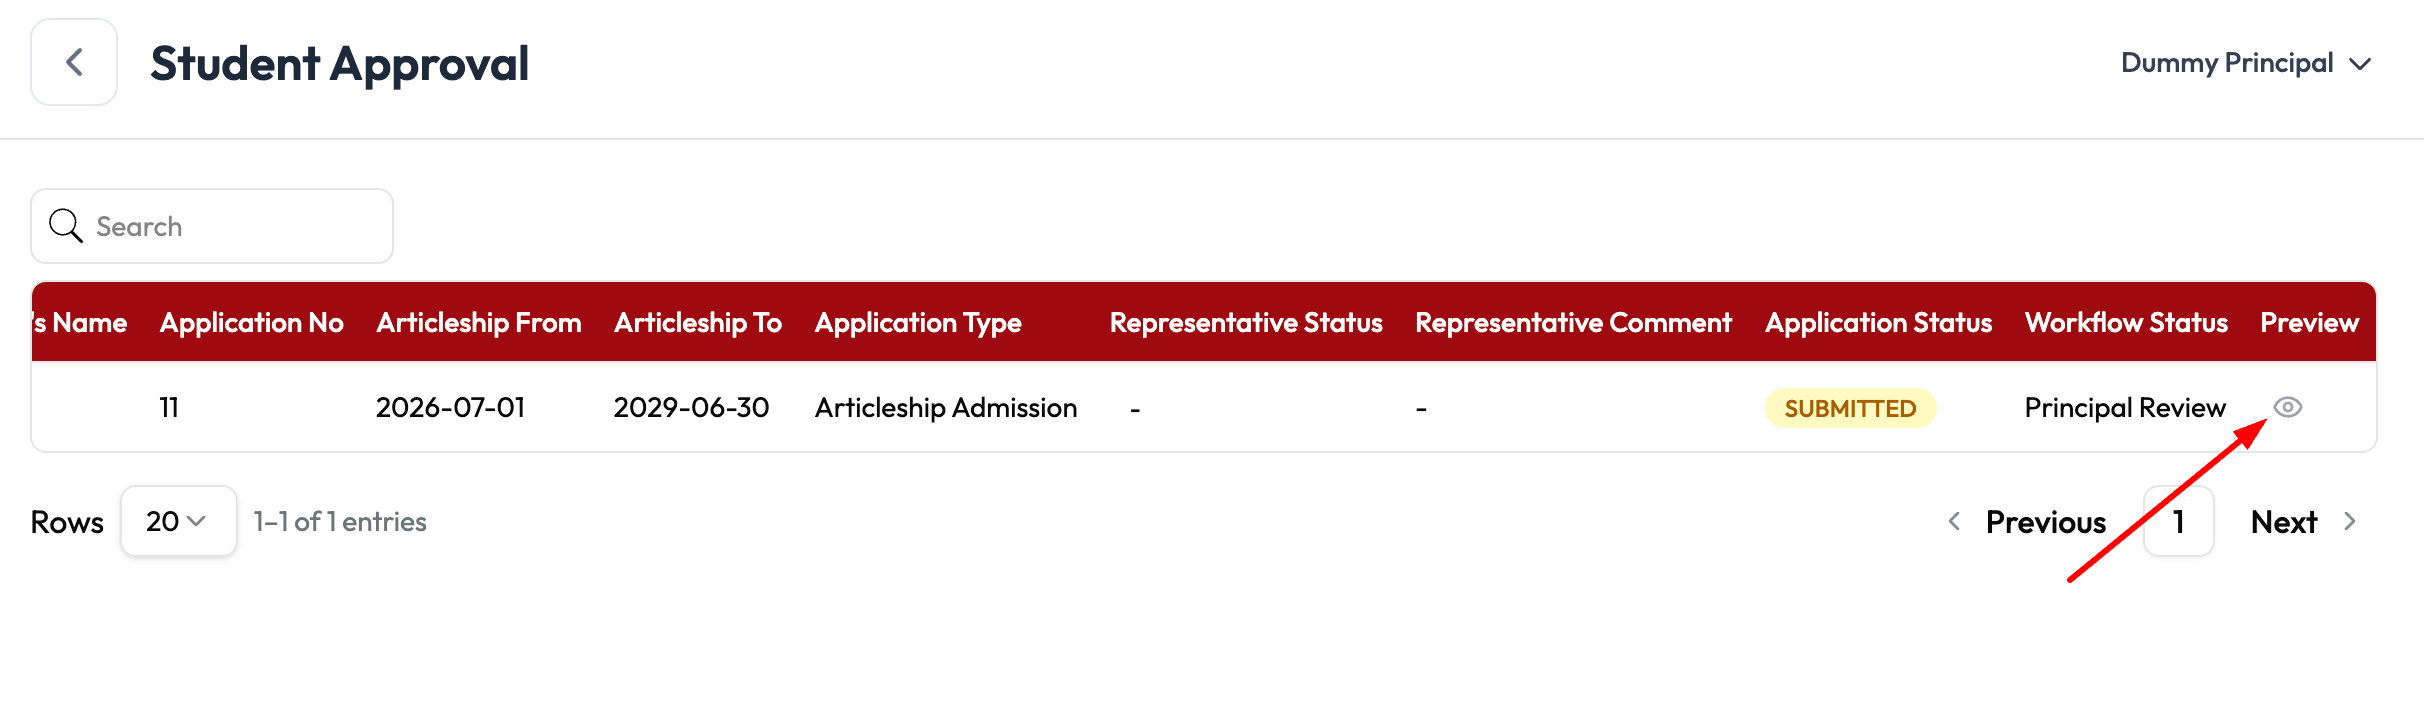
Select the eye icon under Preview to open the application Review the student’s details
The Application Preview page shows the student’s photo, personal information (father’s/mother’s name, date of birth, mobile, email, passport/national ID), firm and principal, and the Articleship period.
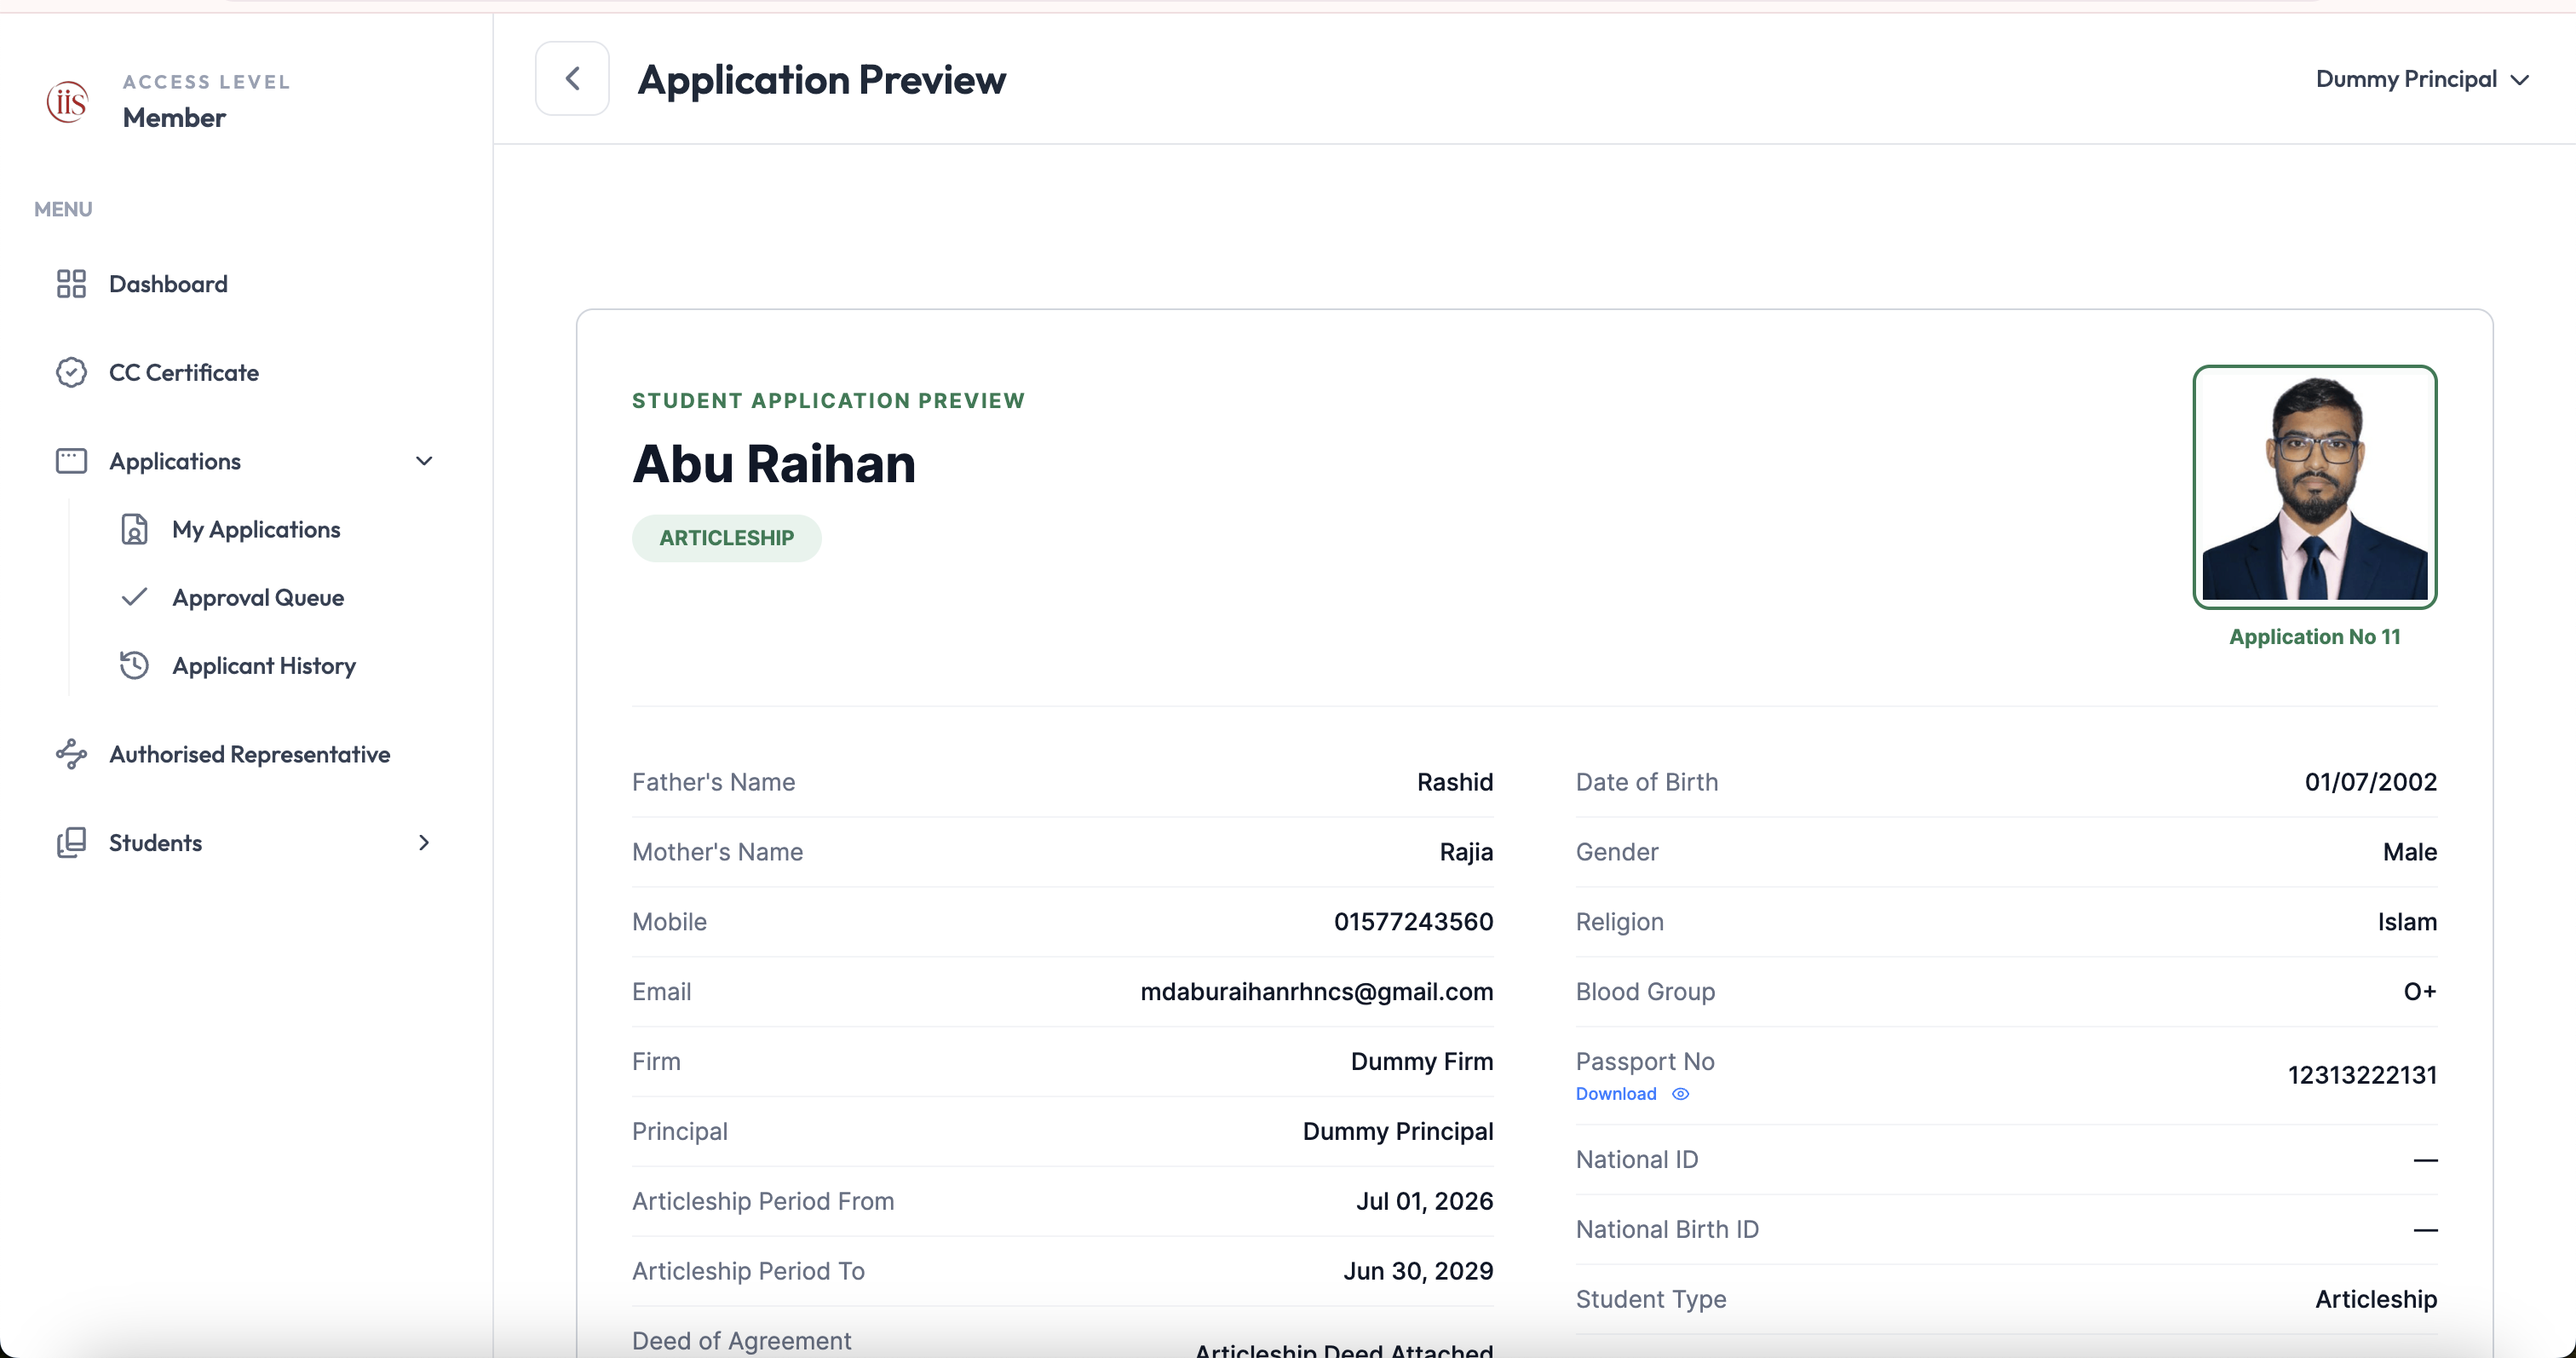
Application Preview — check every field carefully Check academic and address details
Scroll down to see the student’s exam results (with downloadable Certificate and Transcript) and their Permanent and Mailing addresses.
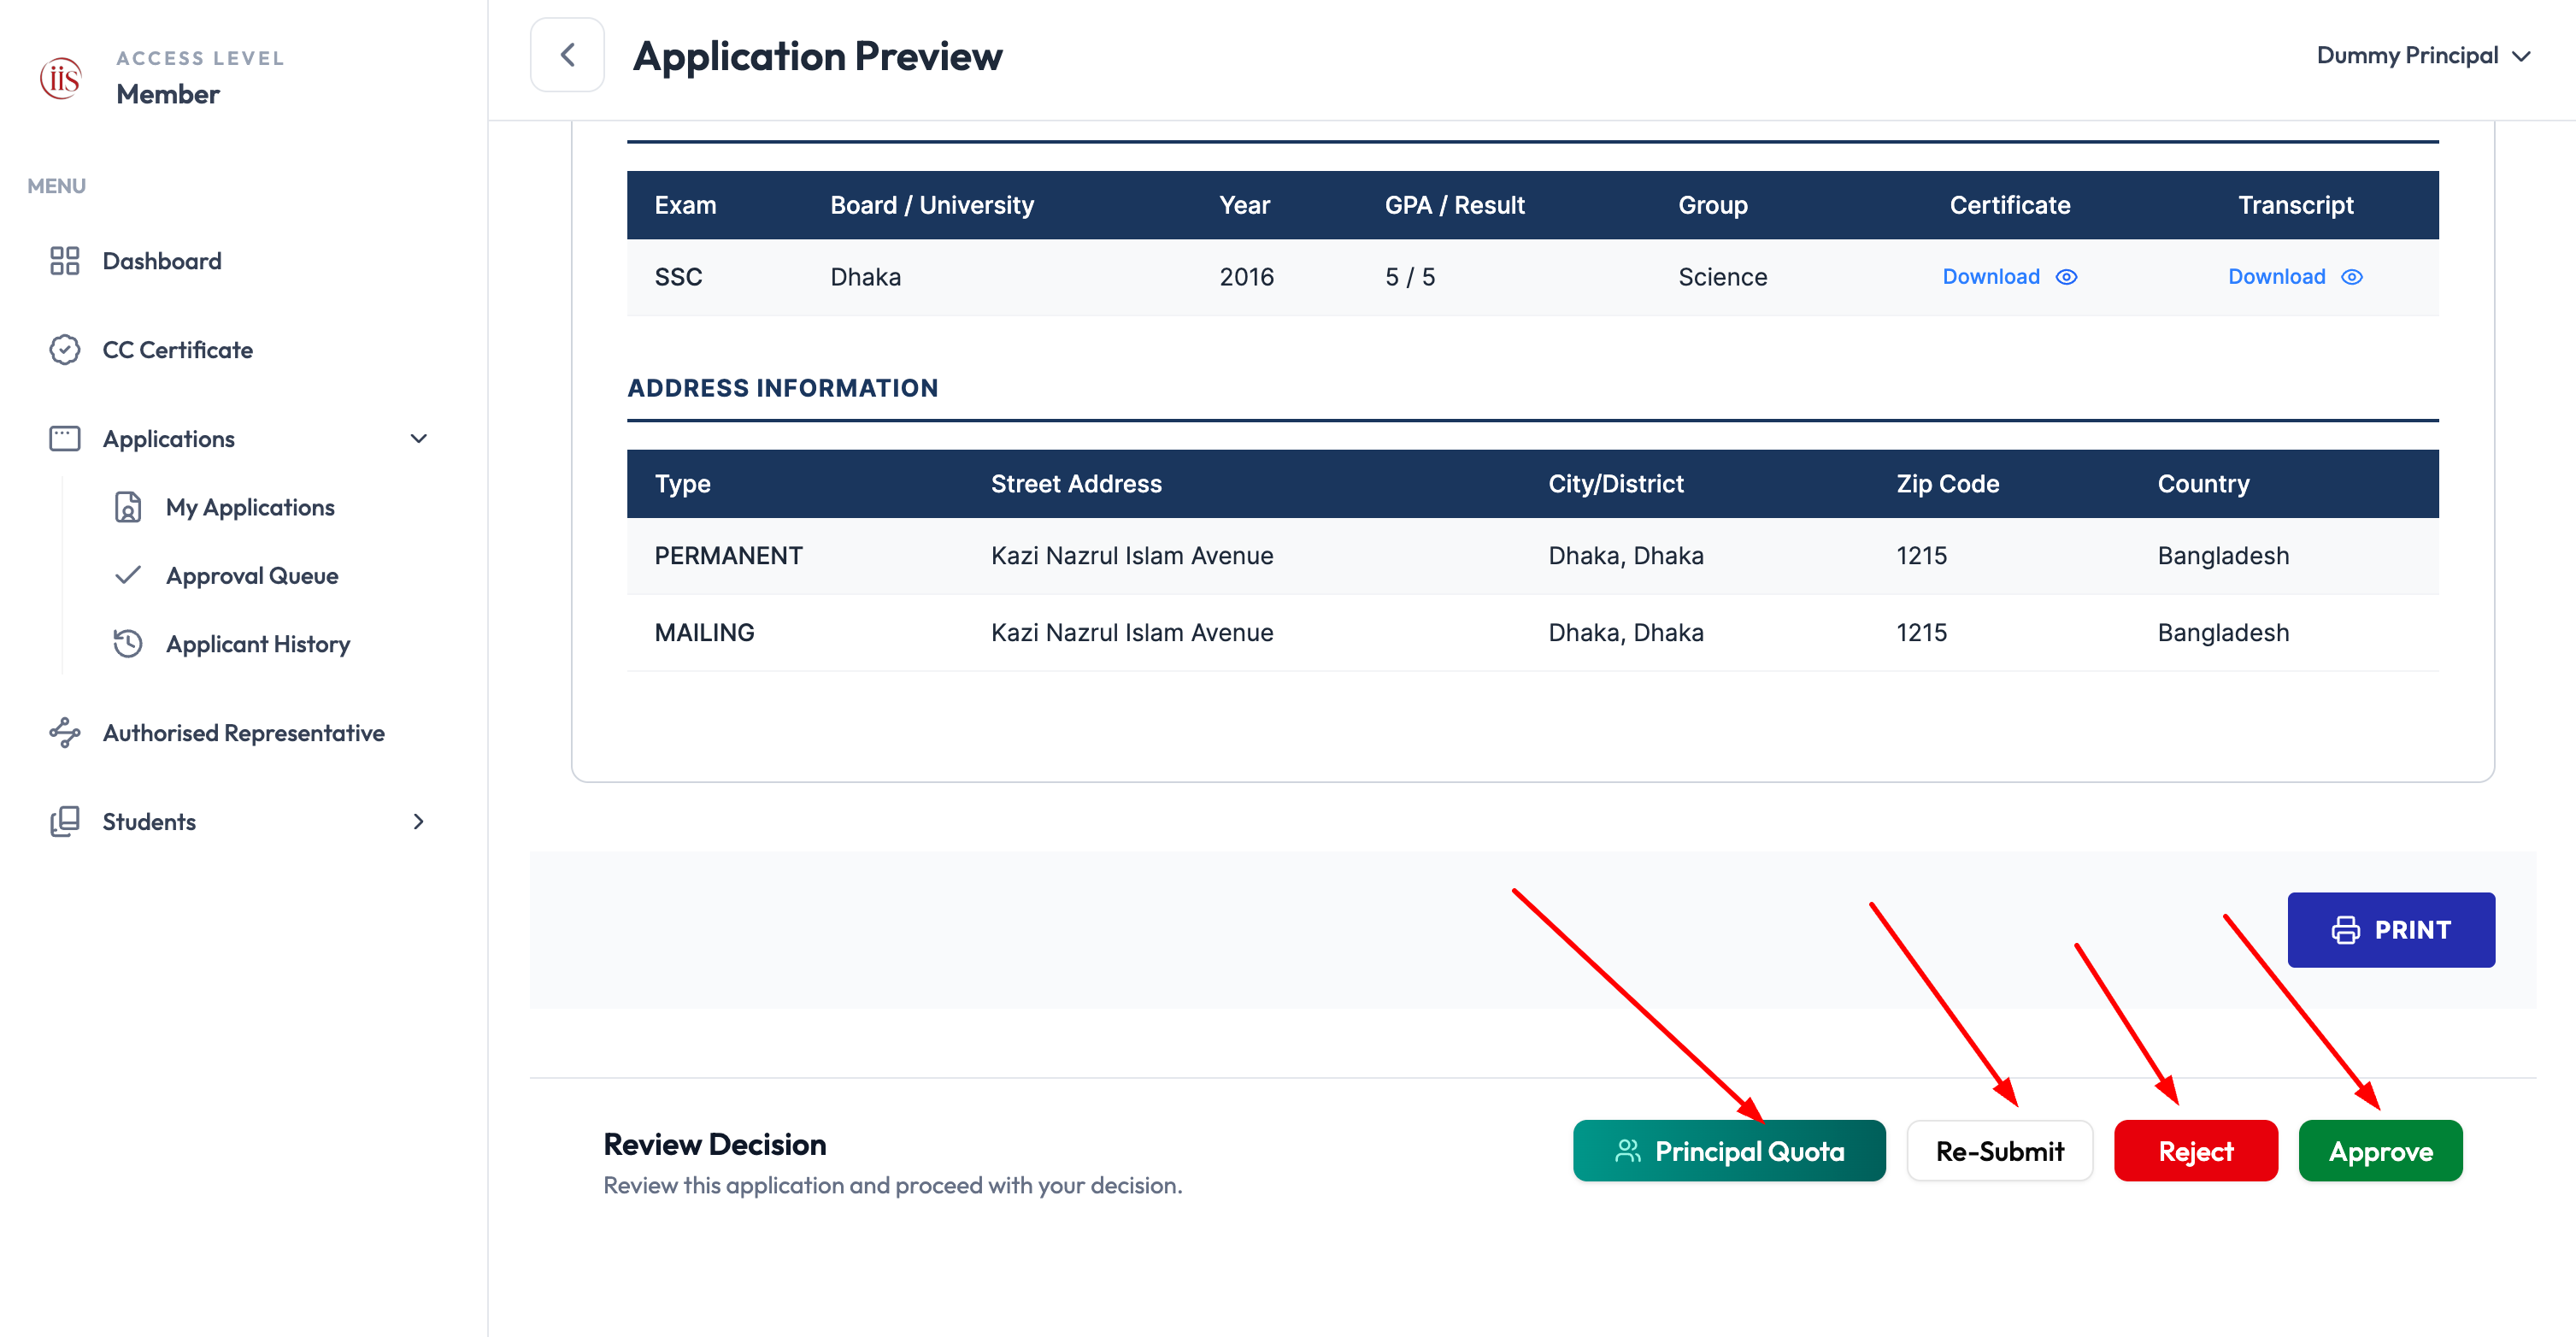
Exam results and address, with the decision buttons below Make your decision
At the bottom, under Review Decision, choose one of four actions: Principal Quota, Re-Submit, Reject, or Approve. Select Print if you need a paper copy first.
What each decision button does
- Principal Quota — opens a read-only summary of your firm’s Articleship intake: Total Quota and Remaining Quota. Check this before approving, so you don’t exceed your firm’s allowed number of students.
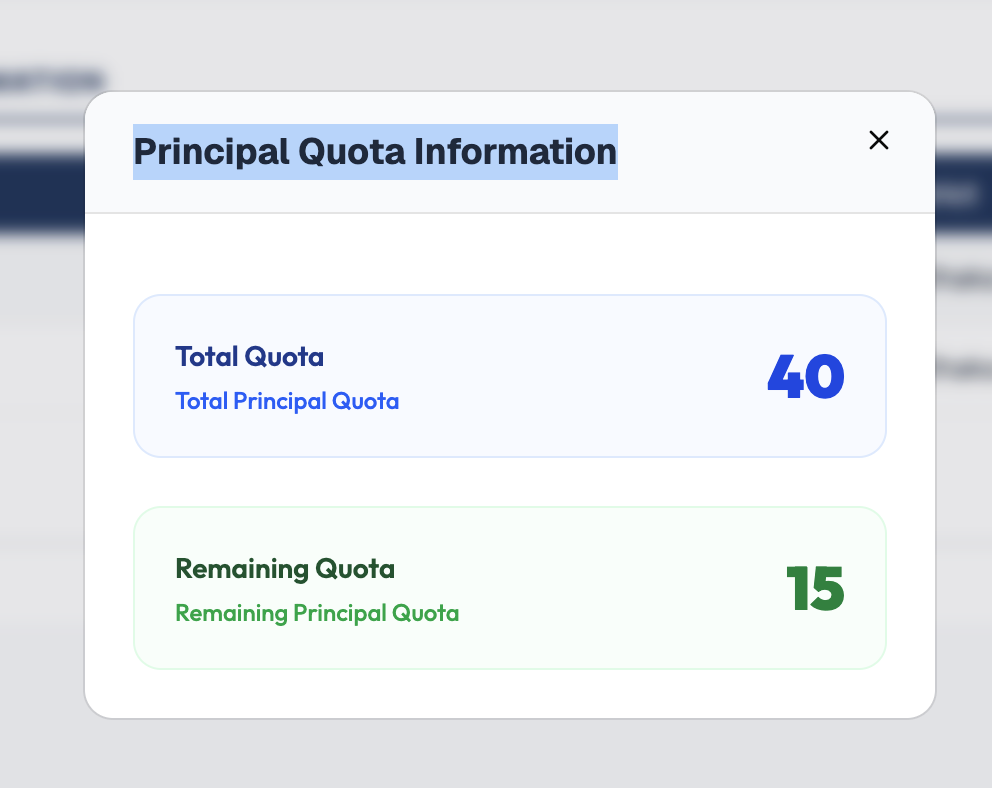
Principal Quota Information — Total Quota vs. Remaining Quota - Re-Submit — sends the application back to the student for corrections. A comment is required so the student knows what to fix, then select Confirm Re-Submit.
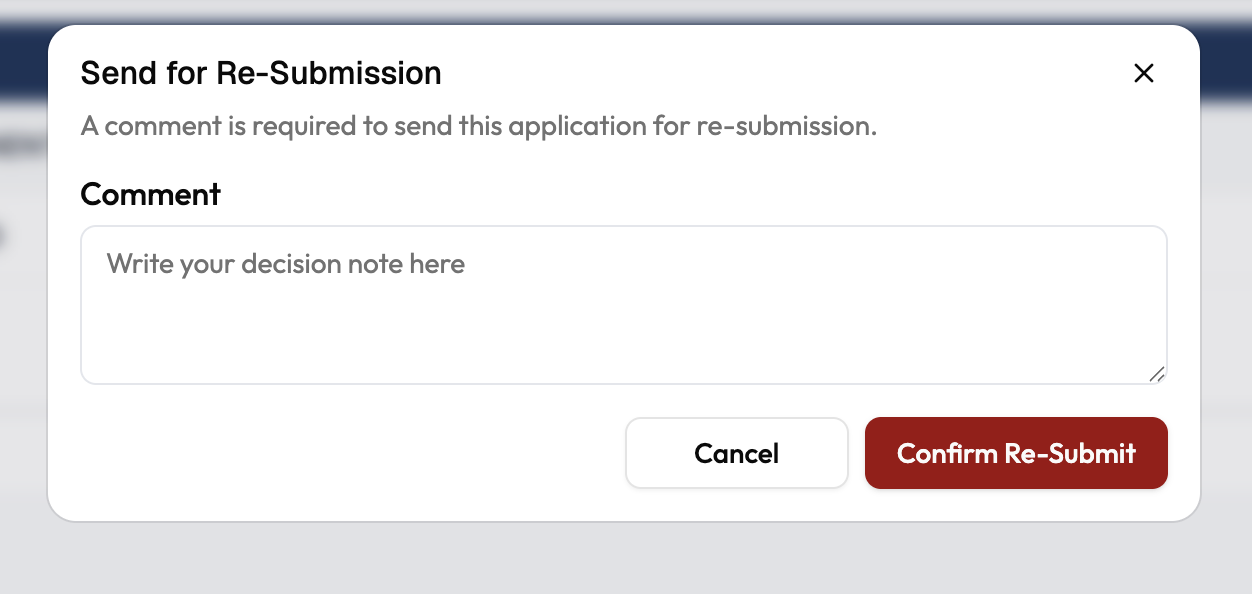
Send for Re-Submission — a comment is required - Reject — permanently declines the application. A comment is required explaining why, then select Confirm Reject.
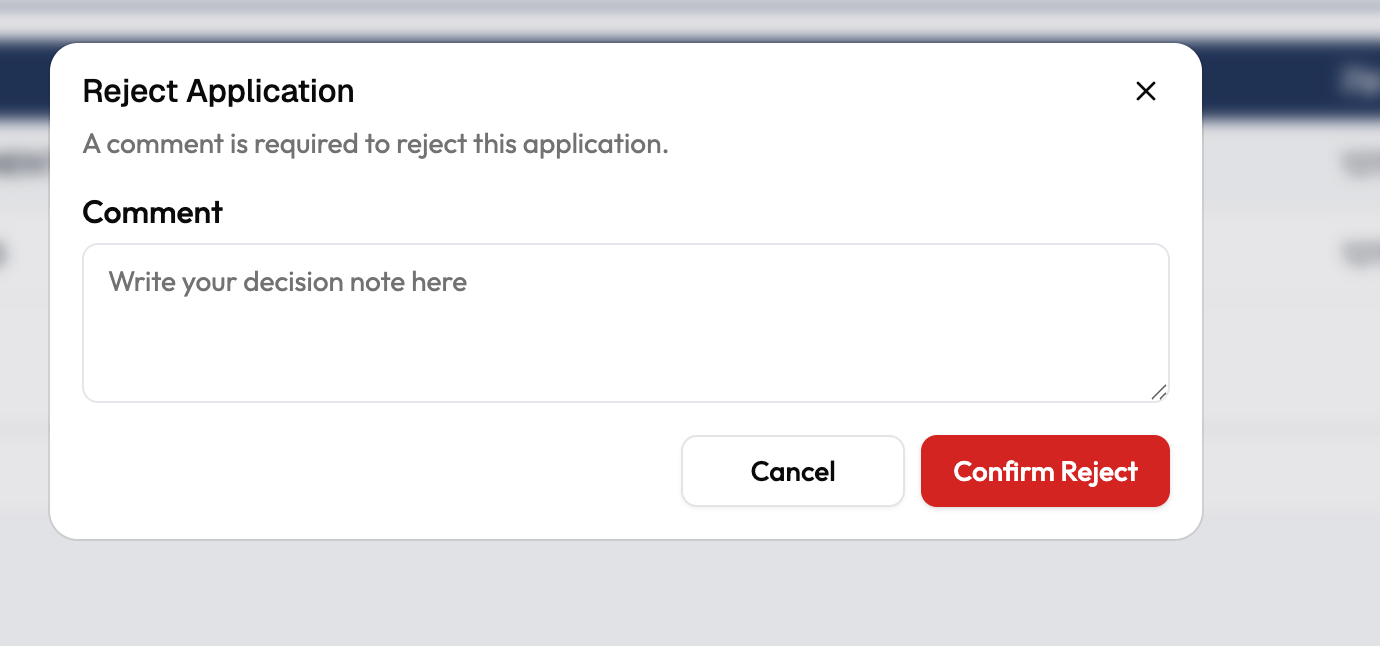
Reject Application — a comment is required - Approve — accepts the application and moves it to the next step of the workflow. A comment here is optional; select Confirm Approve to finish.
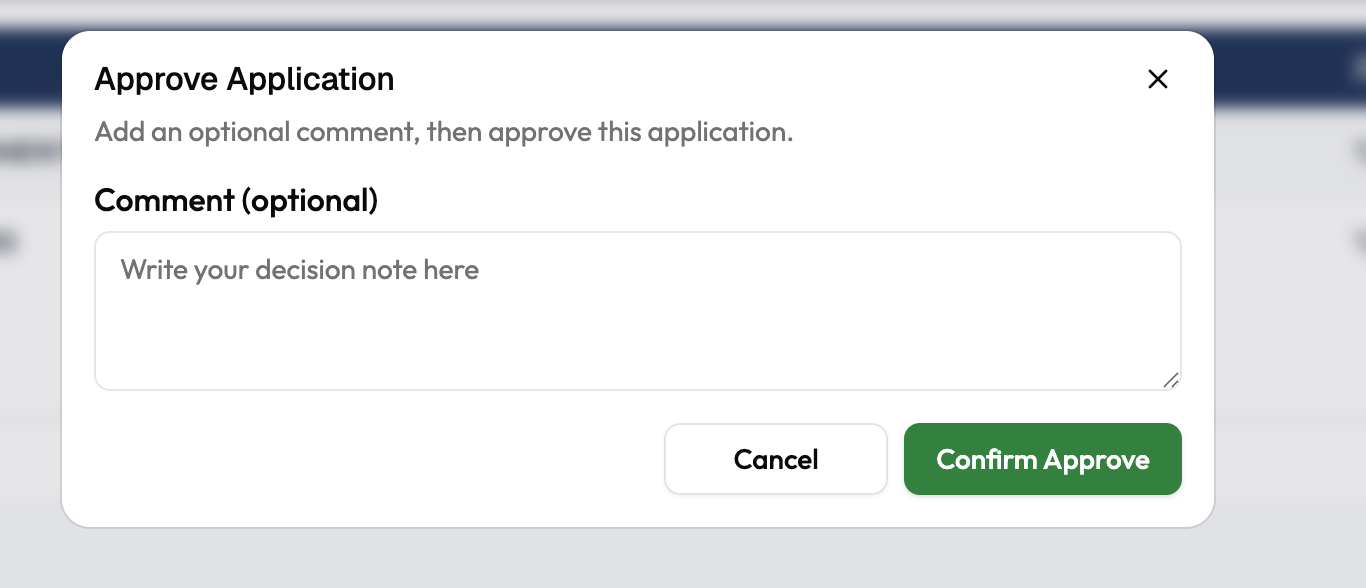
Approve Application — the comment is optional
IIS won’t let you confirm a Reject or Re-Submit without typing a comment — this is what the student sees to know what went wrong, so be specific.
Applicant history
To audit past decisions and see who is currently holding each application, go to Applicant History.